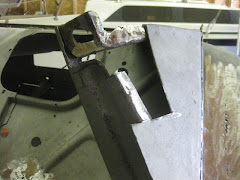
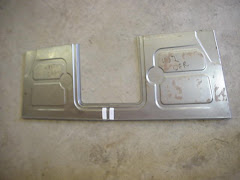
This last week has been very, very wet, hot and humid here in Southeast Iowa. I thought for a while the State of Iowa was going to become the largest lake in the USA. The Skunk River, which is about 5 miles away, has been out of it's banks for almost a week. The port-a-potty located in the middle of the little camping park there has been floating in 2 feet of water until today.
Sooo, I reverted to my little wood shop inside the house that is airconditioned and have been making some swings for my grandkids. Got one more coat of Polyurethane to apply tonight and then back to the F1 tomorrow. Supposed to get sunshine and 80 degree weather for this next week. Maybe I can mow my lawn tomorrow if it dries out enough.
Monday, June 28, 2010
Saturday, June 19, 2010
Front sway bar in
Today I struggled with the front sway bar and it shouldn't have been that hard. There are two outside mounting brackets that are drilled off center and supposed to go in one way on top of the rear stabilizer bars. After renameing the sway bar "The Bitch", I figured if I swapped the mounting brackets from side to side I would gain the half inch I was short. Mother of Pearl, it fell right together. Some times your the windshield and sometimes your the bug.
Also applied the brake caliper brackets and temporarily put the calipers on.
Still need to put the rotors on with the bearings and seals but will do that after everything is painted. Also need to figure out where the brake line brackets will weld to the frame and not be in the way of any swinging parts.
Tuesday, June 15, 2010
Workin the front end
Started this morning putting the front suspension and steering gear together.
First I put on the lower A frame and then attached the rear stablizer bars. Next the upper A frame and since I'm not putting the springs and shocks in yet, they give you a tee bar to use in their place to line everything up. I then added the rack and then the spindles. It's not all real tight yet but now I can locate the brake line hose holders and a couple of other parts to be welded on the frame. Still need to put the brake disc's and calipers on. Maybe tomorrow.
All the stuff I put on today came from Heidts Hotrod Shop
By the way, It's still raining.
Monday, June 14, 2010
Mustang/Pinto IFS going in
Time to start the front end.
I first clamped in the new lower crossmember locating it 15 & 13/16 inch back from the original front spring mount as instructions state. Had to grind off the rivited brake line holder to get the crossmember to fit. Flopped the frame and drilled 3/8" holes in the frame using four bolts on each side to attach the lower crossmember. Flopped the frame back over and positioned the coil spring pods over the frame and lined them up with the lower crossmember and drilled twelve 3/8" holes that hold each pod to the frame and crossmember. Looking pretty sturdy.
Next, I bolted the strut rod support brackes to the back of the lower crossmember and clamped the rear of the bracket to the frame. I flopped the frame again and drilled three 3/8" holes through the bracket and on through the frame. Tightened those bolts and flopped the frame right side up again and drilled the two 3/8" side mounting bolts to finish that application.
It was about 93 degrees out today with 90% humidity so I think I lost a couple of pounds today.
Tomorrow I will start installing the rack
Thursday, June 10, 2010
New CE widened Mustang IFS
Unboxed the Chassis Engineering widened Mustang/Pinto crossover parts to get an idea of what comes next. This will be a little harder than the rear suspension but the instructions look good. Sure glad I have the gantry crane to flip the frame as this is easier that trying to drill the holes laying on my back on the concrete. The frame is already heavier with the rear suspension on so I will take the leaf springs off and set them aside for now. Company coming so will tackle this next week.
Did you notice my work bench. It's two 55 gallon drums and a door. Works great.
Did you notice my work bench. It's two 55 gallon drums and a door. Works great.
Tuesday, June 8, 2010
New rear suspension
I decided that I would wait to primer the frame as the Afterblast looks like it will keep it from rusting for a while and I have to take everything apart again anyway
It felt good to start adding something back on the frame. I unboxed the Chassis Engineering AS-2020C complete Rear End Mounting kit and set it out to make sure I had all the right parts. Those guys don't mess up, it was all there. Went together pretty well with their instruction sheet.
I first flipped the frame over and ground down 4 rivet heads, as instructed, that were in the way and then drilled out the existing spring perch holes to 13/32. I then bolted the new perches on and drilled out 2 more mounting holes for each perch and tighted them up. Then I put the back shackles on loosely and put the spring packs on. Now I realize that I need a rearend to finish up the shock bar, bottom shock mounts and rear sway bar. Time to go shopping for that.
Next I will tackle the front IFS which will be a bit more complicated
I just want to say one more think about sandblasting. I was told it was a thankless, tedious, dirty, messy job. It is all that and more. I'm glad I did it, as now I know every millimeter of that frame. I would do one more for you if you asked me and would only charge you $25,000.
Sunday, June 6, 2010
After Blast
Today I went over all the frame with an Eastwood product called After Blast. It's a Phosphoric acid and water mixture with a zinc phosphoric coating to stop flash rust. I poured it from a gallon jug into a small spray bottle and had the frame upside down. I opened the garage and put on rubber gloves and eye protection. Do not do this in a confined space. I sprayed all I could get to and let it set for about 5 minutes and then wiped it down with and old towel. I then flipped it over with the crane and did the topside, again, letting it set for about 5 minutes and wiped it down. This turns the freshly blasted metal somewhat black, but that is the protection from flash rust. I will let it dry until tomorrow and then will apply some Eastwood stuff called Internal Frame Coating. This stuff converts, encapsolates and seals the rust that I couldn't get to with the sandblaster such as behind the cross frame plates and footboard hangers where they attach to the frame. A very small area. You get a spray can with a long spray tube to get into the tight spots. After that I will spray the frame with Eastwood Extreme Chassis Black Primer.
Saturday, June 5, 2010
Frame sandblasting is done
Well, been a busy week. Had a lot of company and sold my 28 Model A Sedan Delivery yesterday. It went to a nice fellow in Keokuk, about 30 miles south of here. Now I have a little stash to buy parts for the F1 project.
In between visitors I was able to do some sandblasting on the frame and finished it today. I then did some welding on a few spots that were thin or rusted through. The frame is in remarkable shape for it's age and not much welding was needed.
I got some products from Eastwood last week to first wipe down the frame with some stuff called PRE, and then I will spray it with a primer so I can start putting on the new front and rear suspension without the frame surface rusting . It will be nice to finally put some parts back on this old baby.
Subscribe to:
Comments (Atom)


