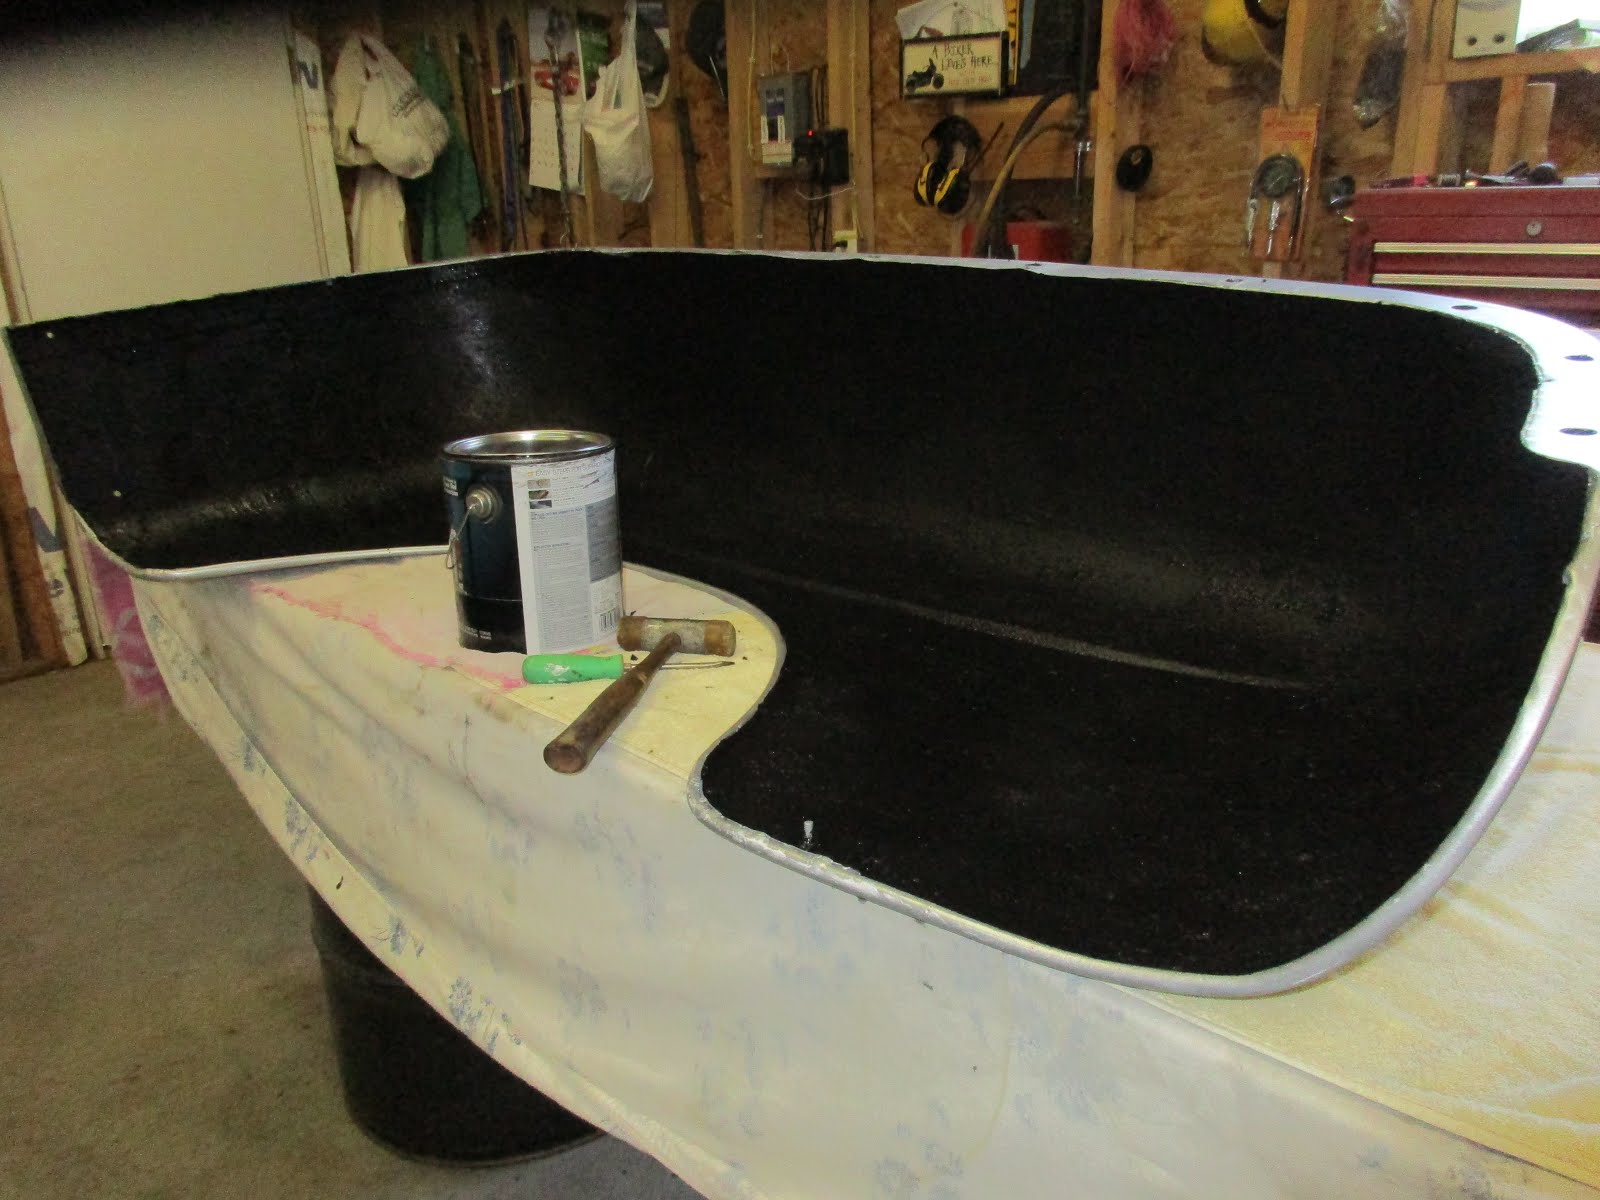
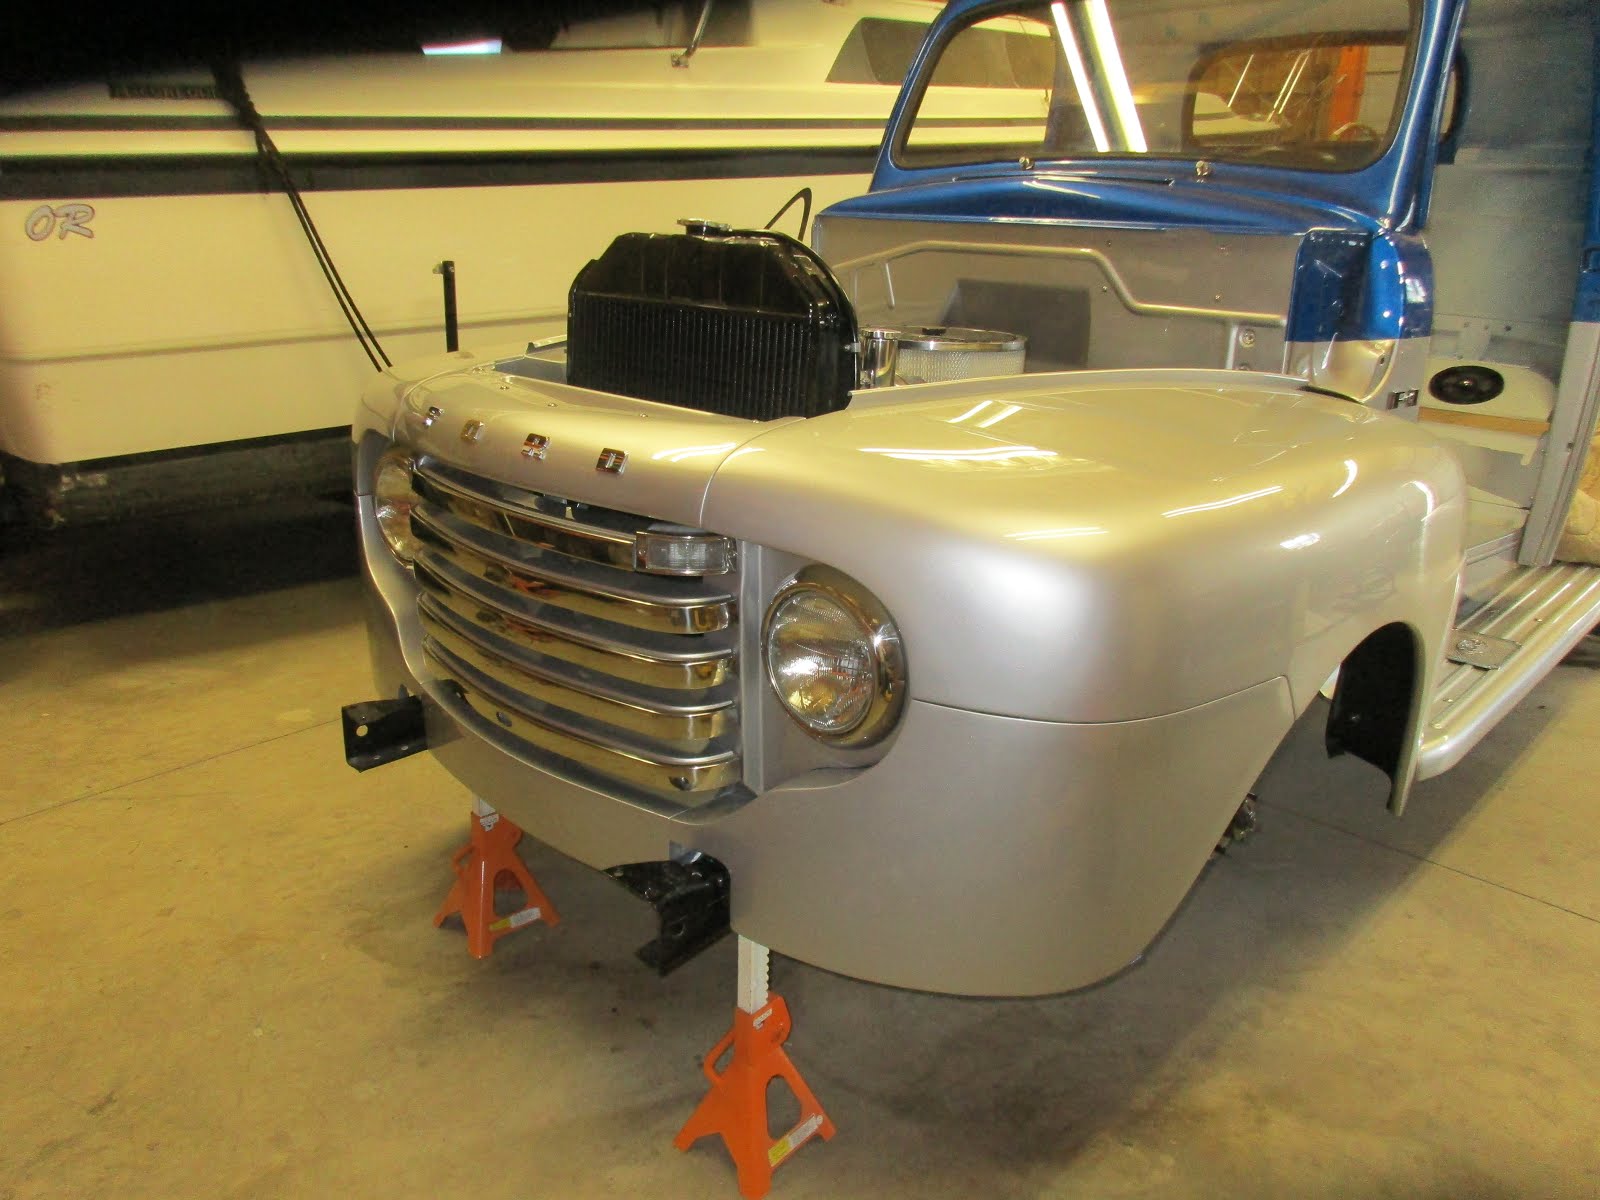
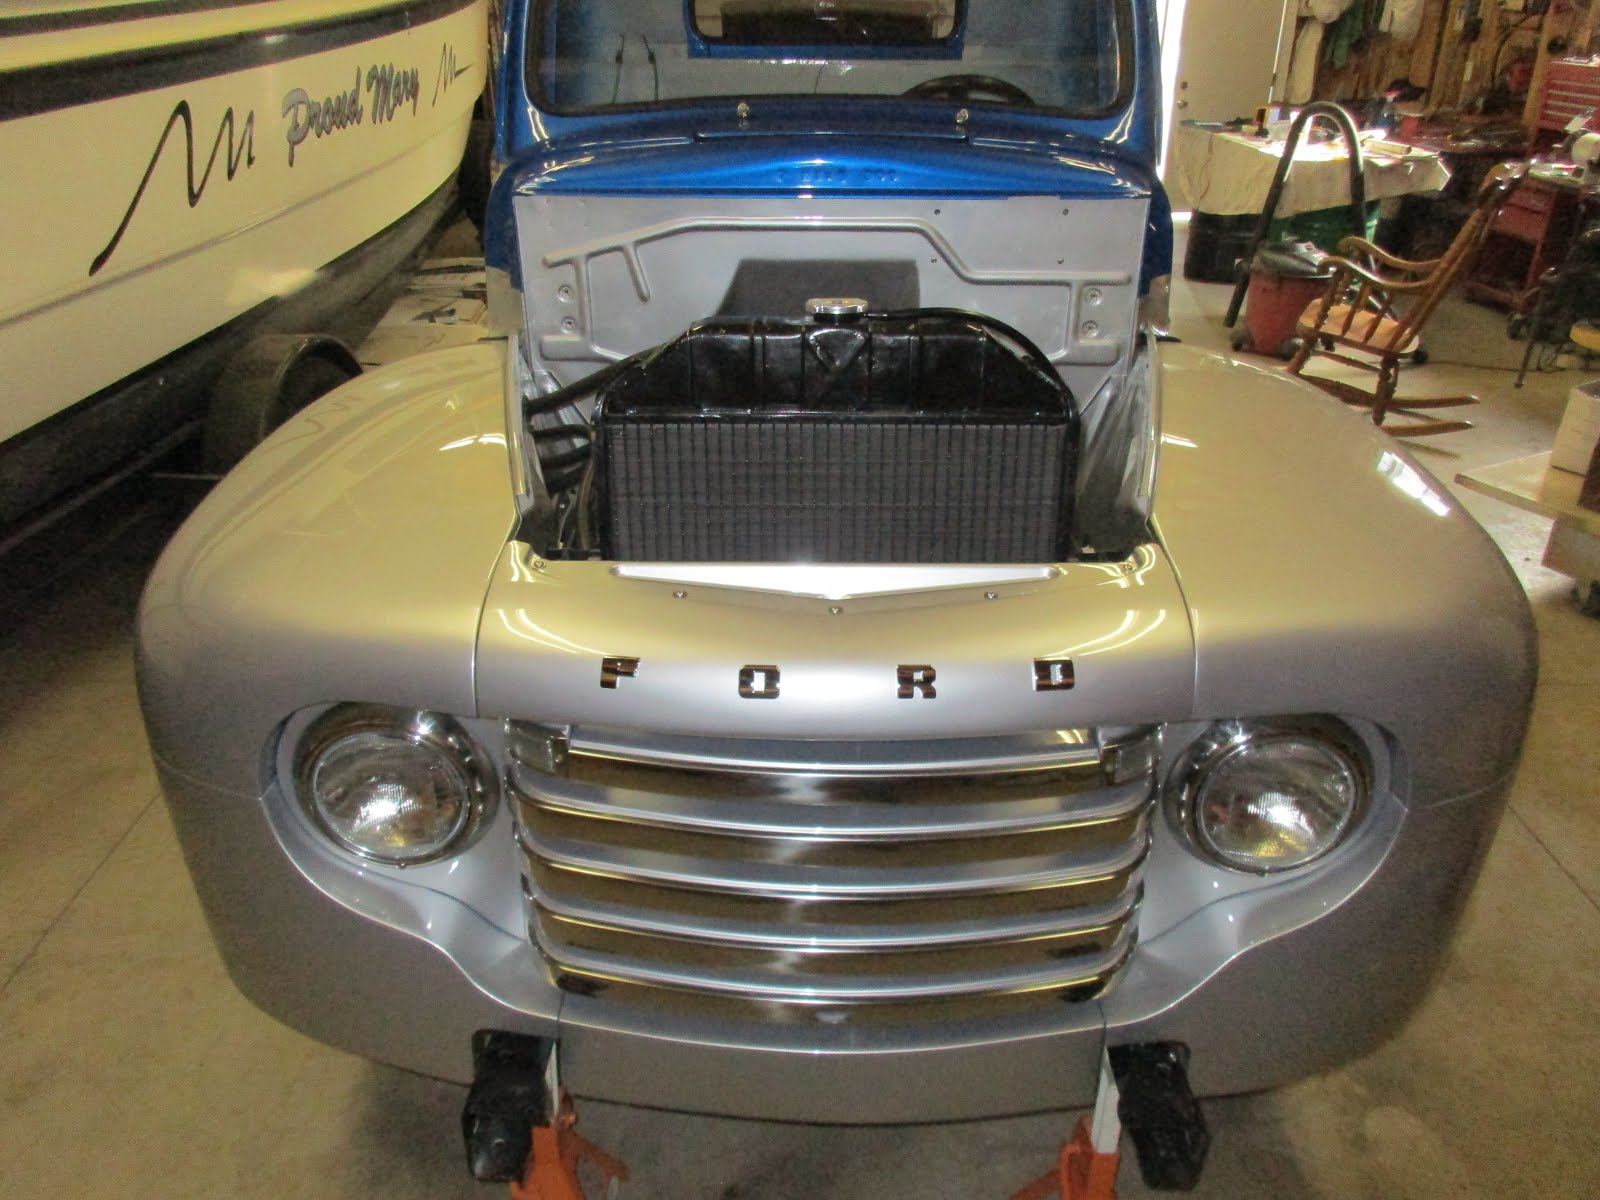
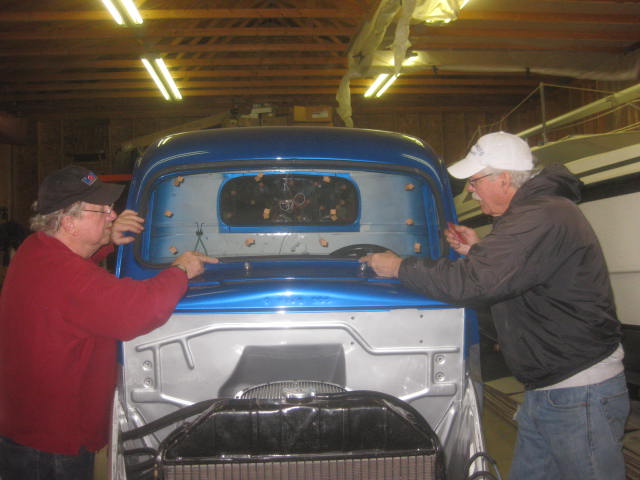
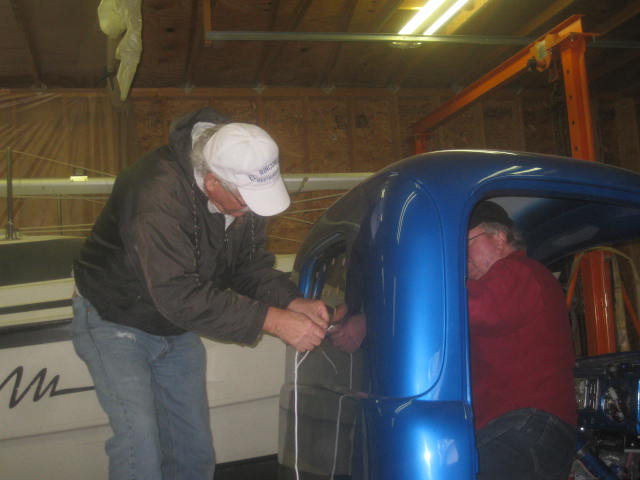
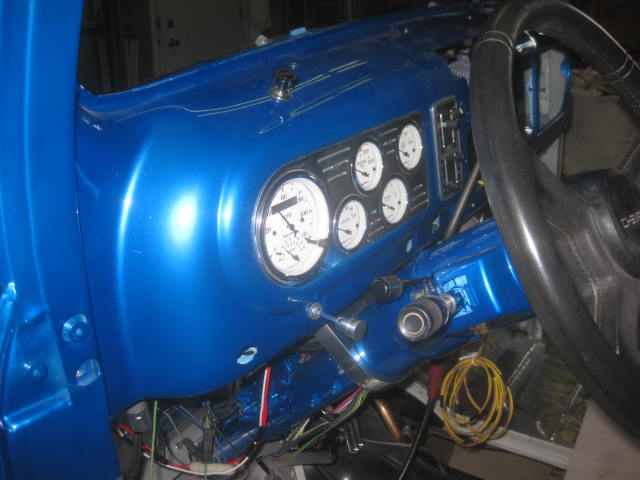
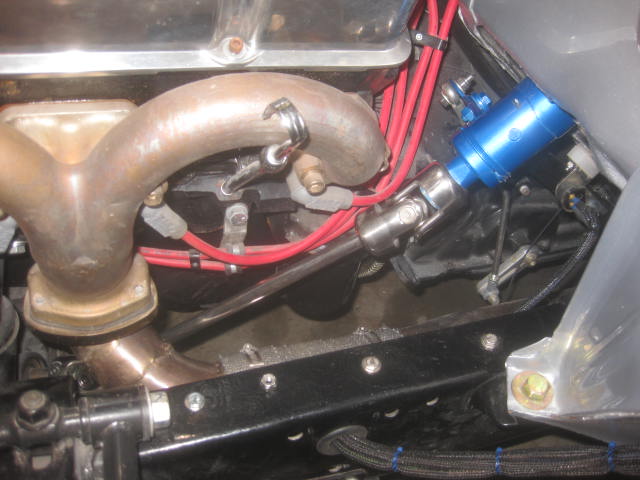
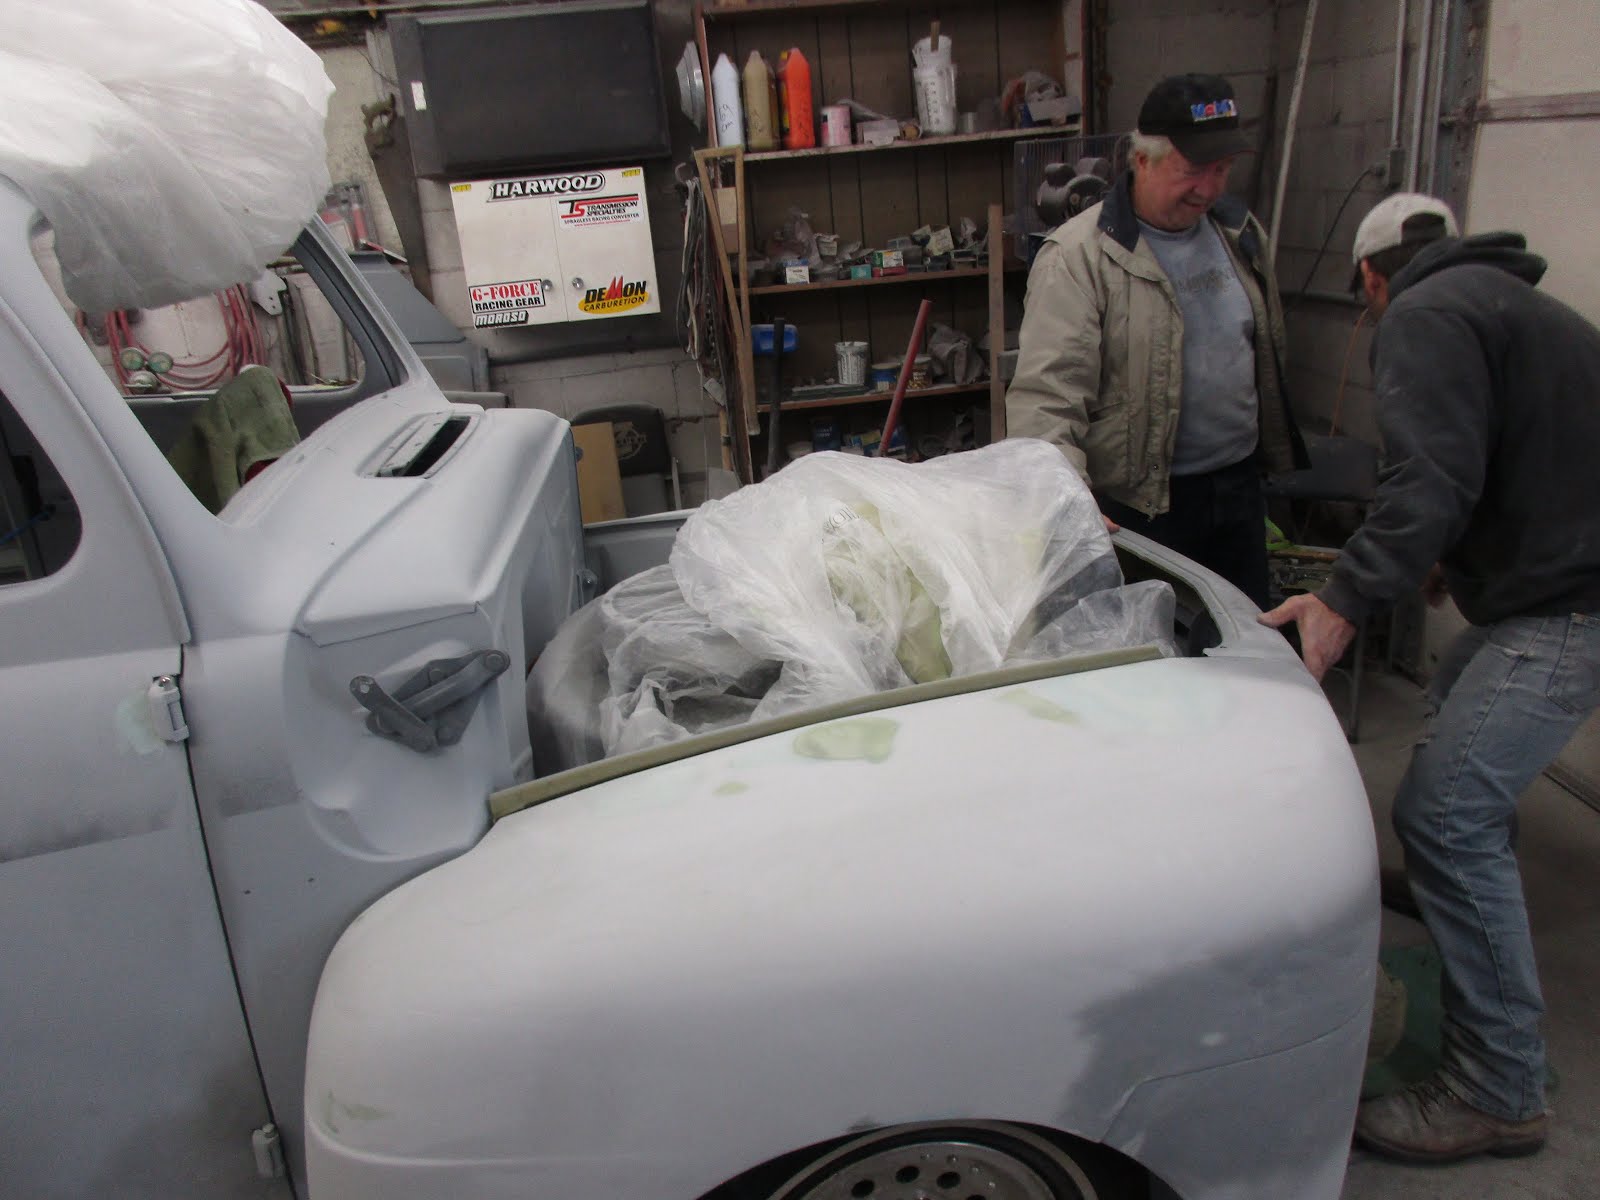
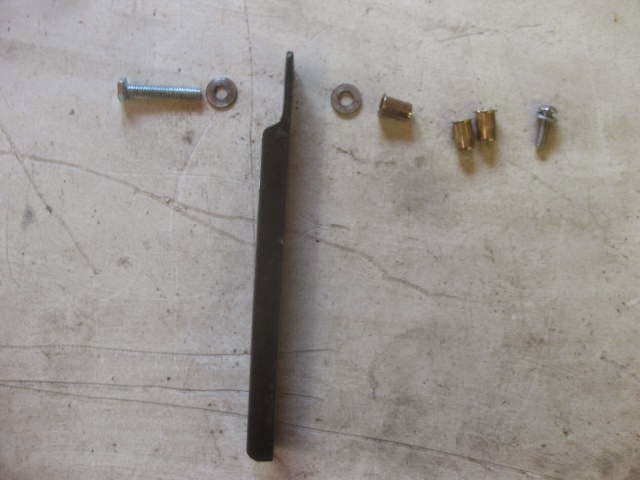
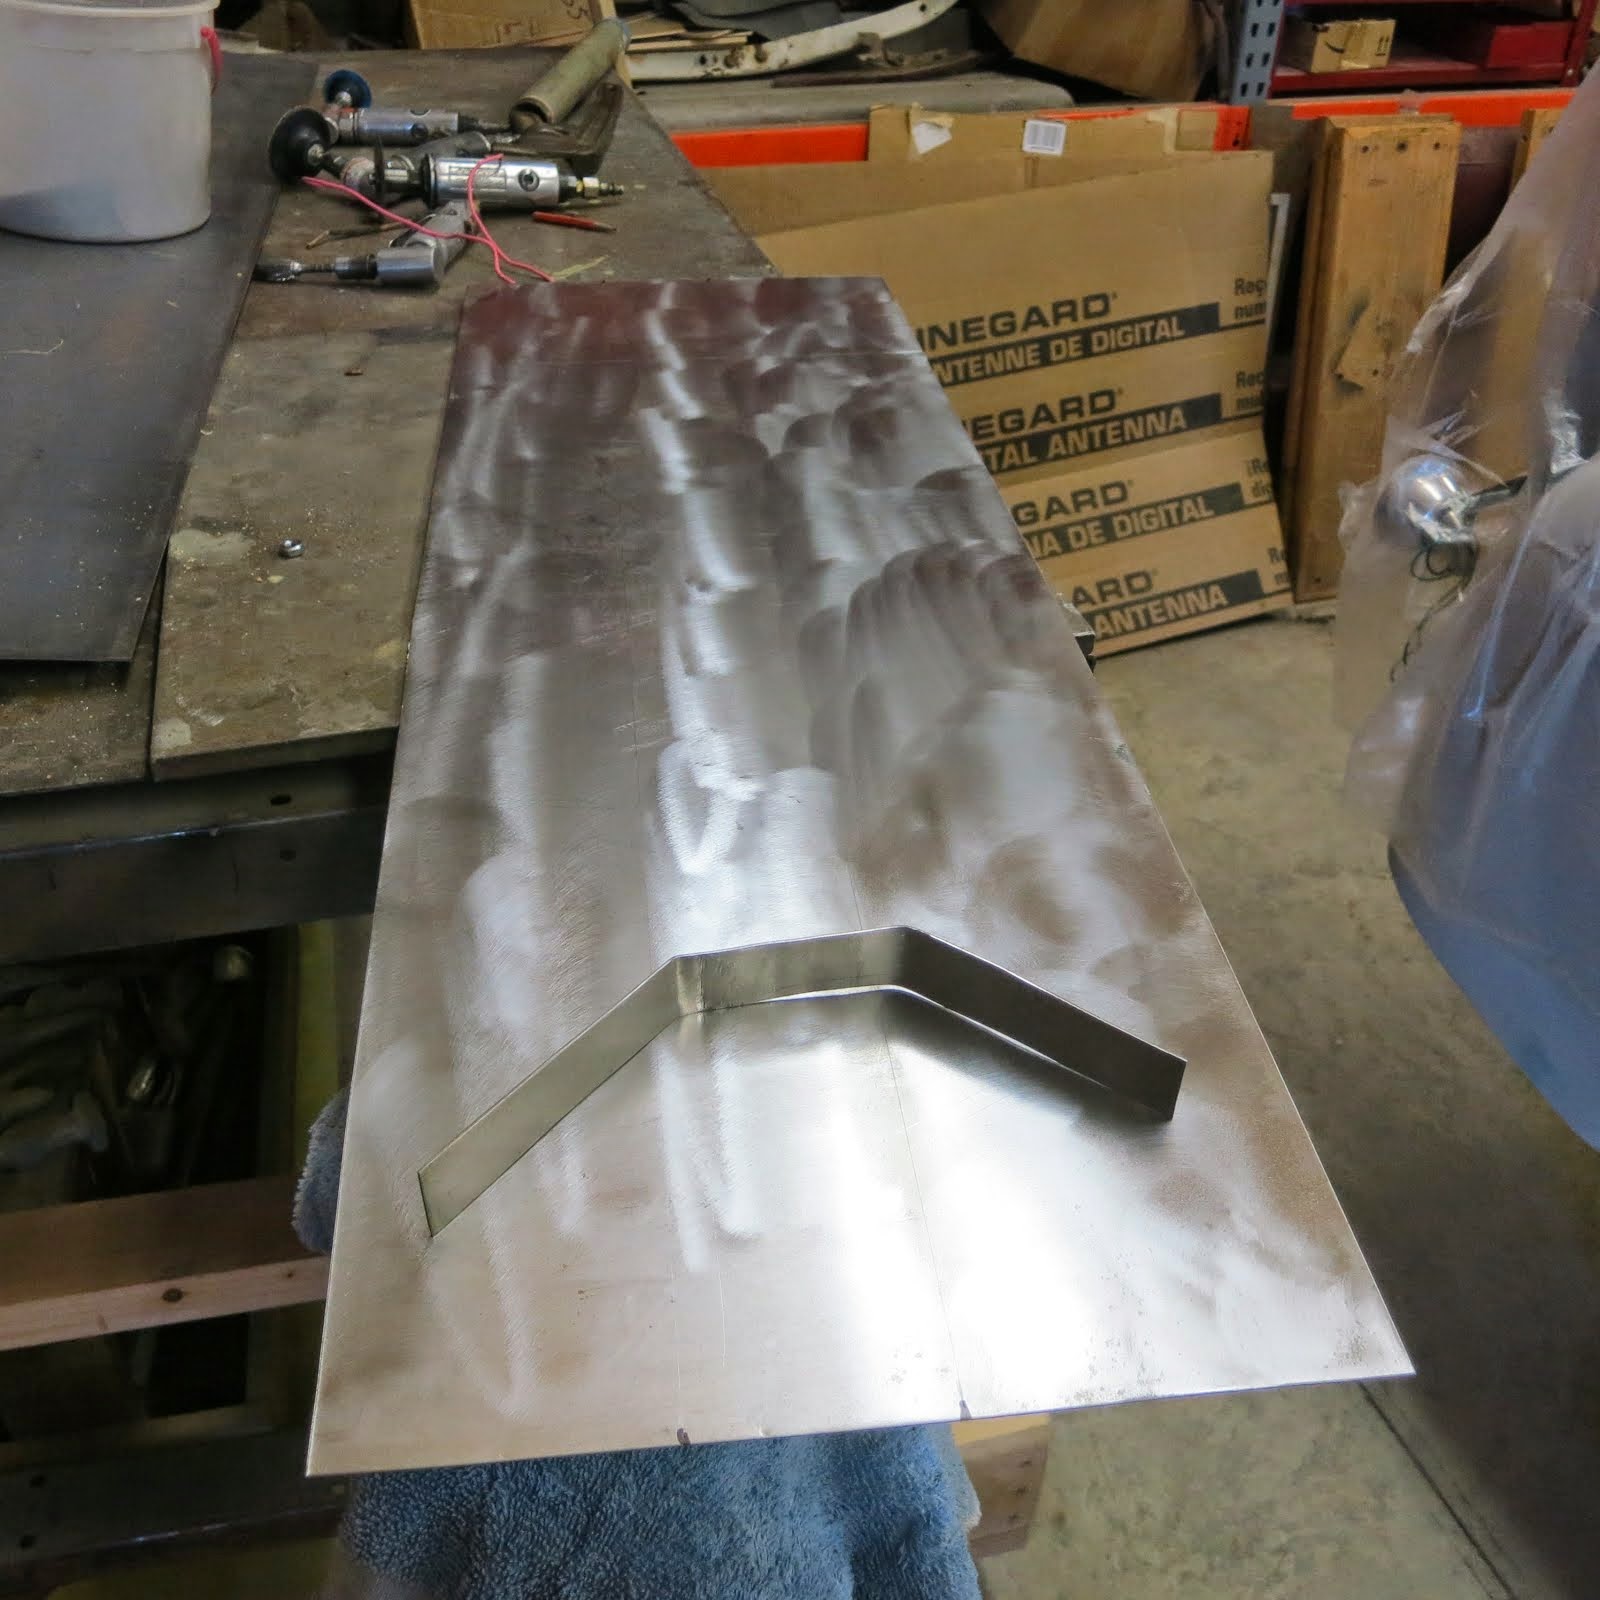
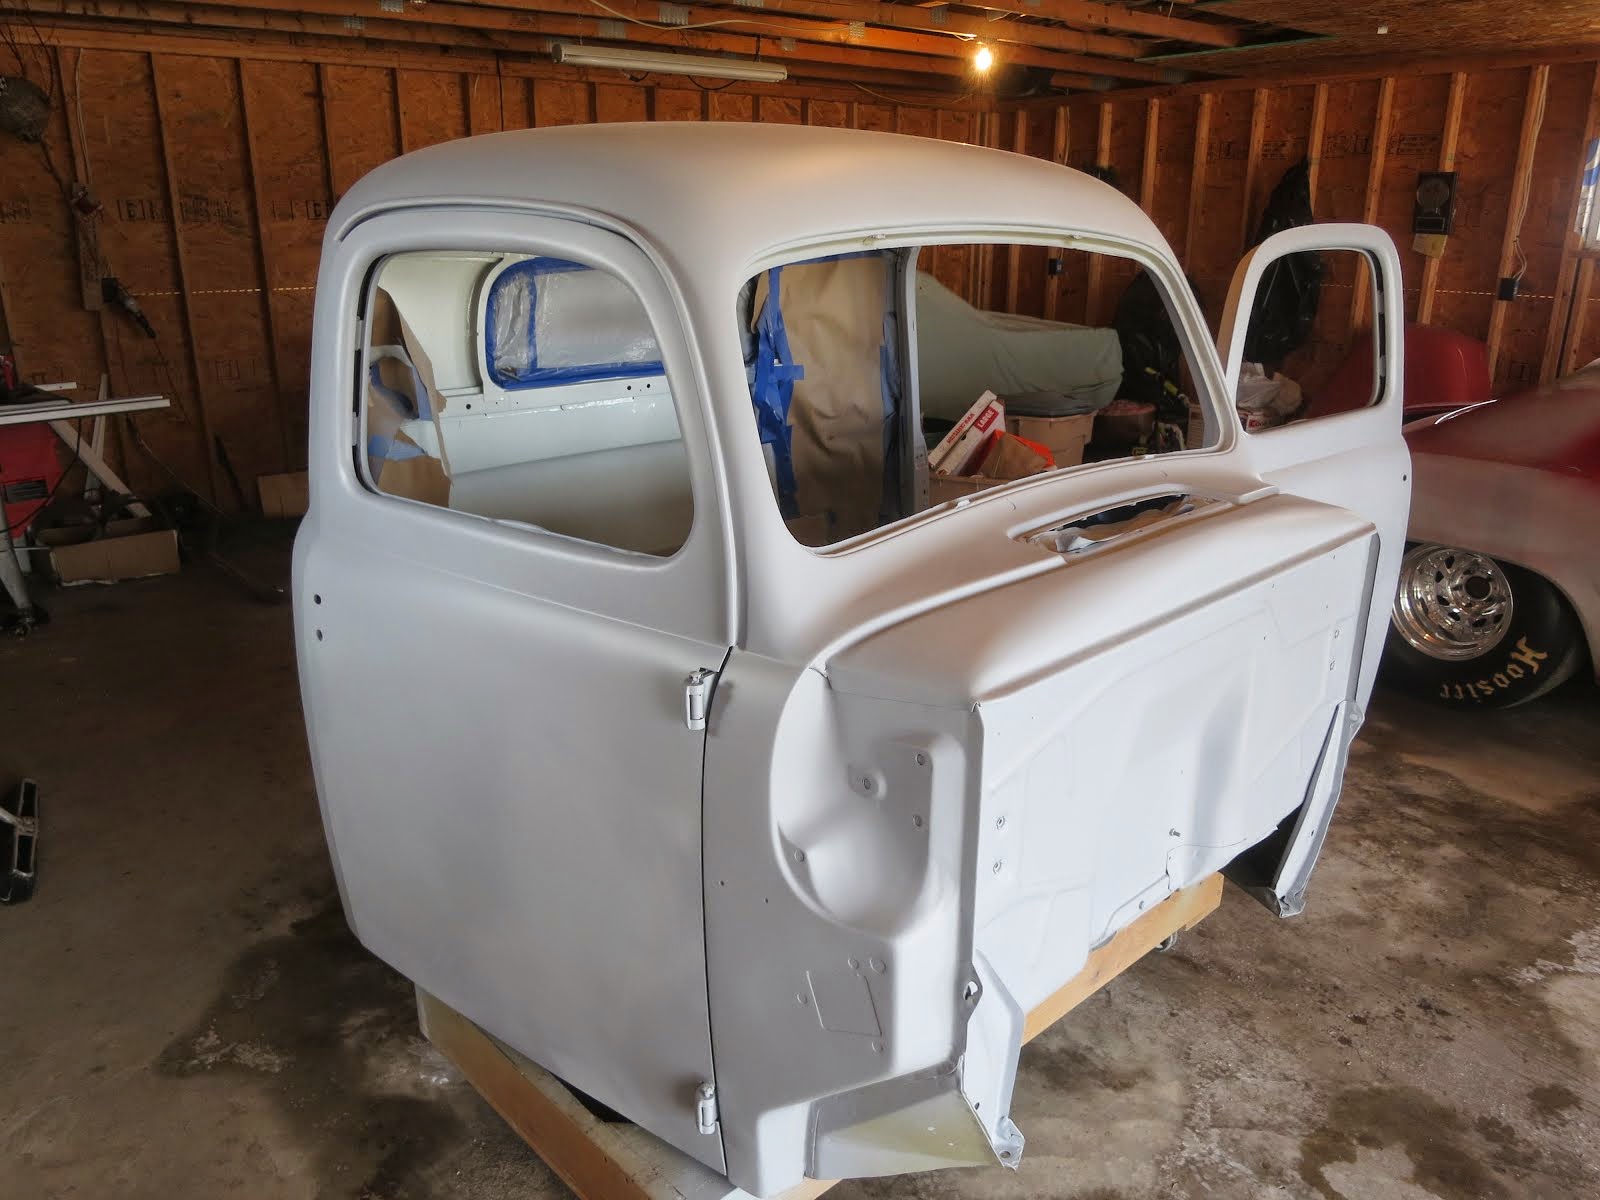
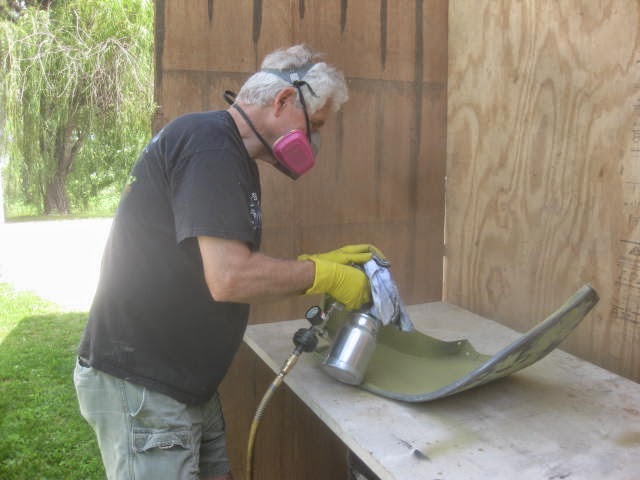
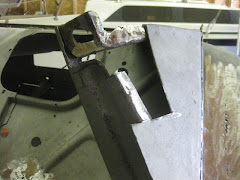
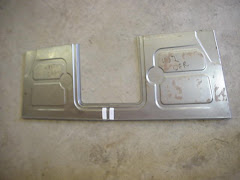
Had some problems doing the spot welding on the new metal I was replacing on the rear fender I had sandblasted. Got real frustrating. I had depleted the Argon gas needed for the MIG welding, so took the bottle in for a refill. Talked to Sam, the welding GURU and salesman at AIRGAS in Burlington. Explained to him what was happening and he gave me some tips to try. I was basicly running on the automatic setting on the welder. Sam told me that wasn't always the right setting for the metal I was welding. I came home and did some fiddling with the controls. Took me a while to get dialed in correctly but all seems better now. As you can see in the pictures, thing are getting better. This all slowed me down considerably, (plus some other things,) but I'm back on the fender and slowly progressing.
Also bought a small 240V electric heater and in the process of installing it so I can work a little longer while it's getting colder.
There is a tunnel and i'm looking for the light at the end. I think it's a long tunnel.
Saturday, October 27, 2012

Tuesday, October 9, 2012
Sandblasting, WHOOT, WHOOT.
Time to hit the sheetmetal. Started beating out some smaller dents in some of the front sheetmetal. Need to weld up some holes and put in some repair pieces.
Got the sandblaster out yesterday and worked on the right rear fender. It's the one with the least amount of rusted out metal. It's pretty clean now, but have to cut out some cancer and weld in some new metal. Three more fenders to to blast. Got the hood and doors to look forward to also. Somewhere there is a song that says "Life is but a dream". You dream a lot while sandblasting.
Got the sandblaster out yesterday and worked on the right rear fender. It's the one with the least amount of rusted out metal. It's pretty clean now, but have to cut out some cancer and weld in some new metal. Three more fenders to to blast. Got the hood and doors to look forward to also. Somewhere there is a song that says "Life is but a dream". You dream a lot while sandblasting.
Saturday, October 6, 2012
Transmission Cooler finished
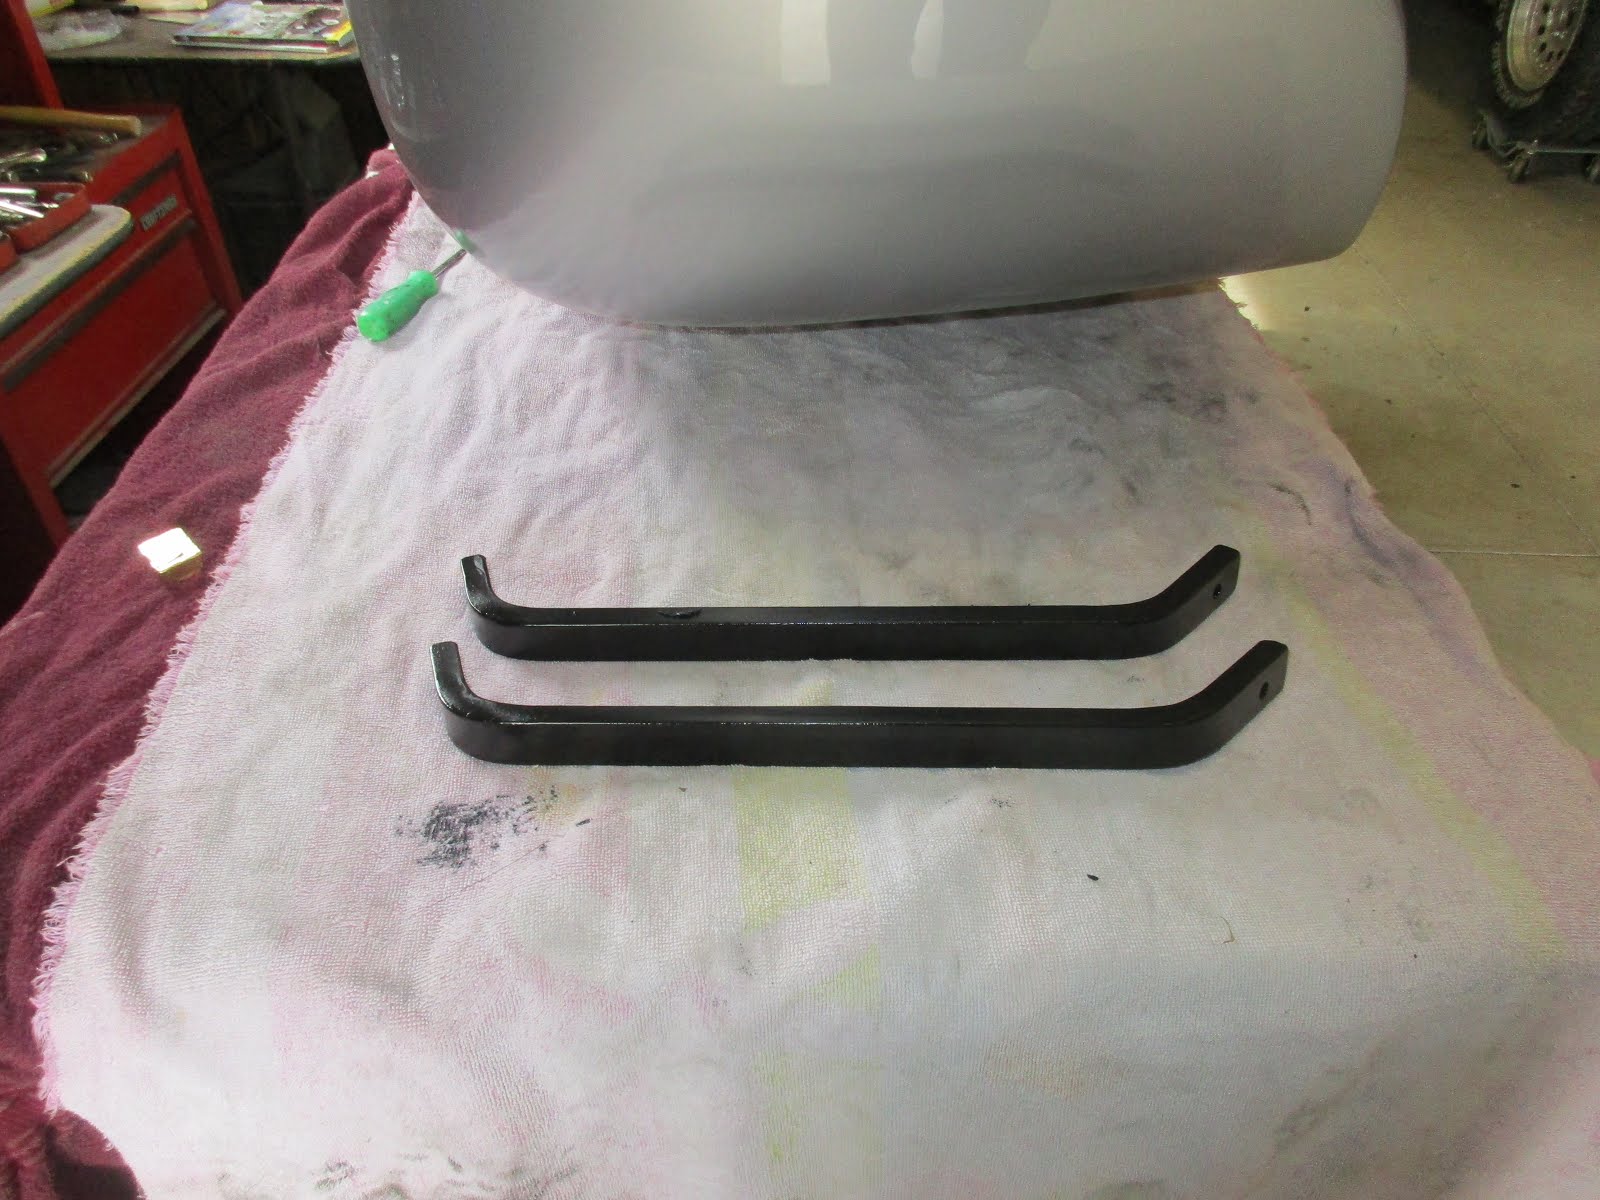
Took the transmission cooler and brackets apart. Trimed the brackets and guard to size and painted all the parts. Finished installing everything. It tuckes up on the frame behind the passenger running board. Looks like it is pretty well protected up under there. Time will tell if I made the right decision by putting it there instead of in front of the radiator. The thermostatic controled fan is not wired up yet, that will come later.
Getting colder out now so got to get the front fenders sandblasted before it gets too late. Got to start beating and welding some sheetmetal now.
WOW, where did the summer go???
Getting colder out now so got to get the front fenders sandblasted before it gets too late. Got to start beating and welding some sheetmetal now.
WOW, where did the summer go???
Thursday, October 4, 2012
Transmission cooler and tin work
Got a nice B&M transmission cooler from Tony Cetta. It is thermostat controlled with a fan mounted to the front of the cooler. I didn't want to put it in front of the radiator, as the airconditioner condenser is already mounted there. My thoughts were, too much blockage through the radiator.
Decided to mount it on the frame behind the passenger side running board. Made a couple of brackets to hang it off the frame. Couldn't figure out what fittings were needed coming out of the transmission for the cooling lines. Found a website that did the same as I was doing with great pictures and all the numbers for the fittings and lines. (GOOGLE is great). Got them all from Summit Racing on Monday and installed it all on Tuesday. Decided I needed a guard to protect the cooler and fan from any road rash. Bought a piece of perforated metal and made the guard. Still have to make some end pieces for the guard and then paint all the parts.
No Job Johnny came down and helped me work on straightening one of the running boards and also fitting the floor cover for the transmission.
Going to try to get some more sandblasting done on metal parts before the weather turns bad.
I think the running gear is very close to starting the engine. If not this fall, next spring for sure.
Decided to mount it on the frame behind the passenger side running board. Made a couple of brackets to hang it off the frame. Couldn't figure out what fittings were needed coming out of the transmission for the cooling lines. Found a website that did the same as I was doing with great pictures and all the numbers for the fittings and lines. (GOOGLE is great). Got them all from Summit Racing on Monday and installed it all on Tuesday. Decided I needed a guard to protect the cooler and fan from any road rash. Bought a piece of perforated metal and made the guard. Still have to make some end pieces for the guard and then paint all the parts.
No Job Johnny came down and helped me work on straightening one of the running boards and also fitting the floor cover for the transmission.
Going to try to get some more sandblasting done on metal parts before the weather turns bad.
I think the running gear is very close to starting the engine. If not this fall, next spring for sure.
Wednesday, September 19, 2012
Power Steering hoses an d Adjusting Valve
Had to get away from the A/C for a while, so started to run the power steering hoses and pressure reducing valve. The Mustang Two rack runs at a lower pressure than the Chevy power steering pump I installed, so I had to put a pressure reducing valve in the lines. I got the kit from Yogi's but it is actually made by Heidt's. The hose is a stainless steel wire mesh covered tubing. They warn you that when working with the mesh that it can poke into your fingers. BIG UNDERSTATEMENT! While making up the four hoses I must have stabbed myself a dozen times. Anyway, made a bracket and mounted the reducing valve to the frame. Finished making up the hoses and hooked everything up today. The reducing valve allowes you to adjust the feel of the steering, hard or soft.
Now I have to find a place for my transmission cooler.
Now I have to find a place for my transmission cooler.
Thursday, September 13, 2012
More procrastination and a little work
The heat has finally subsided, but more interuptions came along. Nancy headed to London with my daughter Shannon and grandson Parker for two weeks, soooo, good time for a road trip on the Harley. Headed to Topeka to see Rubber Toes and do a little cruisin. Headed south out of Topeka for some pie and broke my clutch cable 120 miles from Toes house. Nursed it back to Topeka doing some fancy synchronized shifting without the clutch, and started calling around for a new cable. Had to go to Olatha, (60 miles away) for a new one. Toes and all his tools and knowledge helped me get the new one installed. Headed back home the next day with rain looking me in the face. Toes rode with me to Atchison and a half mile later it started raining. 300 miles of rain. At least it wasn't cold, and I made it home okay.
The girls and Parker got back home and the grandson helped me do some more work on the airconditioning. Got all the holes drilled and hoses run, including the dryer. Yop can see the dryer in the picture mounted on the right inner fender panel below the AC pump.
Still have to make a bracket for the heater valve that will fit behind the right kick panel in the cab.
Maybe next week i'll get more done.
The girls and Parker got back home and the grandson helped me do some more work on the airconditioning. Got all the holes drilled and hoses run, including the dryer. Yop can see the dryer in the picture mounted on the right inner fender panel below the AC pump.
Still have to make a bracket for the heater valve that will fit behind the right kick panel in the cab.
Maybe next week i'll get more done.
Tuesday, August 28, 2012
Heat Procrastination
Well, been a little too hot to work in the shop for a while, but I did get some sandblasting done on the running boards and I got the holes cut in the cab for the AC hoses. I have some of the hoses mocked up and now making some brackets out of the 2 1/2" stainless steel exhaust pipe to hold the dryer. The dryer keeps moisture out of the system. It's a little hard to explain so when I get it installed a picture will help. Hopefully the heat will subside soon.
Thursday, August 16, 2012
Back to the AC
Went ahead with the decision to put the AC controls between the gauges and the radio face plate. I layed out the area to be cut on some masking tape and then drilled 4 holes in the corner areas Next I cut the hole out with a die grinder and a cutting disc. Cleaned up the burr's and everything fit fine.
I think it all lines up symmetrically with the gauges, radio and the ash tray Almost like it was put there 64 years ago
Need to start to laying out the hose routes now. Also need to get some heater hose. It wasn't included in the kit. Found they didn't include a couple of fittings that was supposed to be in the kit for the AC hoses, so need to call Vintage Air and straighten that out. More drillin and cuttin coming up.
I think it all lines up symmetrically with the gauges, radio and the ash tray Almost like it was put there 64 years ago
Need to start to laying out the hose routes now. Also need to get some heater hose. It wasn't included in the kit. Found they didn't include a couple of fittings that was supposed to be in the kit for the AC hoses, so need to call Vintage Air and straighten that out. More drillin and cuttin coming up.
Tuesday, August 14, 2012
A/C and Other Stuff
Got the A/C box mounted under the dash. Had to make 3 out of 4 brackets, but that isn't unusual when it's not a sure fit system. Spent way too long trying to fit the controlls in the area where the ash tray mount is. Didn't like the way I did it, so will ponder that some more. May put it between the gauges and the radio. Looks like it might fit there.
While rummaging around in some of the old parts boxes I found I had forgotten to install the front shocks. Mounted them yesterday.
Working on the front inner fender panels today. Had to cut out and make room where the new front suspension was installed.
Decided to do some more sandblasting today as the weather is finally getting cooler. Worked on the left running board. Need more sand. Will get that tomorrow. Got to get plugging on the sheetmetal.
While rummaging around in some of the old parts boxes I found I had forgotten to install the front shocks. Mounted them yesterday.
Working on the front inner fender panels today. Had to cut out and make room where the new front suspension was installed.
Decided to do some more sandblasting today as the weather is finally getting cooler. Worked on the left running board. Need more sand. Will get that tomorrow. Got to get plugging on the sheetmetal.
Friday, August 10, 2012
Defroster Vents
The defroster vents supplied by Vintage Air are plastic and not as wide as the original ones. I would have had to weld up the old holes in the dash and drill two new ones for mounting the new vents. I decided to use the old ones and then found out the old vent hose was 1-3/4", while the new hose is 2" in diameter. After some head scratching I remembered I had some 2" exhaust pipe left over and found it just slipped over the old vent pipes. They were a little loose, so I mixed up some metal filler and packed it inside. When it dried, I sanded the rough spots out and painted them. They will work great and will be a lot sturdier. Plus they are original equipment. Not that that makes any difference now.
Got to install the main box under the dash next.
Got to install the main box under the dash next.
Tuesday, August 7, 2012
Installing the Air Conditioning
Opened all the boxes for the Air Conditioning today, an actually sat down and read the instructions. I already had the pump installed on the engine, so next I installed the condenser in front of the radiator. Didn't like the brackes that were furnished so made my own out of 1/8" x 1/2" flatbar. Drilled three 3/16" mounting holes in each and gave each a couple of 45 degree bends for a small offset to bring the condenser about 1/2" away from the radiator. Next I have to install the defroster vents in the dash.
Monday, August 6, 2012
Driveway Rake
Stayed out of the garage for a while because of the heat. While resting in the cool of the airconditioning I decided I need to make a rake to smooth out the area where they tore up my lawn while installing the new septic system. I thought it might also work as a driveway groomer.
I had some scrap angle iron laying around so cut some 3/8 bar stock and rebar 2 inches long (45 Pieces) and welded them to two 45" long 2" x 1/4 inch pieces of angle iron. Had to buy some 1/4" x 1-1/2" angle iron for the side pieces and the runners that hold the 8 x 16 concrete weight blocks.
Tried it out yesterday and this morning after adding three weight blocks. Works great, and no welds broke.
As you can see, my best helper is also a great tester.
I had some scrap angle iron laying around so cut some 3/8 bar stock and rebar 2 inches long (45 Pieces) and welded them to two 45" long 2" x 1/4 inch pieces of angle iron. Had to buy some 1/4" x 1-1/2" angle iron for the side pieces and the runners that hold the 8 x 16 concrete weight blocks.
Tried it out yesterday and this morning after adding three weight blocks. Works great, and no welds broke.
As you can see, my best helper is also a great tester.
Tuesday, July 24, 2012
More Good Help
Had a great time in Niagra Falls and Nancy renewed my contract, so I'm good again for a while.
It's been very very hot here in the midwest the past month and the lack of rain is causing havoc with the corn and soybean crops. It also means I spend less time in the garage.
My oldest son Joe showed up from Washington State Saturday and is here for a little more than a week while his wife Louise and her twin sister Linda are doing the RAGBRIA. It's a hot one this year.
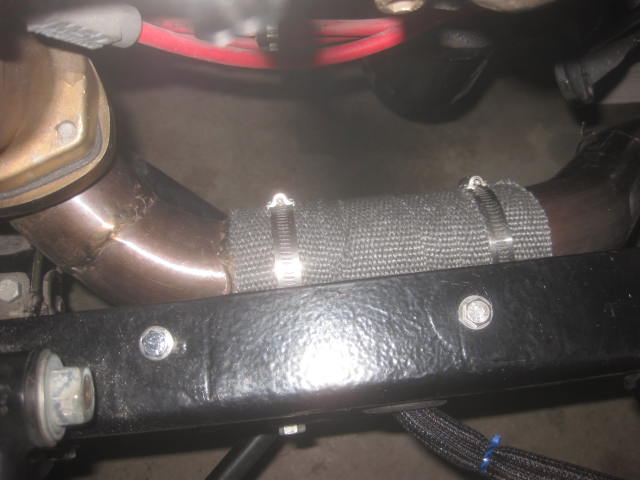
Joe has been helping me on the truck and today we installed the new Edelbrock aircleaner. We also put some heat shielding on the brake lines that run close to the exhaust system. We then finished up the rear axle vent and put on some front sheetmetal for mockup.
Will wait for it to cool down a while before continuing on. I think mounting the Air conditioner condenser will be next. Have to build some brackets for it first.
It's been very very hot here in the midwest the past month and the lack of rain is causing havoc with the corn and soybean crops. It also means I spend less time in the garage.
My oldest son Joe showed up from Washington State Saturday and is here for a little more than a week while his wife Louise and her twin sister Linda are doing the RAGBRIA. It's a hot one this year.
Joe has been helping me on the truck and today we installed the new Edelbrock aircleaner. We also put some heat shielding on the brake lines that run close to the exhaust system. We then finished up the rear axle vent and put on some front sheetmetal for mockup.
Will wait for it to cool down a while before continuing on. I think mounting the Air conditioner condenser will be next. Have to build some brackets for it first.
Saturday, July 14, 2012
30 Years of Pure Bliss
Finished up installing the transmission kickdown cable and made a few clamps to tie things down.
July 17th is our 30th anniversary, so going to take my honey Nancy (AKA Babycakes) to Niagrra Falls
Good time for a break and I think I got a few points for this one. She said she might renew my contract.
July 17th is our 30th anniversary, so going to take my honey Nancy (AKA Babycakes) to Niagrra Falls
Good time for a break and I think I got a few points for this one. She said she might renew my contract.
Thursday, July 12, 2012
New Yogi Parts on
After mocking up all the parts I got from Yogi's, I took it all back apart and primed and painted the brackets gloss black. Put it all back together. Still need the hoses for the power steering and the pully doesn't quite line up yet , so have to sort that out.
Mounted the Carb bracket and put the throttle linkage and Transmission kickdown linkage together. Drilled the firewall for the gas pedal and linkage cable.
Ertzinger showed up and we put the distributor in for mockup of the plug wires. Still have to sort out the routing and buy some plug wire separators.
Opened the wiring box while it was hot outside. Started wiring the gauges but didn't get to far with that yet. That whole wiring project shoud be interesting. Especially for an old plumber
Mounted the Carb bracket and put the throttle linkage and Transmission kickdown linkage together. Drilled the firewall for the gas pedal and linkage cable.
Ertzinger showed up and we put the distributor in for mockup of the plug wires. Still have to sort out the routing and buy some plug wire separators.
Opened the wiring box while it was hot outside. Started wiring the gauges but didn't get to far with that yet. That whole wiring project shoud be interesting. Especially for an old plumber
Thursday, July 5, 2012
More New Parts
Decided to go to the Good Guys Car Show in Des moines last weekend. I wanted to see a lot of cars, but mainly talk to vendors and try to pick up some pointers and parts. Ended up at the YOGI'S display and delt with Yogi himself. He gave me a lot of pointers and and a good deal on the parts I bought from him. Got all the stuff for Air Conditioning, Power Steering pump and brackets, Throttle cable, pedal and braclets, American Autowire Kit for wiring the whole truck. Kickdown cable for the tranny. Alternator bracket and a few other do da's. He gave me 10 percent off and free shipping and threw in a hat and 2 shirts. Nice guy and helped stear me in the right direction. Boxes came Tuesday. Sorted it all out this morning and started putting the air conditioning compressor and brackets on and the power steering pump and brackets to see how the fit was going to be. I have to take it all back apart to paint the brackes after making sure it all fits. It's so hot here now that I was dripping sweat all over the engine so came in to cool off. I think I will look at the wiring kit and see if I can wire up the gauge panel here in the house.
Whew, time for a libation.
Whew, time for a libation.
Tuesday, June 26, 2012
Transmission Linkage fixed
All it takes is time and patients, and maybe a libation or two. Did some tweeking on the column shaft extension I had made and shortened the rod about 1/4 inch and it all came together. Got 6 nice solid shifts. Need to get some stainless one inch bolts to replace the mockup ones I used to put it together and paint the column and that should be finished.
Continuing on with some of the sheetmetal. Have to cut out some rusted area in the front lower fender panel and weld a new piece in. There's a couple of other spots on this piece that need replacing also. Then try some skim coating with body filler. There is a lot of sheetmetal work to do.
Continuing on with some of the sheetmetal. Have to cut out some rusted area in the front lower fender panel and weld a new piece in. There's a couple of other spots on this piece that need replacing also. Then try some skim coating with body filler. There is a lot of sheetmetal work to do.
Saturday, June 23, 2012
Transmission linkage sucks
Taking a break from sandblasting, I thought I might hook up the transmission linkage I got from CCP. This looked very straight forward with minimal thought. Now I wished I had paid more attention in Geomerty class in High School. The brake lever didn't seem to be a problem til I hooked things up and found it in the way. Okay, we can overcome these small obsticals. With a small bend in the shifting rod, wha-la, Brake lever out of the way. Next I found with the 700r4 transmisson, you have an overdrive gear which means you need to move the shift lever one more position. It got humorous after a while as I was moving the steering column up and down, twisting it and moving the shifting rod everywhere. On the floor, In the cab, back to the floor, you get the idea. I haven't figured out (yet) how to get that last shift position. I made an extension for the column lever, rebent the shift lever a few times and now have moved on the doing some hammering and mud work on some sheetmetal. I will let my brain and the shift mechanism cool down for a while. I think it's going to rain.
Friday, June 15, 2012
Sandblasting Again
Got two new clamps I was missing for the exhaust and put them on. Took all the bolts out of the clamps (Stainless Steel) and coated them with anti-sieze, then cranked them all down tight.
Started sandblasting the sheetmetal parts for the front end. Lots of little pieces. Need to get the metal work going. Going to test my hammer skills on small dings. Summer is almost half over.
Started sandblasting the sheetmetal parts for the front end. Lots of little pieces. Need to get the metal work going. Going to test my hammer skills on small dings. Summer is almost half over.
Saturday, June 9, 2012
Back Home from the Dragon
Had the best ride yet this year. 3000 miles and 13 states. Rode "The Dragon" 4 times. Many, many bikes there. Some go fast and some go faster. Was great. Can't wait til next year. Where you say???. We don't know yet.
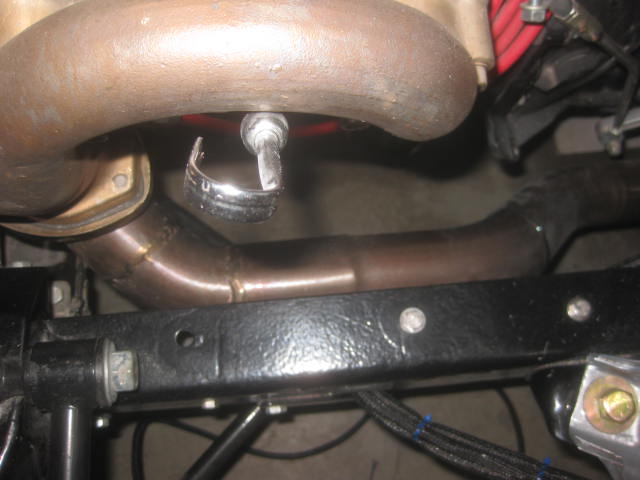
Back to the F1. Got the exhaust J hook hangers installed. I'm checking with the experts to see if I need to apply 2 more hangers. Pretty solid with out them so may just wait and see. Had to order 2 more step clamps. They should be here Tuesday. That should finish the exhaust system
Started doin some sandblasting on the grill parts and the front lower fenders.
By the way, I have to bite the bullet and will put in a whole new septic system. An unwanted venture at this time. Bids are out and back. They should start within two weeks.
Back to the F1. Got the exhaust J hook hangers installed. I'm checking with the experts to see if I need to apply 2 more hangers. Pretty solid with out them so may just wait and see. Had to order 2 more step clamps. They should be here Tuesday. That should finish the exhaust system
Started doin some sandblasting on the grill parts and the front lower fenders.
By the way, I have to bite the bullet and will put in a whole new septic system. An unwanted venture at this time. Bids are out and back. They should start within two weeks.
Sunday, May 20, 2012
J Hooks manifold clamps
Had a problem with our septic system this week plus a few other things slowed me down.
I bought a 3 foot length of 3/8" stainless steel rod and four 6" SS 3/8" bolts and with some help from Rubber Toes (Roger Droz and No Job Johnney ( Bob Ertzinger) we used a propane torch to heat the rods to make J hooks for hangers for the exhaust system.
You may notice that Roger and Bob seem to have had too many jello shots.
Anyway, the 6th annual Old Dogs Motorcycle trip starts tomorrow and Rubber Toes , Two Gallon (Dennis Patrick) and I will head to the "Tail of the Dragon" in North Carolina. We've tried to go there the last two years and weather turned us in another direction. The first hurricane of the season is there right now, but should be gone by the time we get there. The "Dragon" is a 11 mile streach with 318 curves. Shoud be a Whoot.
Will weld up the J hooks when we get back.
Boogie til ya puke!
I bought a 3 foot length of 3/8" stainless steel rod and four 6" SS 3/8" bolts and with some help from Rubber Toes (Roger Droz and No Job Johnney ( Bob Ertzinger) we used a propane torch to heat the rods to make J hooks for hangers for the exhaust system.
You may notice that Roger and Bob seem to have had too many jello shots.
Anyway, the 6th annual Old Dogs Motorcycle trip starts tomorrow and Rubber Toes , Two Gallon (Dennis Patrick) and I will head to the "Tail of the Dragon" in North Carolina. We've tried to go there the last two years and weather turned us in another direction. The first hurricane of the season is there right now, but should be gone by the time we get there. The "Dragon" is a 11 mile streach with 318 curves. Shoud be a Whoot.
Will weld up the J hooks when we get back.
Boogie til ya puke!
Tuesday, May 15, 2012
Exhaust welding done
Bob Ertzinger came down Monday and helped me tweek the rest of the exhaust and.got it ready for welding.
Today I finished the welding on the front part of the exhaust. The right side is in and the left side still has a little clean up yet. Will finish that tomorrow. Welding stainless steel doesn't seem to be much different than regular steel. I still need a lot more practice. I spend too much time grinding and clean up. At least it looks strong and has good penitration.
Next I will start working on some of the sheet metal. I'll start with the easy stuff like the front fender lowers. The ones I got in Spokane are a lot better than the ones that came off the truck but still need patch welding and straighening. As I said before, i'm an apprentice again.
Today I finished the welding on the front part of the exhaust. The right side is in and the left side still has a little clean up yet. Will finish that tomorrow. Welding stainless steel doesn't seem to be much different than regular steel. I still need a lot more practice. I spend too much time grinding and clean up. At least it looks strong and has good penitration.
Next I will start working on some of the sheet metal. I'll start with the easy stuff like the front fender lowers. The ones I got in Spokane are a lot better than the ones that came off the truck but still need patch welding and straighening. As I said before, i'm an apprentice again.
Thursday, May 10, 2012
Back In The Saddle
Got back from Washington State late yesterday. Had a nice 90th birthday party for Nancy's mom and got to see all our kids and grandkids while out there. Thats always a treat.
While visiting in Spokane, I found some Ford F1 parts on Craigslist and picked up a left rear fender, the front right and left lower fenders, 2 running boards and two headlight cans with chrome rings.. The sheetmetal is all better than what I have, but will still need work. Got it all for a hundred bucks from a guy named Robert in Otis Orchards, just east of Spokane. He has three projects he is working on and the F1 needed to go.
Back to the exhaust now. Have to take it all back out and weld up the front sections. A lot of it will be clamped so it can come apart easy.
Nice to be home again.
While visiting in Spokane, I found some Ford F1 parts on Craigslist and picked up a left rear fender, the front right and left lower fenders, 2 running boards and two headlight cans with chrome rings.. The sheetmetal is all better than what I have, but will still need work. Got it all for a hundred bucks from a guy named Robert in Otis Orchards, just east of Spokane. He has three projects he is working on and the F1 needed to go.
Back to the exhaust now. Have to take it all back out and weld up the front sections. A lot of it will be clamped so it can come apart easy.
Nice to be home again.
Tuesday, April 24, 2012
Exhaust and Fuel Sender in
Got the fuel sender installed. Still have to run a ground wire to it but will do that when I get the wiring kit.
The exhaust is finally all mocked up and tack welded.. Now have to take it all back apart and finish the welding. Also have to get and install some hangers.
Going to Washington State for a couple of weeks. Nancys mom is having her 90th birthday party. See you when I get back.
The exhaust is finally all mocked up and tack welded.. Now have to take it all back apart and finish the welding. Also have to get and install some hangers.
Going to Washington State for a couple of weeks. Nancys mom is having her 90th birthday party. See you when I get back.
Friday, April 20, 2012
Exhaust and Gauges
The pictures at right show some of the mockup's I have done so far. As you can see, I even turned some 2 1/2" wooden dowels to use in the process. The one that I think will be used is the one where I cut two 90 degree elbows and made a 2 inch jog in the pipe to clear the brake booster. It's just tack welded so far with a little more fine tuning to do before I complete the welding.
My new Autometer gauges showed up today. The Speedometer has a tachometer at the bottom of the gauge which saved me from installing a separate one. The dash gauge plate is a polished aluminum billet insert made by Boese Engineering out of Tempe Arizona. It will be a while before this all gets wired in but I got the fuel sending unit with the fuel gauge and now I can install it and finish up the fuel tank.
Back to the exhaust.
My new Autometer gauges showed up today. The Speedometer has a tachometer at the bottom of the gauge which saved me from installing a separate one. The dash gauge plate is a polished aluminum billet insert made by Boese Engineering out of Tempe Arizona. It will be a while before this all gets wired in but I got the fuel sending unit with the fuel gauge and now I can install it and finish up the fuel tank.
Back to the exhaust.
Wednesday, April 18, 2012
Who said "Patience is a waste of time"?
Well, sometimes you just have to set back and look. Scratching your head also seems to help.
I thought I had cut a fat hog with my first mockup of the exhaust system. I've modified those plans many times so far and still not finished. I'm having a problem with the drivers side. I have the elbow now coming around the outside of the steering shaft (Bob Ertzingers suggestion), which gives me just enough clearance from the shaft. My problem now is getting around the power brake booster and master cylinder. I made a mockup out of cardboard today that curves inside around the booster. I need a little more contemplation before I start cutting and welding pipe.
Meanwhile, UPS arrived today with the new Flowmaster Mufflers and Torco Stainless Steel step clamps, the carb spacer and mounting bolts and the Speedometer output adaptor for the transmission. Put the Speedo adaptor on and it is now ready to be wired when the new gauges arrive. I got a real nice used Edelbrock 1406 Carberator from Van Aldershof and installed it today after the Spacer and mounting bolts arrived. Still have to connect all the do daa's to it yet but it looks cool setting on the 350. Still have to decide what air cleaner to use but I think one that matches the valve covers will look great.
It will be nice to get the exhaust system sorted out so I can move on, Still a lot of work to do on the cab.
I thought I had cut a fat hog with my first mockup of the exhaust system. I've modified those plans many times so far and still not finished. I'm having a problem with the drivers side. I have the elbow now coming around the outside of the steering shaft (Bob Ertzingers suggestion), which gives me just enough clearance from the shaft. My problem now is getting around the power brake booster and master cylinder. I made a mockup out of cardboard today that curves inside around the booster. I need a little more contemplation before I start cutting and welding pipe.
Meanwhile, UPS arrived today with the new Flowmaster Mufflers and Torco Stainless Steel step clamps, the carb spacer and mounting bolts and the Speedometer output adaptor for the transmission. Put the Speedo adaptor on and it is now ready to be wired when the new gauges arrive. I got a real nice used Edelbrock 1406 Carberator from Van Aldershof and installed it today after the Spacer and mounting bolts arrived. Still have to connect all the do daa's to it yet but it looks cool setting on the 350. Still have to decide what air cleaner to use but I think one that matches the valve covers will look great.
It will be nice to get the exhaust system sorted out so I can move on, Still a lot of work to do on the cab.
Tuesday, April 10, 2012
Steering, Seat belt plates etc.
Made a bracket to hold the steering column to the cab floor plate. I had to Split the plate in half so I could get it around the column I had made the plate last year and now the steering shaft is in solid. That allowed me to cut the 3/4" double D shaft extension and put it and the two universal joints in. Now I can actually turn the front wheels with the steering wheel in the cab.
Made some upper seat belt mounting brackets to weld to the cab just above each seat by the doors so I can install three point seat belts later. Still have to make the brackets for the floor mount yet but will buy the belts first that have and installation package with them. Got to decide on the color first,
Will be working on the exhaust system next.
Had a nice surprise last night when Dennis Patrick (One of my Old Dogs who ride Hogs Partners known as "Two Gallon") from Topeka showed up with his son Russell for a visit. Russell is a woodworker and keeps me updated on his projects. He looks good in my Ford.
Made some upper seat belt mounting brackets to weld to the cab just above each seat by the doors so I can install three point seat belts later. Still have to make the brackets for the floor mount yet but will buy the belts first that have and installation package with them. Got to decide on the color first,
Will be working on the exhaust system next.
Had a nice surprise last night when Dennis Patrick (One of my Old Dogs who ride Hogs Partners known as "Two Gallon") from Topeka showed up with his son Russell for a visit. Russell is a woodworker and keeps me updated on his projects. He looks good in my Ford.
Wednesday, April 4, 2012
CAB BACK ON
Got the cab back on today. My best helper (Nancy) assisted with the installation.
I had been practicing my welding on some scrap exhaust pipe and finally cut a piece of the Stainless Steel pipe and practiced on that. I’m not there yet, but not far away. There are so many little things that needed finished or mocked up that I decided to put the cab back on today. I have to finish mounting the steering shaft to the firewall so the double D shaft can be cut to length and the universal joints installed. Once that’s in I can finalize and weld up the first bends out of the manifold of the exhaust pipe on the drivers side.. Anyway, still plugging along.. Got to get my annual health checkup tomorrow. The one day out of the year where all orifices get checked. Yuck.
Tuesday, March 27, 2012
Water Pump, Fuel Line, Tranny cover and Stuff
Got the bolts for the water pump and installed it. Applied the pulley and fan also. Will have to either modify the existing radiator fan shroud or put an electrical fan on. The new Chevy engine sets about 3'' lower than the old Ford six and puts the fan towards the bottom of the radiator. I'll have to do more investigation on this.
Rolled out the coil of 3/8" steel fuel line and ran it from the tank in the rear to the fuel pump on the engine, with short rubber jumper hoses on each end. Also got it all clamped to the frame on the right side. Still have to run the line up to the carb, but don't have a carb yet.
Worked on the tranny cover and welded in the new piece after cutting out the cancerous part. This may still have to be modified if it doesn't fit over the 700R4 tranny.
Started mocking up the exhaust manifold and the passenger side looks like it should be fairly easy. (Did I say that?) The drivers side is another story. The steering shaft is very close the the dunp tube on the manifold. I'm looking for a short radius 90 degree elbow now to fit in there.
Cab goes back on soon for more mock up.
Rolled out the coil of 3/8" steel fuel line and ran it from the tank in the rear to the fuel pump on the engine, with short rubber jumper hoses on each end. Also got it all clamped to the frame on the right side. Still have to run the line up to the carb, but don't have a carb yet.
Worked on the tranny cover and welded in the new piece after cutting out the cancerous part. This may still have to be modified if it doesn't fit over the 700R4 tranny.
Started mocking up the exhaust manifold and the passenger side looks like it should be fairly easy. (Did I say that?) The drivers side is another story. The steering shaft is very close the the dunp tube on the manifold. I'm looking for a short radius 90 degree elbow now to fit in there.
Cab goes back on soon for more mock up.
Tuesday, March 20, 2012
Been busy
Got a lot of parts ordered and all arrived this week. Installed the Radiator hoses but think I will change the top to a different type. got the new long water pump but now have to get some bolts to hang it.
Got the speedometer drive and driven gears and put that all together today. This allowed me to put the driveline in that's been patienly waiting. All fits good so far.
The Flowmaster stainless steel 2.5 inch exhaust kit arrived, so started mocking that up today. This will take a while. Got to practice welding stainless pipe before I ruin the good stuff.
Still have to weld up the transmission cover thats waiting.
Fuel line is here. That will install shortly.
Weather is great now.
Time to get something done.
Got the speedometer drive and driven gears and put that all together today. This allowed me to put the driveline in that's been patienly waiting. All fits good so far.
The Flowmaster stainless steel 2.5 inch exhaust kit arrived, so started mocking that up today. This will take a while. Got to practice welding stainless pipe before I ruin the good stuff.
Still have to weld up the transmission cover thats waiting.
Fuel line is here. That will install shortly.
Weather is great now.
Time to get something done.
Thursday, March 8, 2012
Radiator and Shroud is in
Got the Stainless Steel radiator mounting kit from Texas and found it was all too small. Guess it probably is for a car. All parts are much smaller than what came out of the truck. Sooo, I sandblased all the rust off the old bolts and springs and gave them a nice coat of primer and gloss black paint. The weather warmed up again the last tweo days so installed the radiator mount and radiator with the fan shroud. Looks good and measurements show I need the long water pump. The 17 inch mechanical fan I got from Texas will work fine I think. i will know after installing the water pump. I also installed the starter.
I needed to finish up making the clamps for the parking brake cables and also installed them.
The manifold elbows I got are plain steel and probably won't get used but is helping me figure out how to run the exhaust piping.
Sand blasted the transmission cover yesterday. part of it was rusted out and had a piece pop riveted to it. I now need to cut out the rusty part and weld in a new piece.
Cold out today so going to order some more parts. (It's only money, right?)
I needed to finish up making the clamps for the parking brake cables and also installed them.
The manifold elbows I got are plain steel and probably won't get used but is helping me figure out how to run the exhaust piping.
Sand blasted the transmission cover yesterday. part of it was rusted out and had a piece pop riveted to it. I now need to cut out the rusty part and weld in a new piece.
Cold out today so going to order some more parts. (It's only money, right?)
Tuesday, February 28, 2012
New radiator core
Got my radiator recored and returned. They put in a new cap receiver on top so I could install a higher pressure cap. Took a couple of days to find one but got one yesterday at a truck repair place in Fort Madison. Seems the cap fits an older International truck, so I got a 10 pound cap. Fits nicely.
I then dug out the radator mounting frame and fan shroud. I had sandblasted them quit a while ago and since the weather was nice yesterday, I got the sanding pot out and did a quick reblast to get the flash rust off them. I have since painted both a nice gloss black to match the radiator.
I found the mounting bolts and springs I had labeled and bagged and decided I didn't want to use them as they were well worn and rusty. I found a mounting kit with stainless steel bolts and springs on line at Sachse Rod Shop in Sachse Texas for 15 bucks. It's on the way now along with a new mechanical fan blade. Hope to have the parts by the weekend so I can get it mounted. Then I can measure and decide which water pump I will put in. I think it will be the long one by the looks of things.
I then dug out the radator mounting frame and fan shroud. I had sandblasted them quit a while ago and since the weather was nice yesterday, I got the sanding pot out and did a quick reblast to get the flash rust off them. I have since painted both a nice gloss black to match the radiator.
I found the mounting bolts and springs I had labeled and bagged and decided I didn't want to use them as they were well worn and rusty. I found a mounting kit with stainless steel bolts and springs on line at Sachse Rod Shop in Sachse Texas for 15 bucks. It's on the way now along with a new mechanical fan blade. Hope to have the parts by the weekend so I can get it mounted. Then I can measure and decide which water pump I will put in. I think it will be the long one by the looks of things.
Wednesday, February 22, 2012
What I did on my winter vacation
Had a great trip to Thailand, Viet Nam and Cambodia. Was gone for 36 days. Glad to be home. Had Jet lag for a week. My sleep times are still not straighten out yet.
The picture of me and (Frank) the snake was taken at the Water Gardens in Paklong-Talag, just north of Bangkok. The Python snake was pretty heavy but very doscile.
Back to the F1 now.
Got a set of MSD ignition wires from Tony Cetta and will also get an auxillary transmission cooler from him.
I took my old radiator up to Advanced Radiator in West Burlington yesterday and owner Kevin Pickle is giving it a total overhaul. It's going from a 3 row tube to a NEW 5 row tube and will fit right back into the original place. Cooling for the 350 shouldn't be a problem. Should have it back by next Monday. Since there wasn't room in the bottom of this radiator for a transmission cooler, I will install the one I get from Tony under the pickup box behind the cab. I will have to build a mounting bracket for it
Now in the process of putting my list of other items needed together and then will go up to Monticello Iowa soon to Yogi's and lay some money down. Should get a percentage cut if my list is big enough. (Lots to buy yet.)
A little chilly to work out in the garage yet, but I still make quick trips back and forth.
The picture of me and (Frank) the snake was taken at the Water Gardens in Paklong-Talag, just north of Bangkok. The Python snake was pretty heavy but very doscile.
Back to the F1 now.
Got a set of MSD ignition wires from Tony Cetta and will also get an auxillary transmission cooler from him.
I took my old radiator up to Advanced Radiator in West Burlington yesterday and owner Kevin Pickle is giving it a total overhaul. It's going from a 3 row tube to a NEW 5 row tube and will fit right back into the original place. Cooling for the 350 shouldn't be a problem. Should have it back by next Monday. Since there wasn't room in the bottom of this radiator for a transmission cooler, I will install the one I get from Tony under the pickup box behind the cab. I will have to build a mounting bracket for it
Now in the process of putting my list of other items needed together and then will go up to Monticello Iowa soon to Yogi's and lay some money down. Should get a percentage cut if my list is big enough. (Lots to buy yet.)
A little chilly to work out in the garage yet, but I still make quick trips back and forth.
Tuesday, January 3, 2012
On More Shot
Well, just before New Years the temp warmed up and I got a chance to hit the garage one more time.
I installed the fill neck on the fuel tank plus the fitting running from the tank to the pump. Then I put in the vent fitting. I still have to mount the rollover valve somewhere on the frame higher than the fill neck and run the line.
It was still warm out so I installed the stainless steeel Ram Horn manifolds. I put the sparkplugs in temporaily to decide what boots I will need on the plug wires. Next I put the fuel pump on. Lookin good.
Looks like I will have a little trouble running the exhaust pipe on the drivers side or I will have to do some figuring on the double D shaft going from the steering column to the steering rack.
Sooo, next will be the fuel lines and the exhaust come Spring.
I installed the fill neck on the fuel tank plus the fitting running from the tank to the pump. Then I put in the vent fitting. I still have to mount the rollover valve somewhere on the frame higher than the fill neck and run the line.
It was still warm out so I installed the stainless steeel Ram Horn manifolds. I put the sparkplugs in temporaily to decide what boots I will need on the plug wires. Next I put the fuel pump on. Lookin good.
Looks like I will have a little trouble running the exhaust pipe on the drivers side or I will have to do some figuring on the double D shaft going from the steering column to the steering rack.
Sooo, next will be the fuel lines and the exhaust come Spring.
Thursday, December 29, 2011
Bada Bling
Had a nice Hotrod bench session yesterday with Van Aldershof and Jim Luther. Those two are full of information and I had the opportunity to ask a multitude of questions. They have been a great help in guiding me in the right direction. This project would be a lot tougher with out their help.
I did bring in the Chevy steering column that Aldershof got for me at a local junk yard and took the aluminum drop piece off that he had made out of a one inch piece of aluminum and got it nicely polished up. I used a buffing wheel on my drill press with some white diamond polishing compound on it. Didn't come out too bad.
Now I have to catagorize all the stuff I learned from the boys and get ready to order parts when we get back fron Asia. We leave on the 7th of January and will return on Feburary 18th.
Happy New Year to whomever reads this stuff and hope 2012 will be as good or better for you and me as 2011 was.
I did bring in the Chevy steering column that Aldershof got for me at a local junk yard and took the aluminum drop piece off that he had made out of a one inch piece of aluminum and got it nicely polished up. I used a buffing wheel on my drill press with some white diamond polishing compound on it. Didn't come out too bad.
Now I have to catagorize all the stuff I learned from the boys and get ready to order parts when we get back fron Asia. We leave on the 7th of January and will return on Feburary 18th.
Happy New Year to whomever reads this stuff and hope 2012 will be as good or better for you and me as 2011 was.
Monday, December 26, 2011
Mary's Lamp
Finished my daughter Mary's lamp today. It is actually a display case/lamp to house the Saguaro cactus bones she was given by a friend. The case is made out of hard maple with black walnut accent pieces. Most of her furniture is of the southwestern motif so I decide to try to make it blend in.
Since we leave for an extended tour to Viet Nam, Thailand and Cambodia on
January 8th for 5 weeks, I will deliver it to her when we get back.
Glad it's done and hope she likes it.
Now back to ordering parts for the F1.
Since we leave for an extended tour to Viet Nam, Thailand and Cambodia on
January 8th for 5 weeks, I will deliver it to her when we get back.
Glad it's done and hope she likes it.
Now back to ordering parts for the F1.
Wednesday, December 7, 2011
Baby it's Cold Outside
Well I haven't died yet but the build has slowed down because my shop is not insulated or heated. It's 18 degrees out this morning with three inches of snow on the ground. I know, I know, for some of you Northerners thats balmy weather and your probably on your way to your favorite ice fishing hole, but this old body needs heat.
I did get the gas tank installed and started doing the plumbing before it got miserable out there. Sooo, I started ordering some parts. Decided on the Speedway Stainless Steel Rams Horn manifolds and they arrived last week. Got some other engine parts too. HEI distributor, One wire Alternator, Fuel pump. Lots more to get yet.
I moved indoors into the wood shop and am in the process of finishing the lamp I started for my daughter Mary last year. She acquired the bones of a saguaro cactus from her friend Bubba (Automatic Slim) in Texas about 5 or more years ago. Mary asked me to make a lamp out of it and after a lot of pondering I decided to make a lamp/display case for it. She likes the Southwestern motif so thats what i'm building. I'll post a picture here when I get it finished. Should be in a week or two.
Meanwhile, Stay warm. I'm trying to.
I did get the gas tank installed and started doing the plumbing before it got miserable out there. Sooo, I started ordering some parts. Decided on the Speedway Stainless Steel Rams Horn manifolds and they arrived last week. Got some other engine parts too. HEI distributor, One wire Alternator, Fuel pump. Lots more to get yet.
I moved indoors into the wood shop and am in the process of finishing the lamp I started for my daughter Mary last year. She acquired the bones of a saguaro cactus from her friend Bubba (Automatic Slim) in Texas about 5 or more years ago. Mary asked me to make a lamp out of it and after a lot of pondering I decided to make a lamp/display case for it. She likes the Southwestern motif so thats what i'm building. I'll post a picture here when I get it finished. Should be in a week or two.
Meanwhile, Stay warm. I'm trying to.
Sunday, November 20, 2011
Rear spring perches welded in
After rechecking the pinion angle I tack welded the spring perches on the rearend in place and then took the rearend apart so I could flip it over to finish the welding. Got it all back together including the rear sway bar.
Got the gas tank out and painted the straps that hold it in place. Will put that in on the next warm day. Then I will run the fuel line to the front and hook it up to the fuel pump.
Got the gas tank out and painted the straps that hold it in place. Will put that in on the next warm day. Then I will run the fuel line to the front and hook it up to the fuel pump.
Sunday, November 13, 2011
Engine and Transmission Install


My advisers arrived yesterday to help me install the engine and transmission.
Van Aldershof, Bob Ertzinger and Jim Luther came with smiling faces and tools in hand to direct the installation. We started with a small calamity when we saw there was no dowel pin in the rear crankshaft to align the flexplate. With a little scurrying around and some phone calls we found out from Tony Cetta that the dowel was for flywheels (when a clutch is used) and wasn't necessary for the flexplate. The flexplate went on nicely and then on to the torque converter. After putting some fluid in the converter it took three of us to finally get it seated on the transmission shaft. We found it wasn't seated the first time as we were putting the engine and tranny together and had to take it back apart. It finally fell in place with the familiar clunk and all went together nicely. When you have 4 people doing this job it goes a lot smoother. After it was set in the frame, Jim installed and torqued the flywheel to converter bolts. None of us were sure what the torque specs on these bolts were so they were torqued at 35 pounds. Jim later called me and said we should check this torque spec to make sure we were right. I found out it should be about 65 pounds according to the bolt maker ARP. Jim advised me to take them back out and reapply some loctite and retorque them to 65 pounds..
We then set in the driveline to make sure it was the correct length. Perfect. We checked the rear pinion angle on the rearend housing and it was very very close. Now I can weld the spring perches on the rearend housing.
All in all, it was a great day. It sure is nice to have knowledgeable friends
Thanks Van, Bob and Jim.

Thursday, November 10, 2011
Rear Bumper Brackets Done
Got some half inch bolts today and put the bumper brackets on the rear of the frame. Gonna look good with a chrome bumper attached.
Most of the stuff for the motor/tranny hookup came today. Was like Christmas. Should warm up next week for the attachment and drop in.
Finished winterizing outside today. Got to put the snow plow on the lawn tractor tomorrow.
Most of the stuff for the motor/tranny hookup came today. Was like Christmas. Should warm up next week for the attachment and drop in.
Finished winterizing outside today. Got to put the snow plow on the lawn tractor tomorrow.
Wednesday, November 9, 2011
Back to work, (Pun intended)
Back is feeling better so got all the necessary items ordered that will be needed to mate the tranny and engine. Most items are coming from Summit Racing. Looks like UPS will deliver them sometime tomorrow. I spent some time yesterday tapping out all the bolt holes in the block so it will be ready to go when it gets hooked up to the tranny
Meanwhile, Lyle Peterson gave me a set of rear bumper brackets to use. My goal for today was to make them look better. They were pretty rusty but with a grinder and sandblaster they cleaned up pretty good. They had a lot of rust pitting but ground most of that out. You can see the before and after in the picture. I just gave them a shot of primer and will paint them Gloss black later tonight. I'll get some half inch bolts tomorrow and see how they look on the frame.
If all goes well, the engine and tranny should be in the frame by next week.
Whoody Ha.
By the way, It tried to snow today. Didn't stick, but it's too soon for that stuff.
Meanwhile, Lyle Peterson gave me a set of rear bumper brackets to use. My goal for today was to make them look better. They were pretty rusty but with a grinder and sandblaster they cleaned up pretty good. They had a lot of rust pitting but ground most of that out. You can see the before and after in the picture. I just gave them a shot of primer and will paint them Gloss black later tonight. I'll get some half inch bolts tomorrow and see how they look on the frame.
If all goes well, the engine and tranny should be in the frame by next week.
Whoody Ha.
By the way, It tried to snow today. Didn't stick, but it's too soon for that stuff.
Saturday, November 5, 2011
No Pain No Gain
Just after my last update I tweeked my back pulling a tree stump out of my yard. Lost some days in the garage. Ice packs and heat have helped. Should be as good as new in a couple more days.
Meanwhile, got my newly rebuild 700R4 transmission back today. Got to get the flywheel ordered and mate the tranny up to the engine.
maybe next week. It all depends on parts, weather and the back.
Meanwhile, got my newly rebuild 700R4 transmission back today. Got to get the flywheel ordered and mate the tranny up to the engine.
maybe next week. It all depends on parts, weather and the back.
Wednesday, November 2, 2011
Things are better now
Since last update a lot has happened. After the window wipers, I built a cardboard mockup box to see how the Air Conditioning was going to fit in under the dash. Going to be tight but it will go. Next, I have been working on the seat risers to see if I want to put in the bucket seats I bought. Almost done with them.
Monday I went to Quincy with Van Aldershof and Jim Luther and ordered a 700R4 transmission Fron Gene Horton. It should be done Friday or next Monday.
Got a call from Cliff Couch on Monday afternoon and he said he had the new engine built. Yesterday Bob Ertzinger and Tony Cetta went with me to pick it up. Got a nice set of valve covers from Tony to dress it up. Cliff filled it up with oil and zinc additive and prelubed the oil system. Got a good 60 lbs pressure. He put in a mild cam, so it should sound very good.
I'll finish the seats this week and if the weather doesn't get too cold, I'll join the transmission and engine and possibly set them in.
The old F1 is gonna look good with a new heart.
Monday I went to Quincy with Van Aldershof and Jim Luther and ordered a 700R4 transmission Fron Gene Horton. It should be done Friday or next Monday.
Got a call from Cliff Couch on Monday afternoon and he said he had the new engine built. Yesterday Bob Ertzinger and Tony Cetta went with me to pick it up. Got a nice set of valve covers from Tony to dress it up. Cliff filled it up with oil and zinc additive and prelubed the oil system. Got a good 60 lbs pressure. He put in a mild cam, so it should sound very good.
I'll finish the seats this week and if the weather doesn't get too cold, I'll join the transmission and engine and possibly set them in.
The old F1 is gonna look good with a new heart.
Monday, October 24, 2011
Good News and Bad News
First the good news.
I finished installing the window wipers today. I tried to cut and grind the two existing dash braces to get the apparatis mounted and finally did as the instructions said and cut both completely out of the way. With a little more modifying it all went into place. Most HotRodders don't like running their ride in the rain. This one will if need be.
Now the bad news.
Cliff called me about the 355 engine and said I should come and look at it. I headed on down to Missouri and he showed me basicly a pile of junk. The heads were bad. The crank bearings bad and one spun on the crank. (it can be reground). One of the pistons was froze on the rod pin. An old distributor gear was used on the distributor and ruined the cam gear. The rods are okay and can be reused. The timing cover was beat up and junk. The pan, intake, timing gear and chain are okay. There was a lot of filings in the pan and so the oil pump is shot.
We found a crack in the block, so that is no good.
To make a long story short, Cliff has another block and will build me a good engine using the parts that are salvagable. Everything else will be new including new heads.
This was a costly mistake on my part. I learned a hard lesson. Won't do that again.
I finished installing the window wipers today. I tried to cut and grind the two existing dash braces to get the apparatis mounted and finally did as the instructions said and cut both completely out of the way. With a little more modifying it all went into place. Most HotRodders don't like running their ride in the rain. This one will if need be.
Now the bad news.
Cliff called me about the 355 engine and said I should come and look at it. I headed on down to Missouri and he showed me basicly a pile of junk. The heads were bad. The crank bearings bad and one spun on the crank. (it can be reground). One of the pistons was froze on the rod pin. An old distributor gear was used on the distributor and ruined the cam gear. The rods are okay and can be reused. The timing cover was beat up and junk. The pan, intake, timing gear and chain are okay. There was a lot of filings in the pan and so the oil pump is shot.
We found a crack in the block, so that is no good.
To make a long story short, Cliff has another block and will build me a good engine using the parts that are salvagable. Everything else will be new including new heads.
This was a costly mistake on my part. I learned a hard lesson. Won't do that again.
Wednesday, October 19, 2011
Whew, Lots of stuff
Got all the brake lines finished and now they are ready for fluid and bleeding. Later on that.
Worked on the steering column brackets and got the top bracket and shim done. Now working on the sheetmetal for the firewall where the bottom of the column goes through.
Got my new Window wiper kit from Dennis Carpenter Industries this week. Looks real nice, but may be a little complicated installing. More head scratching.
Meanwhile, Bob Ertzinger and Tony Cetta helped me take the 355 Chevy engine down to Missouri this morning to Cliff Couch. He has been rebuilding motors for more than 50 years. Does a lot for the race crowd around here. He's 71 years old and doesn't look close to that. He will tear down the engine and make sure it will run okay for me. Should get it back in a couple of weeks Tony has a set of Edlebrock valve covers I can buy for it that will dress it up nicely.
Got to order a starter, water pump, alternator and Carb to finish it off.
Soon I have to get started finding a 700R4 transmission. Maybe out of Kansas City. It would be nice to have all this installed by Spring. (Wishful Thinking.)
I keep plugging along like an old mule.
Worked on the steering column brackets and got the top bracket and shim done. Now working on the sheetmetal for the firewall where the bottom of the column goes through.
Got my new Window wiper kit from Dennis Carpenter Industries this week. Looks real nice, but may be a little complicated installing. More head scratching.
Meanwhile, Bob Ertzinger and Tony Cetta helped me take the 355 Chevy engine down to Missouri this morning to Cliff Couch. He has been rebuilding motors for more than 50 years. Does a lot for the race crowd around here. He's 71 years old and doesn't look close to that. He will tear down the engine and make sure it will run okay for me. Should get it back in a couple of weeks Tony has a set of Edlebrock valve covers I can buy for it that will dress it up nicely.
Got to order a starter, water pump, alternator and Carb to finish it off.
Soon I have to get started finding a 700R4 transmission. Maybe out of Kansas City. It would be nice to have all this installed by Spring. (Wishful Thinking.)
I keep plugging along like an old mule.
Thursday, October 13, 2011
Brakes almost done
Drilled and taped two holes in the front crossover piece and installed the brake metering valve. Got all the brake lines made and installed except the last one at the right rear. Will finish that one this weekend. Also drilled holes in the frame and install insulated brake line clamps about a foot apart. Used Stainless Steel nuts and bolts to hold the clamps down.
Van Aldershof showed up again today and brought the steering column back with a new column drop on it that he made out of a nice chunk of aluminum. He also punched out the ignition switch and installed a new one with a key in it. We mocked it up in the cab and I think it's going to be great. Van saved me a lot of money and time on this little baby. He's an excellent machinist.
Now I will have to build an additional plate to mount the bottom end of the column to the floor board/ firewall.
Van Aldershof showed up again today and brought the steering column back with a new column drop on it that he made out of a nice chunk of aluminum. He also punched out the ignition switch and installed a new one with a key in it. We mocked it up in the cab and I think it's going to be great. Van saved me a lot of money and time on this little baby. He's an excellent machinist.
Now I will have to build an additional plate to mount the bottom end of the column to the floor board/ firewall.
Sunday, October 9, 2011
New Brake Lines Started
Welded up the last two patches on the cab yesterday and did some Mudding.(Body filler). That stuff sets up fast and is harder to sand than I thought. Lot more of that to do yet.
Started on the brake lines today. Made a bracket for the adjustabe proportioning valve and mounted that tucked up in the frame rail for protection. Got three lines bent coming out of the Master Cylinder and holding the residual valves. The top red one is like a 10 pound check valve going to the adjustable proportioning valve and then on to the back drum brakes. The bottom blue one is a 2 pound check valve that goes forward to a hold off / metering valve and then on to the front disc brakes. The hold off / metering valve is used in a disc / drum brake system (like mine) to allow the rear brakes to actuate first. The adjustable proportioning valve provides control of the rate of pressure rise to the rear brakes. Seems complicated , as some engineers figured all this out.
I just puts um where they tells me.. In simple terms, If you push the pedal, you should stop.
It took a little practice learning to do the double flaring needed for the 3/16" steel tubing. I did as Van and Jim instructed me and took my time. Bending the tubing wasn't a problem since i'm an old pipefitter, I've bent a lot of it in the past. Besides, if you make a mistake, you throw that one away and do it over again without telling anyone.
I will mount the metering valve on the front suspension crossover piece tomorow and run the front disc lines.
Started on the brake lines today. Made a bracket for the adjustabe proportioning valve and mounted that tucked up in the frame rail for protection. Got three lines bent coming out of the Master Cylinder and holding the residual valves. The top red one is like a 10 pound check valve going to the adjustable proportioning valve and then on to the back drum brakes. The bottom blue one is a 2 pound check valve that goes forward to a hold off / metering valve and then on to the front disc brakes. The hold off / metering valve is used in a disc / drum brake system (like mine) to allow the rear brakes to actuate first. The adjustable proportioning valve provides control of the rate of pressure rise to the rear brakes. Seems complicated , as some engineers figured all this out.
I just puts um where they tells me.. In simple terms, If you push the pedal, you should stop.
It took a little practice learning to do the double flaring needed for the 3/16" steel tubing. I did as Van and Jim instructed me and took my time. Bending the tubing wasn't a problem since i'm an old pipefitter, I've bent a lot of it in the past. Besides, if you make a mistake, you throw that one away and do it over again without telling anyone.
I will mount the metering valve on the front suspension crossover piece tomorow and run the front disc lines.
Thursday, October 6, 2011
Look Ma, No Holes.
Spent the last couple of days welding up all the holes in the firewall. I should have counted them as there were a bunch. Got some of the mudding and sanding done on the firewall today also.
Still have the little patch in the left back bottom corner to do. Maybe tomorrow.
Then it will be back to the brakes and mockup of the steering column.
Still have the little patch in the left back bottom corner to do. Maybe tomorrow.
Then it will be back to the brakes and mockup of the steering column.
Monday, October 3, 2011
Cab blasting done
Working on the brake lines as a side project right now. Need a couple more adaptor fittings for the Master cylinder yet.
Decided that since the weather was so nice this week that I would finish the sandblasting on the cab. While I was working on that this morning, Van Aldershof showed up with a steering column that he got this morning at Mikes Junk yard. It's out of a GMC and has all the tilt, turn signals and ignition in it. There's no key for it so Van will pop the old one out and put in a new one.
After I mock it up in the truck Van will make a nice polished aluminun column drop for it. Should turn out better than what I was expecting to put in. His help is always appreciated.
The cab blasting is done so now on with the repairs.I have a small section to weld in on the left rear and some minor dents to pound out. Decided to weld up some of the holes in the firewall to give it a cleaner look. Then the body filler starts.
I'm also going to put the old bench seat back in temporarily to do the mockup on the steering column.
Decided that since the weather was so nice this week that I would finish the sandblasting on the cab. While I was working on that this morning, Van Aldershof showed up with a steering column that he got this morning at Mikes Junk yard. It's out of a GMC and has all the tilt, turn signals and ignition in it. There's no key for it so Van will pop the old one out and put in a new one.
After I mock it up in the truck Van will make a nice polished aluminun column drop for it. Should turn out better than what I was expecting to put in. His help is always appreciated.
The cab blasting is done so now on with the repairs.I have a small section to weld in on the left rear and some minor dents to pound out. Decided to weld up some of the holes in the firewall to give it a cleaner look. Then the body filler starts.
I'm also going to put the old bench seat back in temporarily to do the mockup on the steering column.
Subscribe to:
Posts (Atom)