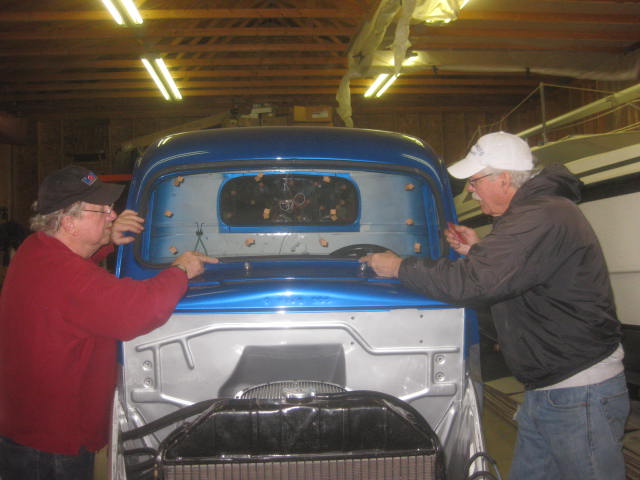
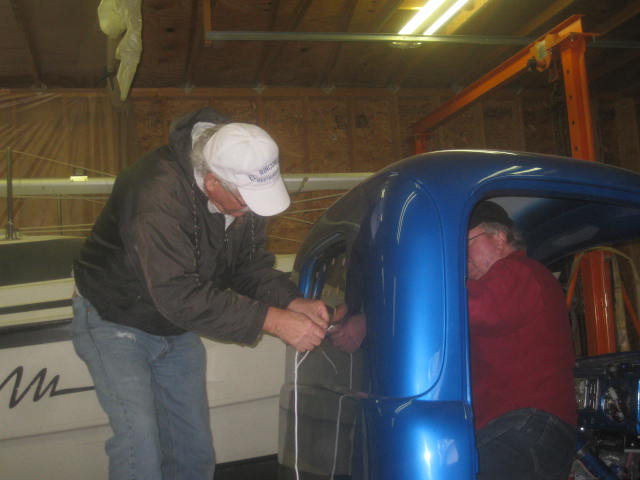
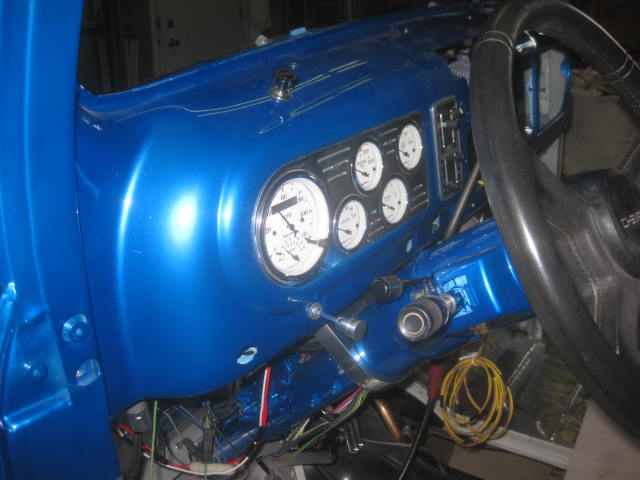
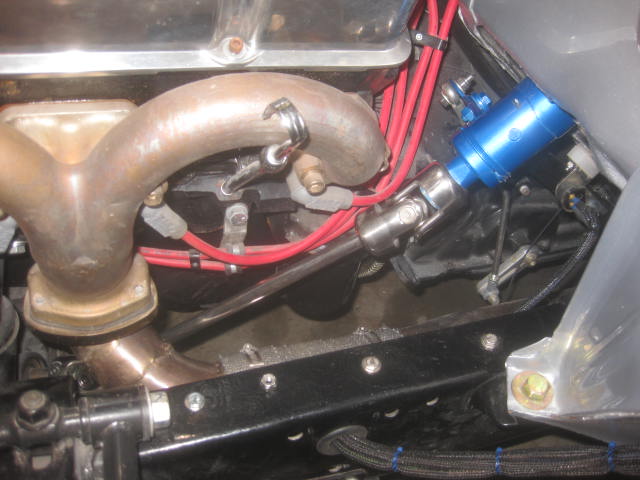
Yesterday was another hot one but decided that while the rear differential was apart, and much lighter, I would finish up the rear suspension. I reapplied the springs and mounted the rearend housing in place and marked where the shock mount bar was going. Then I flipped the frame over with the gantry crane (it's getting heavier) so the drilling of the holes would be easier. Got everything together including the rear sway bar. Thats when I found out I have the wrong bolts for the top shock mounts. Will get some to fit next week. The sway bar in the picture is still covered with bubble wrap as it is chromed.
I have one more cross piece to install yet and that is the transmission mount. I have to get a gutted 700R4 transmission case and an old small block Chevy engine to mock that in place. Then I think I will take it all apart and paint the frame.
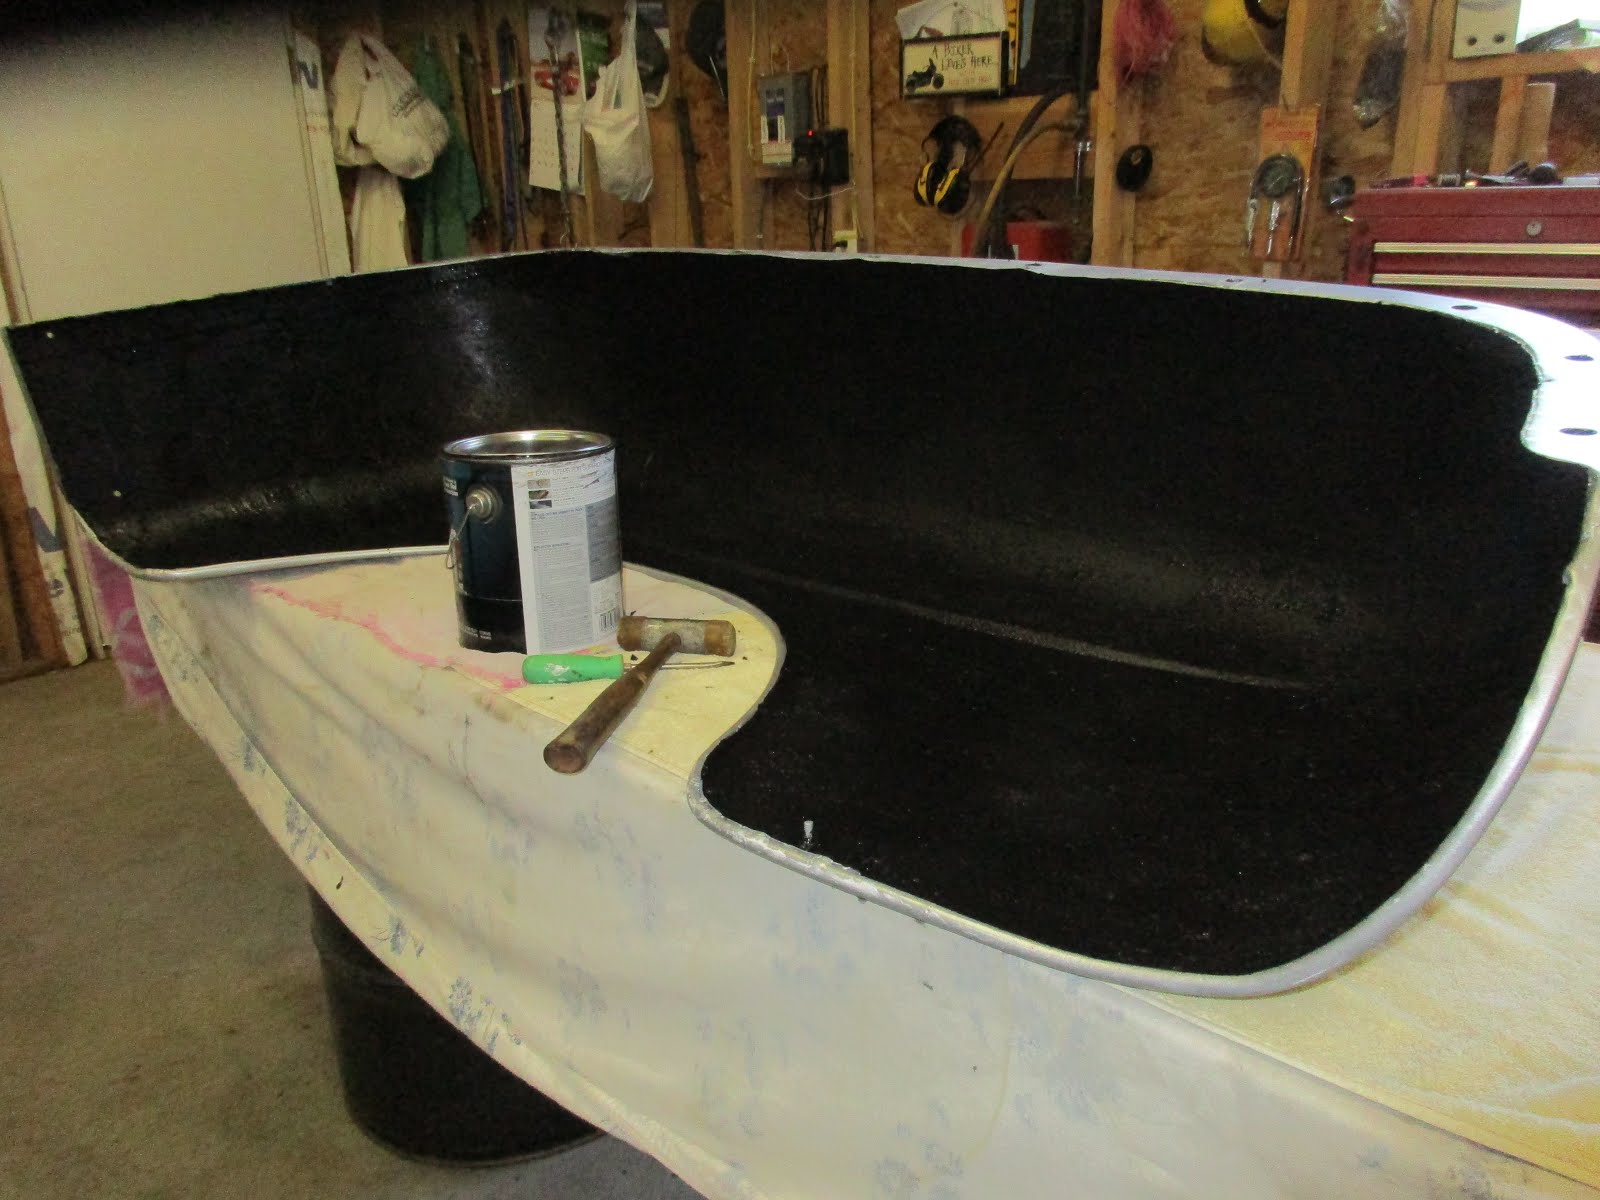
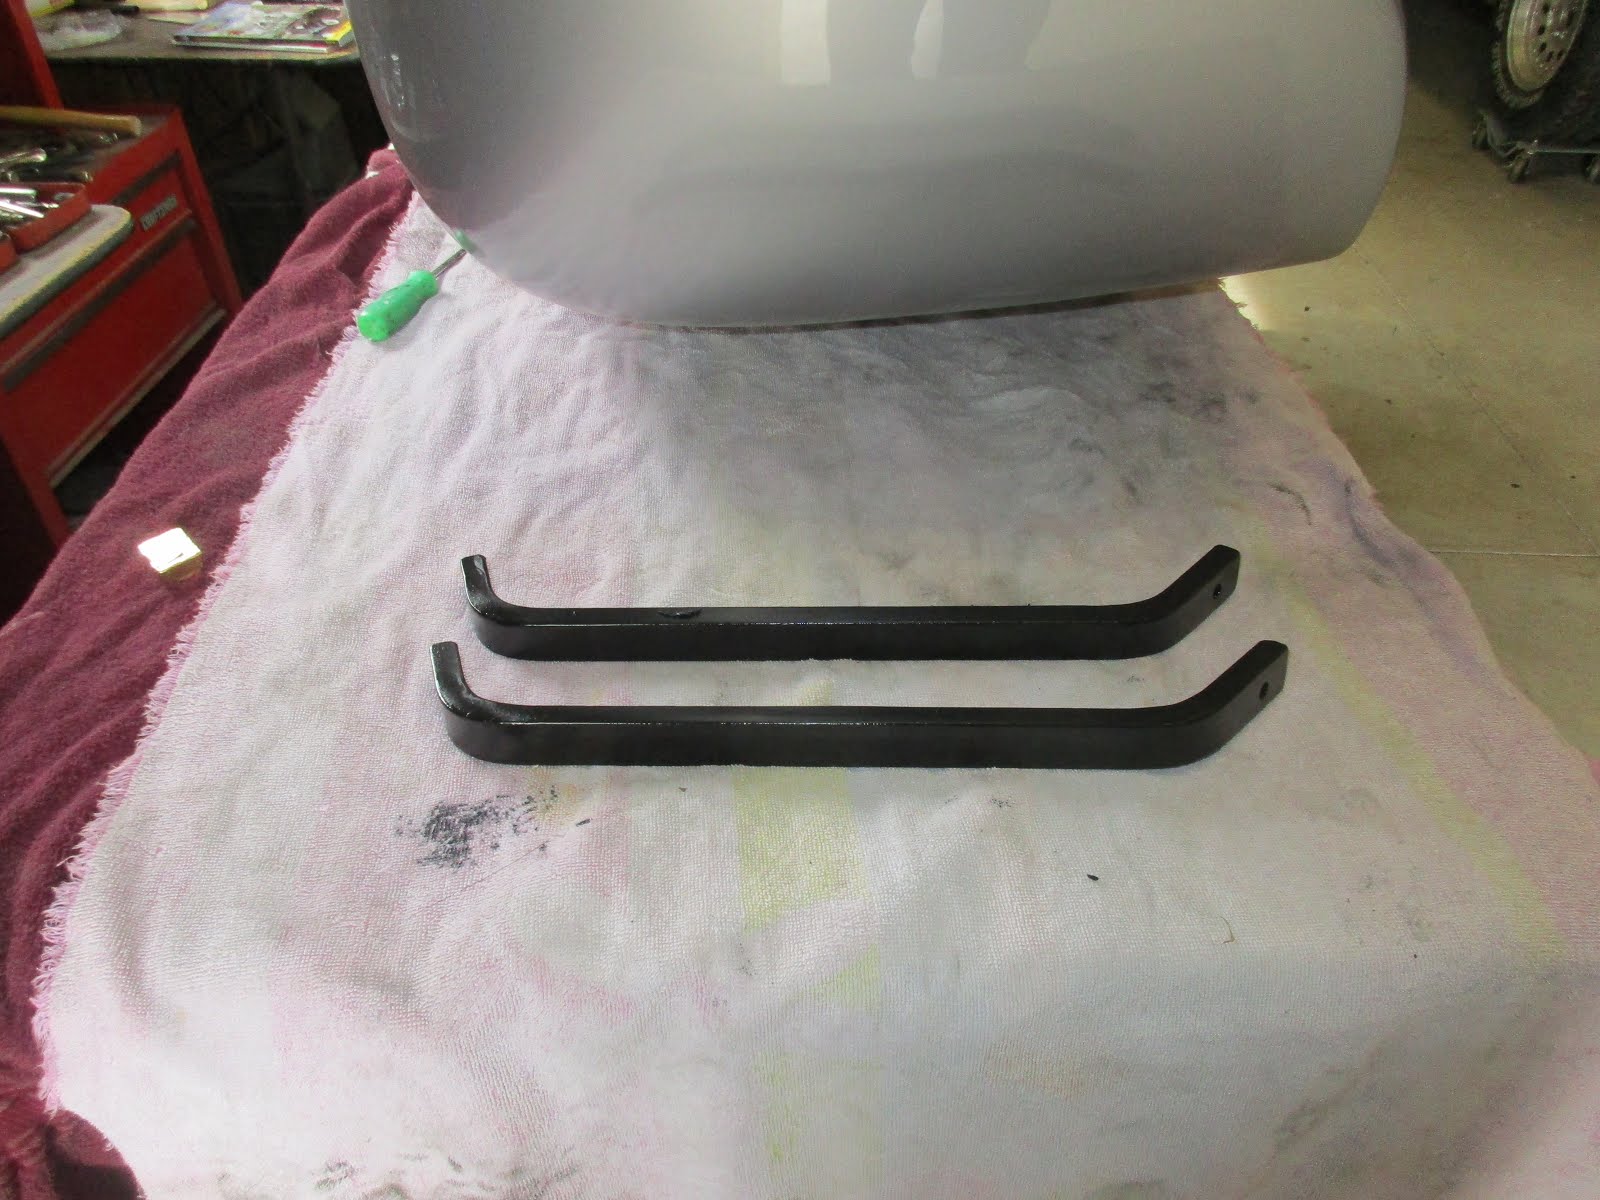
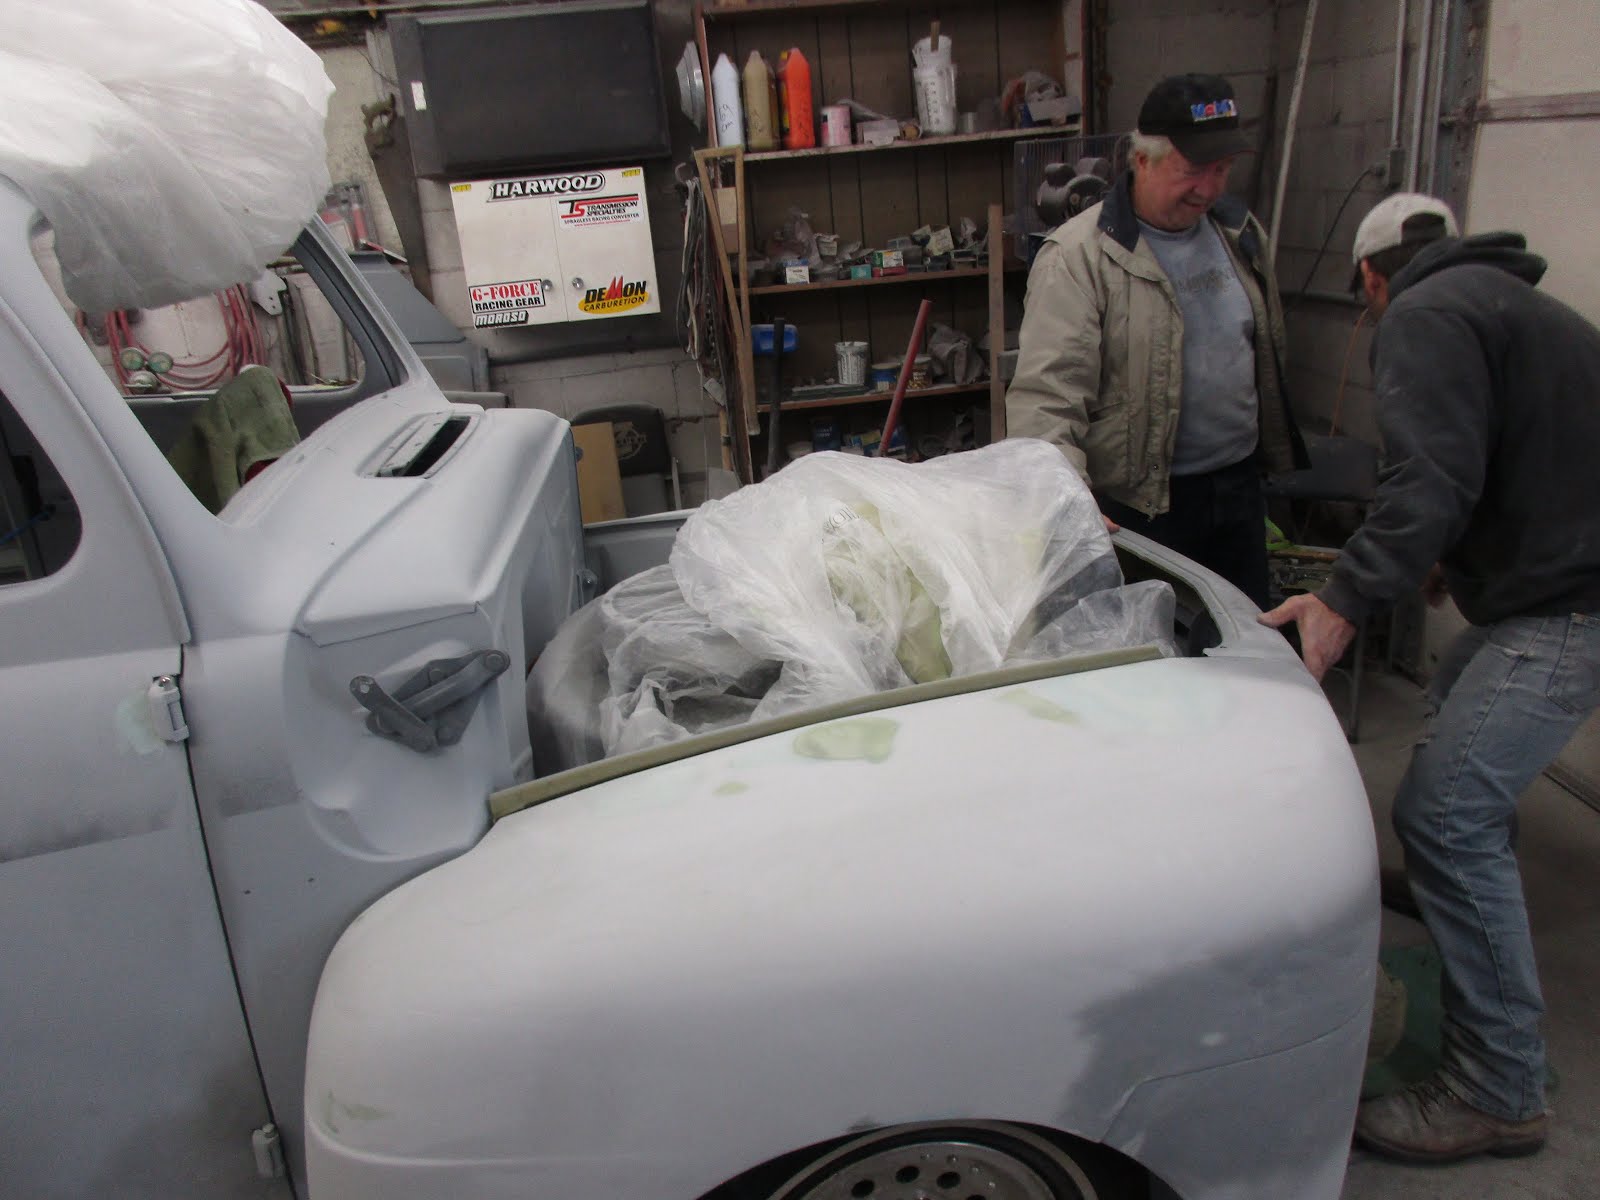
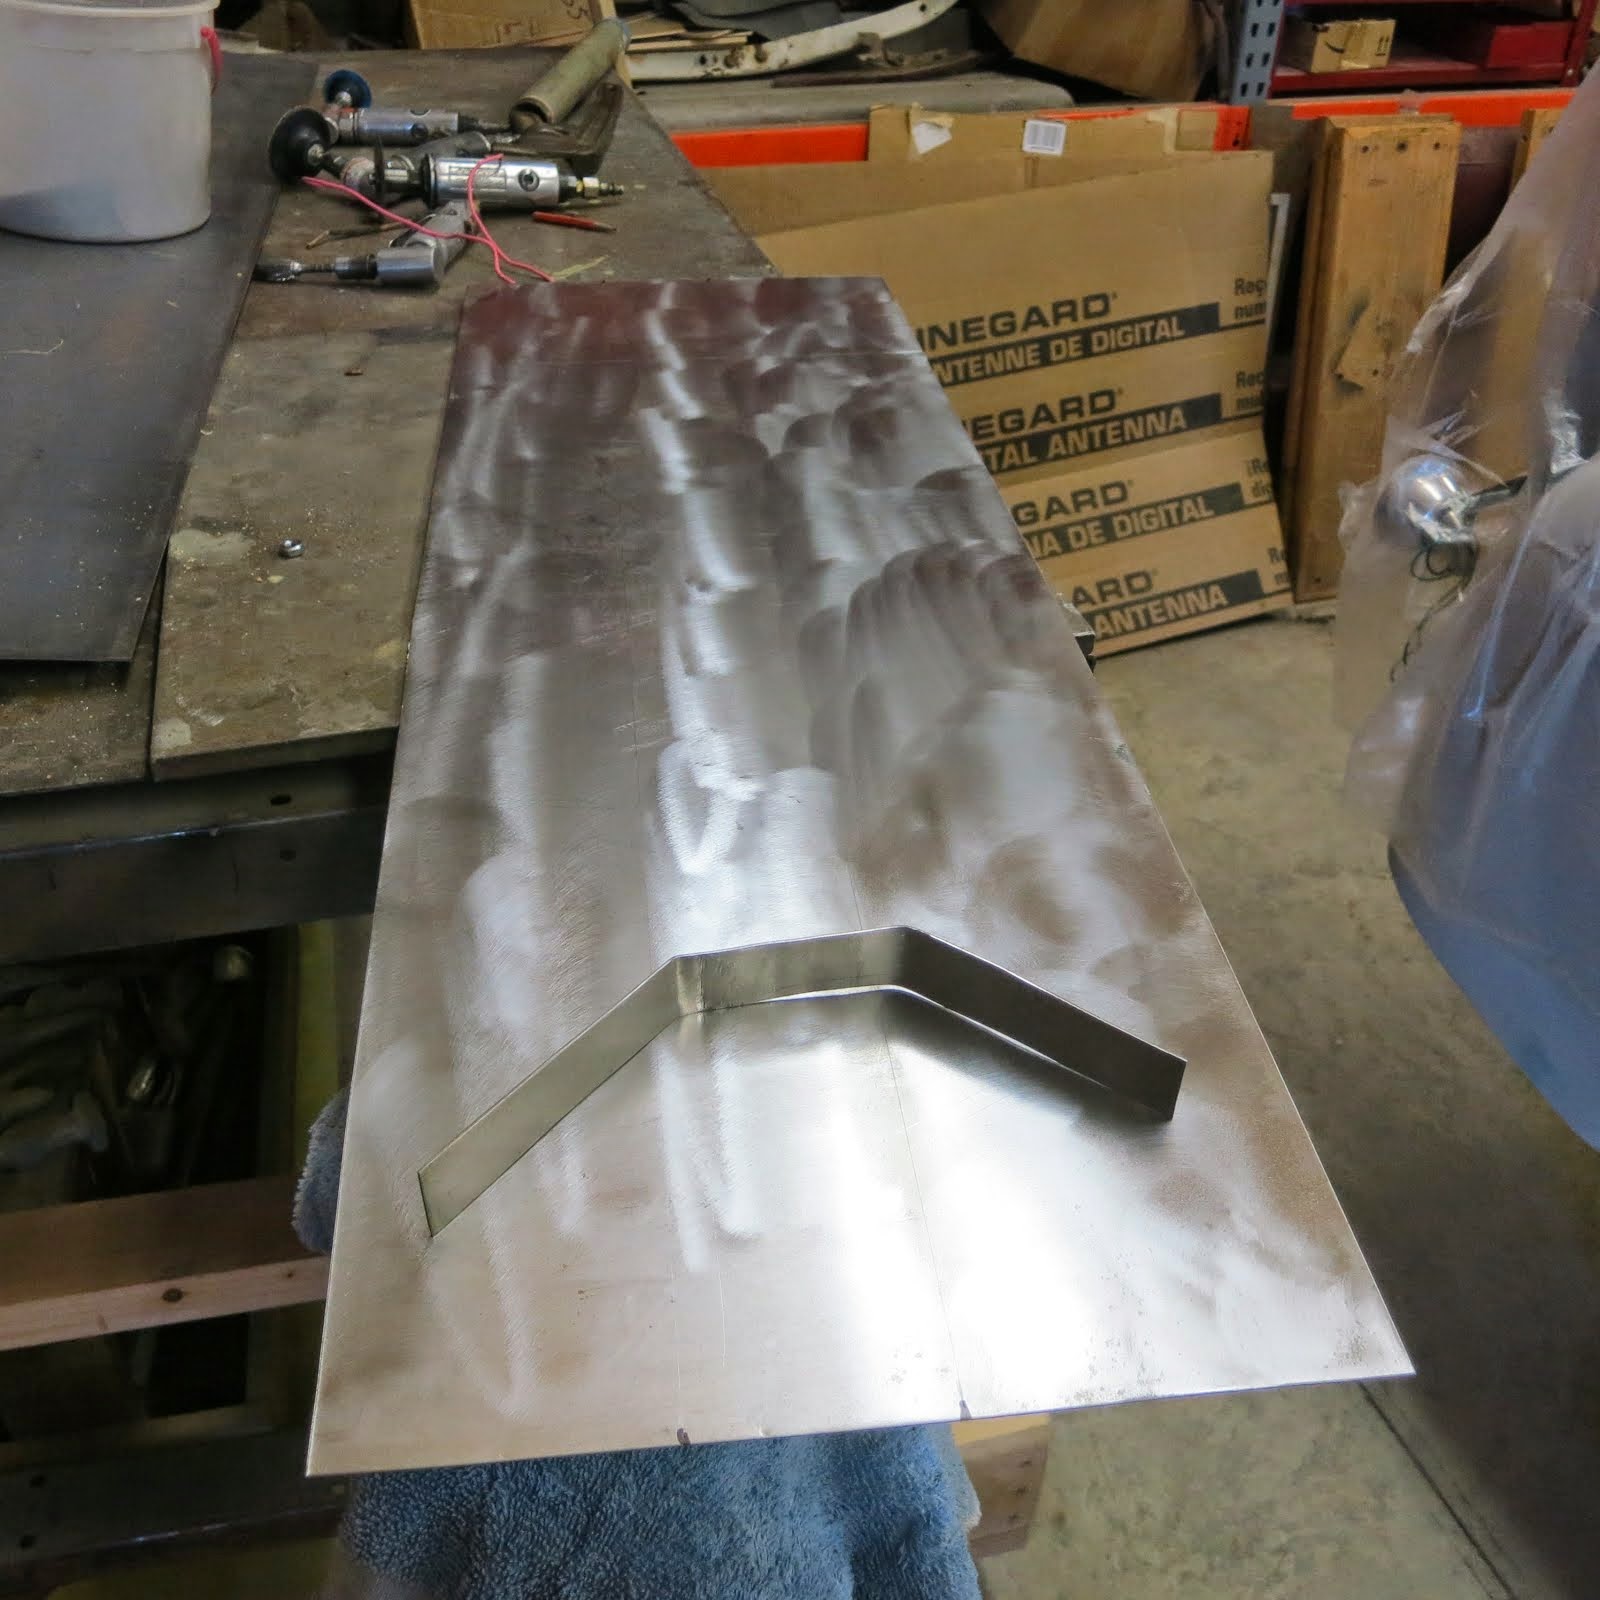
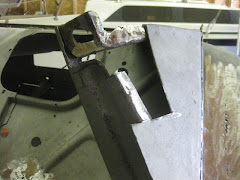
Also been working on one of the front fender mounting pieces that had one end partially rusted away. Welded it up and ground it down. Still more to do on it, but it's good practice for me.
Only have two weeks left before we leave for Europe for five weeks.
Sunday, August 22, 2010

Friday, August 20, 2010
New Drums
Mother of Pearl, new brake drums. Ordered them from NAPA yesterday and picked them up this morning. Checked the fit and then took them over to Lynn Perry for redrilling. Should have them back next week. Now I have to get all the innerds. All the shoes, cylinders, springs etc. to rebuild the backing plates. You just have to find the right place for the right stuff.
Thursday, August 19, 2010
Rear end housing blasted
Well, second set of brake drums came in yesterday and again the wrong ones. On a better note, Lynn Perry called me and he had the axles drilled and new bearings installed. Very nice job. He suggested that if I was going to sandblast the housing that the new seals should be put in after that. I picked all the stuff up from him and came home and blasted the housing. Then I washed it good with my power washer and blew it dry with compressed air. I let it set in the sun for a while to make sure it was dry and then shot it with some Eastwood chassis black primer. The housing is a bit pitted so will ask the experts if I could or should use some Evercoat filler to smooth out the surface before I finish painting it. I may have to remove the primer I just put on to do that but I need it now to finish mocking up the rear suspension.
Think I will work on the drums with a different parts dealer. We both have spent a lot of time trying to get the right ones. Maybe NAPA will become my new best friend.
Think I will work on the drums with a different parts dealer. We both have spent a lot of time trying to get the right ones. Maybe NAPA will become my new best friend.
Monday, August 16, 2010
Heat and Rain, Heat and Rain
A lot more heat and rain this last week, but since I think it's only my mom that reads this stuff, I procrastinated till today to add anything. I did some sandblasting of parts early in the week but could only go till noon. It was 97 degrees one day with a heat index of 110. I stayed out too long that day and haven't blasted since. Besides, got kids and grandkids here now.
I did order brake drums for the 9 inch rear end and they arrived Saturday. Wrong ones. Took them back this morning and should have new ones on Wednesday. This is the fun part of Hotrodding. The hunt.
I did order brake drums for the 9 inch rear end and they arrived Saturday. Wrong ones. Took them back this morning and should have new ones on Wednesday. This is the fun part of Hotrodding. The hunt.
Saturday, August 7, 2010
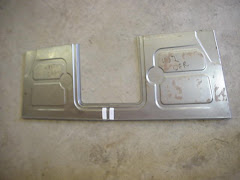
New Floor Pans
The new floor pans arrived yesterday. I researched the internet to find the best ones and found out that BOTP (Blue Oval Truck Parts) were in the ball park as all the other manufacturers, except they are made in the good old USA. I like that and they even engraved USA in the pan. It will be a while before I start installing them as I have to put the cab back on the frame and bolt it down so it doesn't get tweeked out of shape with the cutting and welding. Meanwhile. I cleaned up the pumpkin and it's ready to be reinstalled in the rear end housing when I get it back. Still searching for rear brake parts. Hope I don't have to go to disk brakes although thats not bad, just more expensive. Sandblasted four more parts this morning encluding the radiator mounting frame, front fender mounts and front gravel pan.
Monday, August 2, 2010
Waiting
While I'm waiting for the axles to be drilled and new bearings and seals installed, plus brake parts, I decided to order new floor pans for the truck cab. I did a little research on the Internet and found out most of the places selling the floor pan/pans get them from China. I took a chance on the forum stating the web site "Blue Oval truck Parts" was the best place to get them. The pan will come in two pieces but should be pressed here in the good old US of A. This will be my first attempt at repairing sheet metal on the truck. Street Rodder magazine says this is the best place for a novice like me to start metal repairs as it is all going to be covered up anyway. I like that way of putting it. Should be here by next week.
Friday, July 30, 2010
Searching for drums and shoes
Took the axles and housing to a local hotrodder and machinist that lives about 5 miles away from me. He will redrill the axles to the 5 on 4 1/2 pattern that matches the new front suspension. He will also press off the old bearings and install new ones. The housing will get new seals too.
Meanwhile I was directed to another hotrodder who works at Advanced Auto Parts in Burlington. He is chasing the new drums and brake shoes. Trying to find new 11 inch by 1 3/4 inch drums with the 5 on 4 1/2 pattern may prove to be a problem. May have to clean up the old ones and redrill them. Finding the 11 x 1 3/4 inch shoes should be less of a problem.
The Friday morning group of rodders that gather together is proving to be a vast amount of information for me. These guys have the knowledge and contacts. All you have to do is ask and someone knows something or somebody. Great bunch of guys too. If your a novice like me, and you've never done a project like this, joining a group will save you a lot of time. Plus you get to hear a lot of interesting stories and see a lot of beautiful cars and trucks.
Meanwhile I was directed to another hotrodder who works at Advanced Auto Parts in Burlington. He is chasing the new drums and brake shoes. Trying to find new 11 inch by 1 3/4 inch drums with the 5 on 4 1/2 pattern may prove to be a problem. May have to clean up the old ones and redrill them. Finding the 11 x 1 3/4 inch shoes should be less of a problem.
The Friday morning group of rodders that gather together is proving to be a vast amount of information for me. These guys have the knowledge and contacts. All you have to do is ask and someone knows something or somebody. Great bunch of guys too. If your a novice like me, and you've never done a project like this, joining a group will save you a lot of time. Plus you get to hear a lot of interesting stories and see a lot of beautiful cars and trucks.
Tuesday, July 27, 2010
Grinding off the perches and shock mounts
After pulling the rear end all apart, I used an air cutoff wheel to remove the shock mounts and spring perches. I then used my angle grinder to smooth out the welds, Later, I will weld new spring perches on the bottom of the housing at the appropreate spacing.
Today I will try to contact the guy that may redrill the axles for me. I have decided to have the old bearings pulled off and put new ones on with new seals. Best to do that now and know whats inside. Preventative maintenance is the name of the game.
Today I will try to contact the guy that may redrill the axles for me. I have decided to have the old bearings pulled off and put new ones on with new seals. Best to do that now and know whats inside. Preventative maintenance is the name of the game.
Sunday, July 25, 2010
The Rear End is apart
Took the rear end all apart today except the pumpkin. Found out I have a 37 tooth ring gear and 10 tooth pinion which makes this set up a 3.70 gear ratio. It has the 28 spline axles and small bearings which should be fine. This will be perfect for the Small block 350 engine and 700R4 overdrive transmission thats going into the truck. All the parts in the rear end look great and it even had oil in it. Will have to have the axle bolt pads redrilled for a 5 on 4 1/2 bolt pattern to match the new front suspension pattern. Also will put in new brake cylinders, brake shoes and drums to fit the new drilled bolt pattern. I now have to cut off the old shock mounts and spring perches. New perches will be welded on the bottom of the housing later when the pinion angle is set. This won't happen until the engine and transmission are mocked up and a new driveline is built. I will check with my experts, but except for drilling the new bolt pattern, I think I can reassemble this baby since I didn't disturb the pumkin. That takes an expert to set up if you take it all apart. I may need to replace the bearings, but they are sealed and look, sound and feel good. Someone with more knowledge than I will tell me. Will do it if needed.
I still can't believe I fell into this one. My luck usually doesn't run that way.
I still can't believe I fell into this one. My luck usually doesn't run that way.
Friday, July 23, 2010
Wheels and rear end
Well, I had a bit of luck this week. I found a set of older Ford Explorer wheels on craigslist that were somewhat close to the wheels I think I will eventually put on the F1. I bought them for two reasons. First as I said they look like the ones I want to put on and I thought this would be a chance to see what they would look like on the Ford. Second, I needed a set of rollers to move the frame around when it's done and they only cost 100 buck for the works. The tires are nothing to talk about, but will hold air. While talking to the guy I bought the wheels from, I told him I was looking for a 8.8 Ford rear end also. He said he had one if I wanted to look at it. We measured it and found it was too wide. Behind it was another one that was a 9 inch. He said it was going into a friends race car. I measured it and it looked like just the width I was looking for. I offered him 50 bucks more than the 150 his buddie was going to give him and he agreed. This was a total surprize. I had just about written off finding a 9 inch as they are very scarce now. I think his buddie isn't going to be too happy with him. Got to tear it apart and have the axles redrilled for a 5 x 4 1/2 inch pattern and go through the seals and bearings. Hope the ring and pinion gears are okay. I will find out.
Wednesday, July 21, 2010
Back to Blasting
Been busy doing "Stuff". Had family down with grandkids and then went North to help paint my daughters house and other stuff. Also been researching 9 inch and 8.8 inch rear ends for the F1. I'm finding the 9 inchers are tuff to find and expensive if you do. Thinking I will go for a 8.8 inch instead. Should be strong enough for this old girl even with the new horsepower. Also been learning about metal preperation and painting. I know thats a long way off yet, but Knowledge is knowledge.
Started blasting more panels (front inside fender wells) so I can hang some of the front clip back on for fitment of parts. Lot more blasting to do yet.
Started blasting more panels (front inside fender wells) so I can hang some of the front clip back on for fitment of parts. Lot more blasting to do yet.
Friday, July 2, 2010
Nirvana
This morning I was invited to a local Rodders group up in Burlington. These guys meet every Friday for a BS/info session or Rod Run. I thought this might be a time I could ask questions of experienced guys. WOW, NIRVANA. About twenty guys showed up and I think all are retired. Most are within about a ten year age difference (my group). All either have a car, or multiple cars, or working on a car. They welcomed me into the group and I set back and listened for a bit. One of the guys asked me if I was working on a project, so I explained the F1. One other guy in the group is also working on a 48 F1. Within a few short minutes I was asked if I wanted to sell the old engine and transmission out of the F1, one fellow offered the use of a Ford 9" rearend for Mock-up, An offer to use a Chevy 350 block and 700R4 transmission for mock-up. I was amazed at the talent that looked like was available in the group. Toward the end of the gathering they stated and they would like to do a Rod Run to my place some Friday to see what I am doing. A real nice bunch of guys with years of experience and information.
This project just gets better all the time.
This project just gets better all the time.
Monday, June 28, 2010
Just a swingin
This last week has been very, very wet, hot and humid here in Southeast Iowa. I thought for a while the State of Iowa was going to become the largest lake in the USA. The Skunk River, which is about 5 miles away, has been out of it's banks for almost a week. The port-a-potty located in the middle of the little camping park there has been floating in 2 feet of water until today.
Sooo, I reverted to my little wood shop inside the house that is airconditioned and have been making some swings for my grandkids. Got one more coat of Polyurethane to apply tonight and then back to the F1 tomorrow. Supposed to get sunshine and 80 degree weather for this next week. Maybe I can mow my lawn tomorrow if it dries out enough.
Sooo, I reverted to my little wood shop inside the house that is airconditioned and have been making some swings for my grandkids. Got one more coat of Polyurethane to apply tonight and then back to the F1 tomorrow. Supposed to get sunshine and 80 degree weather for this next week. Maybe I can mow my lawn tomorrow if it dries out enough.
Saturday, June 19, 2010
Front sway bar in
Today I struggled with the front sway bar and it shouldn't have been that hard. There are two outside mounting brackets that are drilled off center and supposed to go in one way on top of the rear stabilizer bars. After renameing the sway bar "The Bitch", I figured if I swapped the mounting brackets from side to side I would gain the half inch I was short. Mother of Pearl, it fell right together. Some times your the windshield and sometimes your the bug.
Also applied the brake caliper brackets and temporarily put the calipers on.
Still need to put the rotors on with the bearings and seals but will do that after everything is painted. Also need to figure out where the brake line brackets will weld to the frame and not be in the way of any swinging parts.
Also applied the brake caliper brackets and temporarily put the calipers on.
Still need to put the rotors on with the bearings and seals but will do that after everything is painted. Also need to figure out where the brake line brackets will weld to the frame and not be in the way of any swinging parts.
Tuesday, June 15, 2010
Workin the front end
Started this morning putting the front suspension and steering gear together.
First I put on the lower A frame and then attached the rear stablizer bars. Next the upper A frame and since I'm not putting the springs and shocks in yet, they give you a tee bar to use in their place to line everything up. I then added the rack and then the spindles. It's not all real tight yet but now I can locate the brake line hose holders and a couple of other parts to be welded on the frame. Still need to put the brake disc's and calipers on. Maybe tomorrow.
All the stuff I put on today came from Heidts Hotrod Shop
By the way, It's still raining.
First I put on the lower A frame and then attached the rear stablizer bars. Next the upper A frame and since I'm not putting the springs and shocks in yet, they give you a tee bar to use in their place to line everything up. I then added the rack and then the spindles. It's not all real tight yet but now I can locate the brake line hose holders and a couple of other parts to be welded on the frame. Still need to put the brake disc's and calipers on. Maybe tomorrow.
All the stuff I put on today came from Heidts Hotrod Shop
By the way, It's still raining.
Monday, June 14, 2010
Mustang/Pinto IFS going in
Time to start the front end.
I first clamped in the new lower crossmember locating it 15 & 13/16 inch back from the original front spring mount as instructions state. Had to grind off the rivited brake line holder to get the crossmember to fit. Flopped the frame and drilled 3/8" holes in the frame using four bolts on each side to attach the lower crossmember. Flopped the frame back over and positioned the coil spring pods over the frame and lined them up with the lower crossmember and drilled twelve 3/8" holes that hold each pod to the frame and crossmember. Looking pretty sturdy.
Next, I bolted the strut rod support brackes to the back of the lower crossmember and clamped the rear of the bracket to the frame. I flopped the frame again and drilled three 3/8" holes through the bracket and on through the frame. Tightened those bolts and flopped the frame right side up again and drilled the two 3/8" side mounting bolts to finish that application.
It was about 93 degrees out today with 90% humidity so I think I lost a couple of pounds today.
Tomorrow I will start installing the rack
I first clamped in the new lower crossmember locating it 15 & 13/16 inch back from the original front spring mount as instructions state. Had to grind off the rivited brake line holder to get the crossmember to fit. Flopped the frame and drilled 3/8" holes in the frame using four bolts on each side to attach the lower crossmember. Flopped the frame back over and positioned the coil spring pods over the frame and lined them up with the lower crossmember and drilled twelve 3/8" holes that hold each pod to the frame and crossmember. Looking pretty sturdy.
Next, I bolted the strut rod support brackes to the back of the lower crossmember and clamped the rear of the bracket to the frame. I flopped the frame again and drilled three 3/8" holes through the bracket and on through the frame. Tightened those bolts and flopped the frame right side up again and drilled the two 3/8" side mounting bolts to finish that application.
It was about 93 degrees out today with 90% humidity so I think I lost a couple of pounds today.
Tomorrow I will start installing the rack
Thursday, June 10, 2010
New CE widened Mustang IFS
Unboxed the Chassis Engineering widened Mustang/Pinto crossover parts to get an idea of what comes next. This will be a little harder than the rear suspension but the instructions look good. Sure glad I have the gantry crane to flip the frame as this is easier that trying to drill the holes laying on my back on the concrete. The frame is already heavier with the rear suspension on so I will take the leaf springs off and set them aside for now. Company coming so will tackle this next week.
Did you notice my work bench. It's two 55 gallon drums and a door. Works great.
Did you notice my work bench. It's two 55 gallon drums and a door. Works great.
Tuesday, June 8, 2010
New rear suspension
I decided that I would wait to primer the frame as the Afterblast looks like it will keep it from rusting for a while and I have to take everything apart again anyway
It felt good to start adding something back on the frame. I unboxed the Chassis Engineering AS-2020C complete Rear End Mounting kit and set it out to make sure I had all the right parts. Those guys don't mess up, it was all there. Went together pretty well with their instruction sheet.
I first flipped the frame over and ground down 4 rivet heads, as instructed, that were in the way and then drilled out the existing spring perch holes to 13/32. I then bolted the new perches on and drilled out 2 more mounting holes for each perch and tighted them up. Then I put the back shackles on loosely and put the spring packs on. Now I realize that I need a rearend to finish up the shock bar, bottom shock mounts and rear sway bar. Time to go shopping for that.
Next I will tackle the front IFS which will be a bit more complicated
I just want to say one more think about sandblasting. I was told it was a thankless, tedious, dirty, messy job. It is all that and more. I'm glad I did it, as now I know every millimeter of that frame. I would do one more for you if you asked me and would only charge you $25,000.
It felt good to start adding something back on the frame. I unboxed the Chassis Engineering AS-2020C complete Rear End Mounting kit and set it out to make sure I had all the right parts. Those guys don't mess up, it was all there. Went together pretty well with their instruction sheet.
I first flipped the frame over and ground down 4 rivet heads, as instructed, that were in the way and then drilled out the existing spring perch holes to 13/32. I then bolted the new perches on and drilled out 2 more mounting holes for each perch and tighted them up. Then I put the back shackles on loosely and put the spring packs on. Now I realize that I need a rearend to finish up the shock bar, bottom shock mounts and rear sway bar. Time to go shopping for that.
Next I will tackle the front IFS which will be a bit more complicated
I just want to say one more think about sandblasting. I was told it was a thankless, tedious, dirty, messy job. It is all that and more. I'm glad I did it, as now I know every millimeter of that frame. I would do one more for you if you asked me and would only charge you $25,000.
Sunday, June 6, 2010
After Blast
Today I went over all the frame with an Eastwood product called After Blast. It's a Phosphoric acid and water mixture with a zinc phosphoric coating to stop flash rust. I poured it from a gallon jug into a small spray bottle and had the frame upside down. I opened the garage and put on rubber gloves and eye protection. Do not do this in a confined space. I sprayed all I could get to and let it set for about 5 minutes and then wiped it down with and old towel. I then flipped it over with the crane and did the topside, again, letting it set for about 5 minutes and wiped it down. This turns the freshly blasted metal somewhat black, but that is the protection from flash rust. I will let it dry until tomorrow and then will apply some Eastwood stuff called Internal Frame Coating. This stuff converts, encapsolates and seals the rust that I couldn't get to with the sandblaster such as behind the cross frame plates and footboard hangers where they attach to the frame. A very small area. You get a spray can with a long spray tube to get into the tight spots. After that I will spray the frame with Eastwood Extreme Chassis Black Primer.
Saturday, June 5, 2010
Frame sandblasting is done
Well, been a busy week. Had a lot of company and sold my 28 Model A Sedan Delivery yesterday. It went to a nice fellow in Keokuk, about 30 miles south of here. Now I have a little stash to buy parts for the F1 project.
In between visitors I was able to do some sandblasting on the frame and finished it today. I then did some welding on a few spots that were thin or rusted through. The frame is in remarkable shape for it's age and not much welding was needed.
I got some products from Eastwood last week to first wipe down the frame with some stuff called PRE, and then I will spray it with a primer so I can start putting on the new front and rear suspension without the frame surface rusting . It will be nice to finally put some parts back on this old baby.
In between visitors I was able to do some sandblasting on the frame and finished it today. I then did some welding on a few spots that were thin or rusted through. The frame is in remarkable shape for it's age and not much welding was needed.
I got some products from Eastwood last week to first wipe down the frame with some stuff called PRE, and then I will spray it with a primer so I can start putting on the new front and rear suspension without the frame surface rusting . It will be nice to finally put some parts back on this old baby.
Saturday, May 29, 2010
My Pot Arrived
The 100 pound pressure sandblasting pot arrived from Eastwood yesterday and I put all the pieces together this morning. Looks like it's going to work okay. There are 3 sizes of nozzles that came with it so I will do some experimenting to see which gets the best results. I already found out this morning that the cheap blasting grit I have been using is to large for all but the biggest nozzle. That one looks like it will work. Maybe we will see more progress this week. It's warm enough out for shorts and now I have to put long pants back on.
Saturday, May 22, 2010
The rain is gone for a couple of days
The rain finally quit yesterday afternoon. Before bringing the frame back outside to do more sandblasting today, I decided to take Nancy for a ride on my BMW motorcycle. Had a great ride and breakfast at Laura's restaurant with No Job Johnny. After we got home Nancy helped me get the frame out and my little blast tent set up. I decided to do a little mowing of the yard before I got into it. I found about one quarter of the lawn is still so wet it can't be mowed yet.
Anyway got all set up and blasted about 4 feet of the bottom side of one frame rail and the sand quit coming. I had ordered some new tips from Sears on May 8th because I knew this one was wearing out. Well, it finally did. No new tips from Sears yet and the new pressure blaster from Eastwood isn't going to be shipped till the 26th. Called Sears to find out where the new nozzles were. Guess what, computer problems and had to be reordered and will be here the 26th maybe. Not all is lost, Nancy and I are getting our exercise lifting the frame up and down. I will work on small parts till some kind of blasting equipment shows up. Suppose to rain again on the 26th.
Anyway got all set up and blasted about 4 feet of the bottom side of one frame rail and the sand quit coming. I had ordered some new tips from Sears on May 8th because I knew this one was wearing out. Well, it finally did. No new tips from Sears yet and the new pressure blaster from Eastwood isn't going to be shipped till the 26th. Called Sears to find out where the new nozzles were. Guess what, computer problems and had to be reordered and will be here the 26th maybe. Not all is lost, Nancy and I are getting our exercise lifting the frame up and down. I will work on small parts till some kind of blasting equipment shows up. Suppose to rain again on the 26th.
Monday, May 17, 2010
Still Raining
Been raining for a week now. Hope for more sunshine starting tomorrow. Ordered a pressure sandblasting pot from Eastwood. The one that holds 100 pounds af blasting media. It's back ordered and won't be shipped til the 26th of May. Flipped the frame over with the chain hoist so I can blast the bottom. Hope to move it back outside tomorrow and continue with the sandblasting unit I have. Made another roll around cart for the truck bed last week. This allowed me to remove the bed from the little canoe trailer I had it setting on. Besides, Nancy wants to use the trailer. Bought her a new lawn mower for Mothers Day. When will I learn that flowers or some type of bling are a better gift than a mower. Hey, it's a pretty red color. I get to move back inside the house next week, Maybe.
Monday, May 10, 2010
Old Dogs are Home
Well, the old dogs pulled back into Wever Friday afternoon. We made it all the way to Erin Tennesee before no gas available ahead of us. The flooding in Tennesee closed roads and gas delivery was not available. Turning South was worse. Looked like the ride to the Dragon Tail in North Carolina was terminated. We decided to head back into Arkansas and ride "The Pig Tail Trail" South out of Eureka Springs. We did that and it was a blast. A rapidly wearing front tire on my bike directed us back North to Lebanon MO to the Ozark Harley shop. 2 hours later we were back on the blacktop headed home. Our last day in was the only day we had to ride in the rain and wind. All in all, we rode in 7 states and over 2300 miles. Was a little disappointing not being able to ride the Dragon, but we had as much fun as 3 old dogs could have anyway.
Got more sand for sandblasting the frame yesterday but looks like rain all week. Maybe Friday. Will putter on some other stuff til then.
Got more sand for sandblasting the frame yesterday but looks like rain all week. Maybe Friday. Will putter on some other stuff til then.
Tuesday, April 27, 2010
Blasting, Blasting, Blasting
Started blasting the frame. Set up a plastic tent with a plastic pipe frame. Put a couple of pieces of panel board down for the floor and to make it easier to collect the blown sand. Works pretty well. Found out I can buy blasting sand at Huffmans Farm and Home for $5.50 a bag. That is much better than the dollar a pound stuff at other places. Works good for the frame. I think it will be too course for the cab and fenders. Will have to see about soda blasting those. Anyway, it is tedious, dirty and sand goes everywhere. I bundled up with my welding jacket and filter mask, then the hood. The plastic lens in the hood doesn't last too long with all the sand bouncing off it. I cut 4 more spares out of some left over stuff I had in the shop. The blasting will take a few days to finish and our yearly motorcycle ride will be upon us starting this Saturday. Rubber Toes and Two Gallon will ride up here to Wever fron Topeka on friday and we leave for a 10 state ride through the Smokies this year. Heading to the "Tail of the Dragon" in Deals Gap, North Carolina. This means no work on the F1 for about 2 weeks.
Oh well, it's not like it's a race. Who has more fun than me?
Oh well, it's not like it's a race. Who has more fun than me?
Saturday, April 24, 2010
The Frame is Empty
Today I finished removing all the parts from the frame that will be coming off. I started by grinding off the heads of the rivets holding the rear spring pearches, and driving them out with a punch. Moved up to the transmission crossover mount and did the same thing, Had to do some tricky grinding on the rivets holding the front end and motor mounts. Got them all punched out and dropped out the front end. Those boys at the Ford Company back in 48 sure new how to put in a tight rivet.
This all brought me back to the Hillyard Diesel Shop, when I was a Sheetmetal Worker/Pipefitter, and knocked rivets off the panels on old Great Northern F units. Guess what, I'm still working on a F unit. Also remembered that even though I wear leather gloves to hold the punch, It seems like evey fifth strike with the hammer gets my left index finger top knuckle. The left hand is now slightly larger than the right one. This all goes away with a few beers.
Sandblasting the frame comes next and I still haven't quite got that figured out. I need to get the frame outside I think to keep the mess down in the garage. Still thinking about a portable floor for the blasting booth (maybe a piece of linoleum). Should start on that next week. When the frame is clean, I will start putting the new suspension on. It will be nice to work on clean stuff.
I wonder how many beers before this swelling goes down?
This all brought me back to the Hillyard Diesel Shop, when I was a Sheetmetal Worker/Pipefitter, and knocked rivets off the panels on old Great Northern F units. Guess what, I'm still working on a F unit. Also remembered that even though I wear leather gloves to hold the punch, It seems like evey fifth strike with the hammer gets my left index finger top knuckle. The left hand is now slightly larger than the right one. This all goes away with a few beers.
Sandblasting the frame comes next and I still haven't quite got that figured out. I need to get the frame outside I think to keep the mess down in the garage. Still thinking about a portable floor for the blasting booth (maybe a piece of linoleum). Should start on that next week. When the frame is clean, I will start putting the new suspension on. It will be nice to work on clean stuff.
I wonder how many beers before this swelling goes down?
Tuesday, April 20, 2010
Portable Blasting Booth
As you can see by the pictures, I set up a very primitive Blasting booth. Although it does work, I figured out a smaller one will fulfill most of my needs. I cut the plastic pipe in half to 5 feet long and this will give me a 5 foot by 5 foot square 7 feet high. This should capture the media in a smaller area. I now need to come up with a better floor. I will do some research at Menards and Lowe's.
I did a small welding job on a hitch for a friend today and then sandblasted it and painted it. All those skills worked, but need enhancement. I hope Bob's trailer doesn't leave his hitch somewhere along the highway.
The hunt for knowledge is exciting and learning what you don't know is, well, what can I say. Should have done this 40 years ago.
I did a small welding job on a hitch for a friend today and then sandblasted it and painted it. All those skills worked, but need enhancement. I hope Bob's trailer doesn't leave his hitch somewhere along the highway.
The hunt for knowledge is exciting and learning what you don't know is, well, what can I say. Should have done this 40 years ago.
Thursday, April 15, 2010
Sandblasting is a blast
Well, time to try out the sandblasting. I first hooked up the little cheap hand hopper I got from Harbor Freight and it worked, but not very well. I then hooked up the roll around siphon rig my son-in-law John loaned me. I had renewed the siphon hose, as it was deteriorated, with a new longer one and things didn't work at all. Found out if I shortened the hose and lowered the pressure it worked pretty well. With all the research I did on blasting, they are right. This is a messy job. You also need serious protective gear. It also goes through blasting media like Montazuma's revenge. Sooo, need to find a place to buy media cheaper and build a portable enclosure to blast in and be able to reclaim the media. I'm not detoured by this as I learned some patience while woodworking. It is kinda neat to watch all the rust and paint desolve right before your eyes. As you can see, I am easily entertained.
Friday, April 9, 2010
Compressor air piping in
Went to town today for the pipe and fittings to finish up the lines from the air compressor. Got it all piped and except for cleaning up my mess and putting a few more clamps on, I think it's finished. Doing a leak down test as we speak. Looks good so far. Didn't even fall off a ladder today. That's a plus in itself.
Should be able to try some sandblasting soon.
That old front suspension is staring at me and wondering when it will get it's freedom.
Should be able to try some sandblasting soon.
That old front suspension is staring at me and wondering when it will get it's freedom.
Wednesday, April 7, 2010
Inside work
It was raining again all day today, so thought I would tackle removing the rearend. This one didn't come out easy. Had to use a cheater bar on a breaker bar to get the nuts to break loose. After a bunch of penetrating oil was poured on and a lot of grunting, they popped loose. Anyway, got the rearend out and only smashed one thumb. I think It's all comin back to me now.
Next I think I will pull the rear springs and spring purches. They are riveted on the frame, so will grind off the heads and punch or drill out the rivets. I have to be careful with this part as the new rear suspension will use these same holes.
Anybody reading this stuff???
Next I think I will pull the rear springs and spring purches. They are riveted on the frame, so will grind off the heads and punch or drill out the rivets. I have to be careful with this part as the new rear suspension will use these same holes.
Anybody reading this stuff???
Tuesday, April 6, 2010
Engine and tranny are out
Finished wiring the Big Ass compressor this morning and cranked it up. Sounds great and pumped up to 175 pounds. This baby ought to blow the drawers of anything. Now I have to pipe it and install an in line dryer to take the moisture out of the air. This is a USA made compressor and it sure shows.
Next I pulled the driveline out of the F1 and got all the rest of the motor and transmission bolts out and unhooked the clutch linkage. Hooked the web straps around them both and rolled the gantry crane over and hooked up the chain hoist. Nancy came out and helped me work it up out of the frame. Tried to set it down on the cart I had made for it and had to pull it back up and do some modifications to the cart. My jigsaw fixed that and then set it back in place on the stand. I'll roll it over in the corner some where out of the way till I figure out what to do with it.
The rear end will be the next thing to come out and then the rear suspension which is all rivited in. A lot of grinding and drilling to do there.
The frame is sure starting to look bare.
Next I pulled the driveline out of the F1 and got all the rest of the motor and transmission bolts out and unhooked the clutch linkage. Hooked the web straps around them both and rolled the gantry crane over and hooked up the chain hoist. Nancy came out and helped me work it up out of the frame. Tried to set it down on the cart I had made for it and had to pull it back up and do some modifications to the cart. My jigsaw fixed that and then set it back in place on the stand. I'll roll it over in the corner some where out of the way till I figure out what to do with it.
The rear end will be the next thing to come out and then the rear suspension which is all rivited in. A lot of grinding and drilling to do there.
The frame is sure starting to look bare.
Monday, April 5, 2010
Christmas in April
Has been a good day today. Picked up Dave Aldershof this morning and headed to West Branch Iowa to get the new suspension kit. I posted a couple of pictures of Dave and his 39 Chevy and 32 Roadster for you to admire.
On arrival at Chassis Engineering we were greated by Jim, The owner who takes the money, and Denny and George who helped me with ordering parts. They had everything boxed and ready to go. Very nice people to deal with.
Before loading up. we went Through the shop to the back building where Roy Lewis, the retired original owner, was working on his 32 foot long duel diesel engine land speed record vehicle. Roy holds the single diesel engine LSR at Bonneville at a hair over 306 MPH. He is the driver of the car and is slightly older than I am. He is in the process of adding a second engine and will try to break the duel engine record this year set by Andy Greene at 317 MPH. Greene has gone 350 in his car but not a record attempt.
The picture of the 1916 Harley is Roy's round tuit job. He give's me insperation.
Brought all the parts home and unloaded them in the Garage and went to get Nancy to show her the Mothers Day present I got for her.
Going to pull the engine and Transmission next.
On arrival at Chassis Engineering we were greated by Jim, The owner who takes the money, and Denny and George who helped me with ordering parts. They had everything boxed and ready to go. Very nice people to deal with.
Before loading up. we went Through the shop to the back building where Roy Lewis, the retired original owner, was working on his 32 foot long duel diesel engine land speed record vehicle. Roy holds the single diesel engine LSR at Bonneville at a hair over 306 MPH. He is the driver of the car and is slightly older than I am. He is in the process of adding a second engine and will try to break the duel engine record this year set by Andy Greene at 317 MPH. Greene has gone 350 in his car but not a record attempt.
The picture of the 1916 Harley is Roy's round tuit job. He give's me insperation.
Brought all the parts home and unloaded them in the Garage and went to get Nancy to show her the Mothers Day present I got for her.
Going to pull the engine and Transmission next.
Friday, April 2, 2010
Big Blue is here
Big blue (the compressor) got delivered today. Now I have to set it in place and wire it. Should be ready to do some sandblasting soon. Got to get the engine and transmission out next. My new front and rear suspension kit is ready up in West Branch and Dave Aldershof will go up with me Monday to haul it all home. It will set for a while til I get all the old front and rear suspension off. Then I will sandblast the frame. Then the long process of putting things back together begins. I've been told, that's the hard part.
Tuesday, March 30, 2010
New Gantry Crane
Looks like Nancy has added some music to the Blog.
Yesterday I went to Davenport,Iowa to pick up a new 1 ton Gantry Crane, I figured it would be kind of hard to get 4 fat guys with strong backs together each time I needed a lift on the truck, so I opted to go this direction. Besides, the crane doesn't drink beer.
No Job Johnny came down this morning and I had all parts off the trailer and out of the crate. The whole thing weighs about 600 pounds. Bob helped me put it all together and also brought me a pulley system to use with it. Had it all together in a couple of hours and I thought that would be it. Bob said "I want to see that cab come off", so we set the crane over the truck and lifted the cab off. Worked great. Next I will use it to pull the engine and transmission.
Marian, My neighbor across the street came over and I told her she could help pull the engine and transmission.
I got the crane first, so I can lift the new compressor off the trailer (loaned by Dean Long) That i'm going to get next week. Lot's more to do before I get started with the sandblasting.
I ordered the new front IFS suspension and rear suspension from Chassis Engineering in West Branch Iowa last week. Should be hearing from them soon to come pick that up.
Nice to have good weather again and back on this project.
Tomorrow i'm gonna ride my Harley.
Boogie til ya Puke.
Yesterday I went to Davenport,Iowa to pick up a new 1 ton Gantry Crane, I figured it would be kind of hard to get 4 fat guys with strong backs together each time I needed a lift on the truck, so I opted to go this direction. Besides, the crane doesn't drink beer.
No Job Johnny came down this morning and I had all parts off the trailer and out of the crate. The whole thing weighs about 600 pounds. Bob helped me put it all together and also brought me a pulley system to use with it. Had it all together in a couple of hours and I thought that would be it. Bob said "I want to see that cab come off", so we set the crane over the truck and lifted the cab off. Worked great. Next I will use it to pull the engine and transmission.
Marian, My neighbor across the street came over and I told her she could help pull the engine and transmission.
I got the crane first, so I can lift the new compressor off the trailer (loaned by Dean Long) That i'm going to get next week. Lot's more to do before I get started with the sandblasting.
I ordered the new front IFS suspension and rear suspension from Chassis Engineering in West Branch Iowa last week. Should be hearing from them soon to come pick that up.
Nice to have good weather again and back on this project.
Tomorrow i'm gonna ride my Harley.
Boogie til ya Puke.
Friday, March 26, 2010
Engine stand
Well, got the engine stand done today and will be pulling the engine and transmission soon. I also finally brought the Miller 211 MIG welder from my wood shop to the toy barn. Still haven't tried it yet but the wiring is ready and will do that soon also.
Wednesday, March 24, 2010
Finally Back
Well, I'm still alive. Back is okay now and had to go back to Washington State for family business. Got back Late Sunday night. As an update, I bought a Miller 211 automatic mig welder in Febuary. Haven't had time to try it out yet but finished wiring the plug for it in the garage today. Going to buy the big ass compressor for sandblasting and other chores within the next two weeks. It will be a 5 horse Quincy. USA made just down the river from me. Just to let you know what direction I am going with the F1, It will get a new IFS front suspension and new rear suspension from Chassis Engineering located in West Branch Iowa. It is an all bolt in kit made specifically for the F!. I got a great deal from great folks at Chassis Engineering with the help of 2 guys here in burlington that went with me two weeks ago to do the preliminary ordering. Thanks to Dave Aldershof who has delt with them before and Bob Ertzinger I got a great deal. Also got to meet Roy Lewis, the founder of Chassis Engineering back in the early 60's, and now retired from the business but working his dream. He holds the single diesel engine powered land speed record at Bonneville at just over 306 MPH. He drives the car and I think is older than me. He is adding a second diesel engine with two turbo's for each engine to see if he can break the two engine record at 317 MPH. What an interesting guy. I will final order the stuff from Chassis Engineering probably within the next two weeks. Got to get all this done before Nancy gets back from Washington and finds out what i'm doing. I am going to start building the cart to hold the engine and transmission tomorrow so I can get it pulled out. I will add more pictures when Nancy gets home with the camera. More later.
Wednesday, February 10, 2010
Still alive but hurtin!
Need to get an update in here so you don't think I died. Sent Nancy off to Mexico this morning. Had a big blizzard yesterday with about 8" of snow. Put her on a train to Chicago. Big snow there too so hope the plane gets out. Meanwhile, I tweeked my back layin some tile in the basement area and have been laying low. I did get uptown to buy a new Mig welder a couple of weeks ago for the project. It's a Miller 211 autoweld. Good advice from David Bitting. Nice machine and I will put a picture on when I'm able. Next aquisition will be the Quincy compressor,(probably next month.) I'm itching to get going on this project but right now I have to go put the ice pack back on. Be aware, as Arnold said, "I'll be back"
Tuesday, January 19, 2010
Back Again
Well, been gone for 6 weeks out to Washington State. Time to get this thing going again. Did a lot of internet research while out West.
Some decisions:
Going to put in a new IFS front end from Chassis Engineering Inc. Located in West Branch, Iowa, about 120 miles north of here. Also going to use their rear suspension package with front and rear sway bars and transmission mount.
The next items will be a small block Chevy engine and 700r4 transmission with a Ford 9" or Ford 8.8" rearend up grade. This combo should let me drive at freeway speeds in comfort. Should also have disc brakes front and rear
Decided to buy a nice big Quincy compressor so I can do all my own sandblasting. Got a sandblaster from my son-in-law John to try out on blasting the frame.
Still have to pull the old six banger and transmission out yet and the front and rear end. All the sheetmetal is off but I still have to set the cab off the frame.
Also need a mig welder to tie things together.
Then a torch set up to round out the big tool expenderatures
But first, Nancy found some tile she likes and will tile the lower computer room area. Uhg, more time on the Lewinski's
Going to check on the Mig welder this week. Thinking of a Miller 180.
More to come, Im still alive. Want to drive it before I die.
Some decisions:
Going to put in a new IFS front end from Chassis Engineering Inc. Located in West Branch, Iowa, about 120 miles north of here. Also going to use their rear suspension package with front and rear sway bars and transmission mount.
The next items will be a small block Chevy engine and 700r4 transmission with a Ford 9" or Ford 8.8" rearend up grade. This combo should let me drive at freeway speeds in comfort. Should also have disc brakes front and rear
Decided to buy a nice big Quincy compressor so I can do all my own sandblasting. Got a sandblaster from my son-in-law John to try out on blasting the frame.
Still have to pull the old six banger and transmission out yet and the front and rear end. All the sheetmetal is off but I still have to set the cab off the frame.
Also need a mig welder to tie things together.
Then a torch set up to round out the big tool expenderatures
But first, Nancy found some tile she likes and will tile the lower computer room area. Uhg, more time on the Lewinski's
Going to check on the Mig welder this week. Thinking of a Miller 180.
More to come, Im still alive. Want to drive it before I die.
Wednesday, November 25, 2009
240 Wiring is in.
Just finished the wiring job. Got the trench filled in just before the rain started. According to my test meter, I now have 250 volts in The TOY BOX. Now I have to wait and see if the jolly old fat man will bring me a big ass compressor to suck up that juice.
Tuesday, November 24, 2009
Wiring for 220 volts
Well, I've been doing a lot of soul searching on this project. Found out my soul was blank, so had to use some other souls to help me. I decided I would like to try to do all the sandblasting myself. That being the case, I need to wire the TOY BOX for 220 voltage so I can run a big ass compressor and get a good mig welder. After figuring all that out, Nancy and I went to Indianapolis to visit my sister and her daughter and family. I left there 4 pounds heavier. Those girls can sure cook.
Back to the F1. Bought all the material to wire the TOY BOX yesterday. Planned to get it all wired including digging a trench for the wire between the garages done today. I got both boxes mounted in the garages and some of the wire strung, but didn't get the trench dug yet. Will do that tomorrow.
Back to the F1. Bought all the material to wire the TOY BOX yesterday. Planned to get it all wired including digging a trench for the wire between the garages done today. I got both boxes mounted in the garages and some of the wire strung, but didn't get the trench dug yet. Will do that tomorrow.
Tuesday, November 17, 2009
Found a tap today at FASTENAL but the kid there never heard of a tap extractor. Will have to buy one from the internet. Raining and cold today. Doing research on the internet on Compressors, 220 volt wiring, Welders, Sandblasters and Oxy/Acet torches. Lets hope time and money don't run out before this project is done. I will always have money for beer though, cause Nancy gets a raise in January. (:
Saturday, November 14, 2009
Drillin and Tappin
Went back to working on the cab yesterday. Started drilling and tapping the door hinge plates. We had to drill the heads off 6 of the 12 screws holding the doors on. The top six just had to be cleaned out with a tap. The bottom 6 had to be drilled out and retapped. Broke the tap on the next to last one. Got to get an extractor to get it out. Got the heater out and controls. Glove box door and box liner. Ash tray and holder out. Defroster hoses and deflectors out. Will work on the left side of the dash next that holds the gauges, ignition, Starter button. The air intake flap and parking brake handle also need to come out. A little bit each day.
Tuesday, November 10, 2009
Knuckle Busting
Well, got my second badge of courage today. Smashed my left thumb while trying to chisel a bolt off. I guess that's why they call it knuckle busting. Finished the cart to put the cab on so I can roll it around the shop. Went to work on the front clip and with the help of my thumb, I got most of it apart except a little of the grill area. Have to figure out how to lift the cab and set it on the cart. Will probably use some 2X6's for bracing and a chain jack. Contemplating that in my head now. Then have to build some kind of roller cart for the engine and transmission next.
Friday, November 6, 2009
Monday, November 2, 2009
Well six days have gone by and a lot of progress. Rubber Toes Droz showed up on Monday afternoon and I was working on getting the brake hubs off. He changed clothes and said "Lets do it" Got all the drums off except the right front. Looks like it needs a brake job. We tackled the running boards next and had to grind all the heads off the bolts. This grinder is turning out to be the right tool. We got the boards off and cleaned up some of the mess and Toes was grumbling about my organizational skills as he was trying to find tools to work with. By the next day, he had all the wrenches categorized and organized. Even I didn't have trouble finding things. The next morning No Job Johnny showed up for breakfast and then we started working on the front clip. That came off altogether and I will separate those parts later.
Bob left and we decided to take a break and do a little motorcycle riding. Toes took my old BMW and I took Chubby the Wonder Hog and off we went to pick up a golf club my son-in-law Quinn left at Gibson Woods golf course in Monmouth during the Hog Snout Tour. It was about 53 degrees and the wind was gusting up to 30/35 miles and hour. We had bundled up but after riding the 118 miles round trip we were ready for a cuppa hot tea.
Bob left and we decided to take a break and do a little motorcycle riding. Toes took my old BMW and I took Chubby the Wonder Hog and off we went to pick up a golf club my son-in-law Quinn left at Gibson Woods golf course in Monmouth during the Hog Snout Tour. It was about 53 degrees and the wind was gusting up to 30/35 miles and hour. We had bundled up but after riding the 118 miles round trip we were ready for a cuppa hot tea.
Wednesday, November 4, 2009
Wednesday we started working on the cab doors. Big problem here, as the screws did not want to come out. We ended up going to town and got an impact driver which was made in Taiwan and proceeded to break after about 5 good whacks. Toes drilled out the screws that wouldn't loosen. Got both doors off. On the trip to town for the impact driver we stopped and talked to a couple of rod builders that Roger knew and WOW, did I get an education. These guys are pro's and their work is outstanding. It was well worth our time to meet and make some new sources of information.
Thursday, November 5, 2009
Thursday we started on the cab and the steering column and box. The steering box was a bugger to get loose. All the rest of the bolts to the cab had to be ground off. The cab was loose late that evening and we slid it back on the frame about 6 inches. I now have to figure out how to set it off. It is too heavy for us two to handle. Sooo, without Rogers help I would still be standing beside her with a puzzled look on my face. Amazing what two or three guys can accomplish in a short time with a grinder and a 5 pound maul. I still can't believe Toes drove all the way here from Topeka to get dirty and scrape a few knuckles. He also brought some of his famous BBQ pork with him. Both Bob and Roger have been a big inspiration so far on this project. Unfortunately, Toes left this morning, and wouldn't let me talk him into living here for the next couple of years. He said I need to work on those organizational skills first.
I'm learning as I go and it continues to be great fun. Roger said something about "the fear of the unknown" but I just keep putting one foot in front of the other and sometimes the left shoe is on both feet.
Boogie til ya Puke.
Coot
I'm learning as I go and it continues to be great fun. Roger said something about "the fear of the unknown" but I just keep putting one foot in front of the other and sometimes the left shoe is on both feet.
Boogie til ya Puke.
Coot
Sunday, November 1, 2009
Bring Beer
To those that have danced with tequila in their boots, Well, since I have slowed down on golf and woodworking, I decided to try something different. I have always, or at least for a few years, wanted to put together an old vehicle of some sort. First it was a 32 Ford roadster highboy on my wish list. Then the thought of maybe a late forties early fifties Chevy pickup. Changed my mind again to a 48 Ford F1 pickup ( that is Nancy's birthday year but I can't reveal how old she is ) and started looking. Found one over in Lincoln Nebraska in late September owned by a very nice lady named Stehpanie, and brought it home. Now, bear in mind I have no special tools to do this project. but as Colonel Sanders stated when he was 70 years old, "I hate chicken, but I needed a job". Sooo, he is my inspiration. (A chicken plucker for inspiration, Hummmm).Well, i'm into it now, and Nancy thought, since i'm not doing the Hog Snout stuff anymore that some of you might be interested in watching this project come apart and hopefully back together. I realize this is not golf and this type of thing may not flip your skirt up, so if your not interested, I understand. Watching cockroaches die isn't my bag either, although I don't mind stepping on them. Delete this if you don't give a rip, or, you can go to Nancy's newly constructed Blog Spot Called: www.norms48ford.blogspot.com and see how much inspiration the chicken plucker has given me. This is going to be a long project and i'm almost 69 years old now, so I have to get busy. I don't plan on working on it every day, but if you visit the site every once in a while, you hopefully will see some progress. This is my first endeavor of this kind, so I welcome all comments whether it be constructive or criticism or constructive criticism . I have already found out the F1 is the teacher and I am the Apprentice. I don't know much about Blog Spots, but in this case, you have to start reading from the bottom and go back to the top. Strange, but what does an old plummer know? Any and All help will be appreciated. Bring beer. I will Boogie til I puke.
I am
NOTSONORMO
I am
NOTSONORMO
October 30, 2009 - The Fenders Come Off

 Got the box and rear bumper off today and put it on my little trailer. The box wasn't as heavy as I thought it would be but I know it will take 4 people to put it back on. It needs some repairs but will get it sand blasted first.(some time in the future.).I'm rethinking the 6 volt system. Had trouble getting it started again today but as it warms up it runs fine. I think the 12 volt system will be the way to go. A lot of guys ahead of me have done it for a reason and I guess, why reinvent the wheel. Frame looks pretty good but the bolts are sure a bugger to get out. Have ground the heads off most of them.Hope the pix down load faster this time.
 Coot
October 30, 2009 -- 12 volt versus 6 Volt
Well. today was a good day. Started out trying to get the engine running better. Wasn't going to well so decided to start taking off some parts. I don't have a torch, so decided to use my angle grinder to grind off the heads of the rusty bolts holding the bed and fenders on. Cut off 8 half inch bolt heads holding the main bed down. Cut off a bunch of smaller heads holding the two rear fenders on. Wasn't too bad, just took a while. Both rear fenders off but the bed is still attached. This was good progress so thought I should give the engine another try. Found the Distributor was off one more cog. Got it running and adjusted the distribtor so it was purring like a loud kitten. Opened the garage door (see, i'm getting smarter) and ran it for about 15 minutes. Warmed up good and found I do have to get the radiator repaired. Leaks in two spots near the top. Also found the oil sending unit is leaking so will need to renew that. All dash gauges seem to work. Got about 50 lbs of oil pressure and didn't seem to smoke much. Starts right up now with a push of the start button. I had been thinking I would change it to a 12 Volt system but, 6 volts seem to be working fine now.
Coot
Coot
MOTHER of PEARL !

10/27 Well, I stayed out of the garage yesterday and attended to other chores, but today it was back at the fuel pump. Had to take some guards off and used a 1/4 inch drive socket set to get the nuts off. Tite place. Anyway got it off and washed up the outside. Took the glass sediment bowl off and found a tar like liquid inside. The gasket for the bowl broke so knew I would have to get or make another. Was pumping the shaft arm and heard a pop. Thought I might have blown the diaphragm so took that apart. More rusty goo. The diaphragm looked like it may have some cracks and will need replacing eventually. Decided to go to town and see if Farm King had a gasket or/and a carb kit. No luck there. was going to go to Auto-Zone and saw Huffman's coming up so though, hummm, I wonder. Guess what. They had the gasket but no fuel pump or carb kit. Went on home and put the fuel pump back together. I thought I might as well try it cause I can't get a kit today anyway. Turned the gas shut off valve on the tank back open and put the fuel line to the carb in a plastic container to see if the pump was pumping. Hit the starter button and no fuel in the sediment bowl. Put some gas in the carb and hit the start button again. Ran for a few seconds and checked the bowl again. Looked like it was half full, MOTHER OF PEARL, could this be happening? Put more gas in carb. Ran another 5 seconds and bowl was full now. More gas in carb. This time gas shot into the plastic container. WAHOO, Removed the container and hooked the fuel line up to the carb. Grabbed the gas linkage and hit the start button. HAH, that bugger fired up and started running. It ran as long as I slowly fed the gas with the linkage. It ran for about 3 or 4 minutes when I realizes the garage door was shut and I thought I better shut it off and open the door so this won't be my last time doing this. I could not have been happier. Went to get Nancy (for proof) and she came out and I did it again. This time I slowed the feed down and guess what? It idled. Again MOTHER OF PEARL. Nancy snapped a couple of pictures as I was grinning. I shut it off and she said "is it always going to be that lowd?" I told her there was no exhaust system on it yet. I have lot of tweaking to do yet and I also think the radiator has a leak at the top but the Phoenix is starting to rise out of the ashes. Yes I have grease on my face and yes I have grease on my forearms and hands and fingernails, but who gives a big rats ass.
I'm Happy.
Coot
Subscribe to:
Posts (Atom)