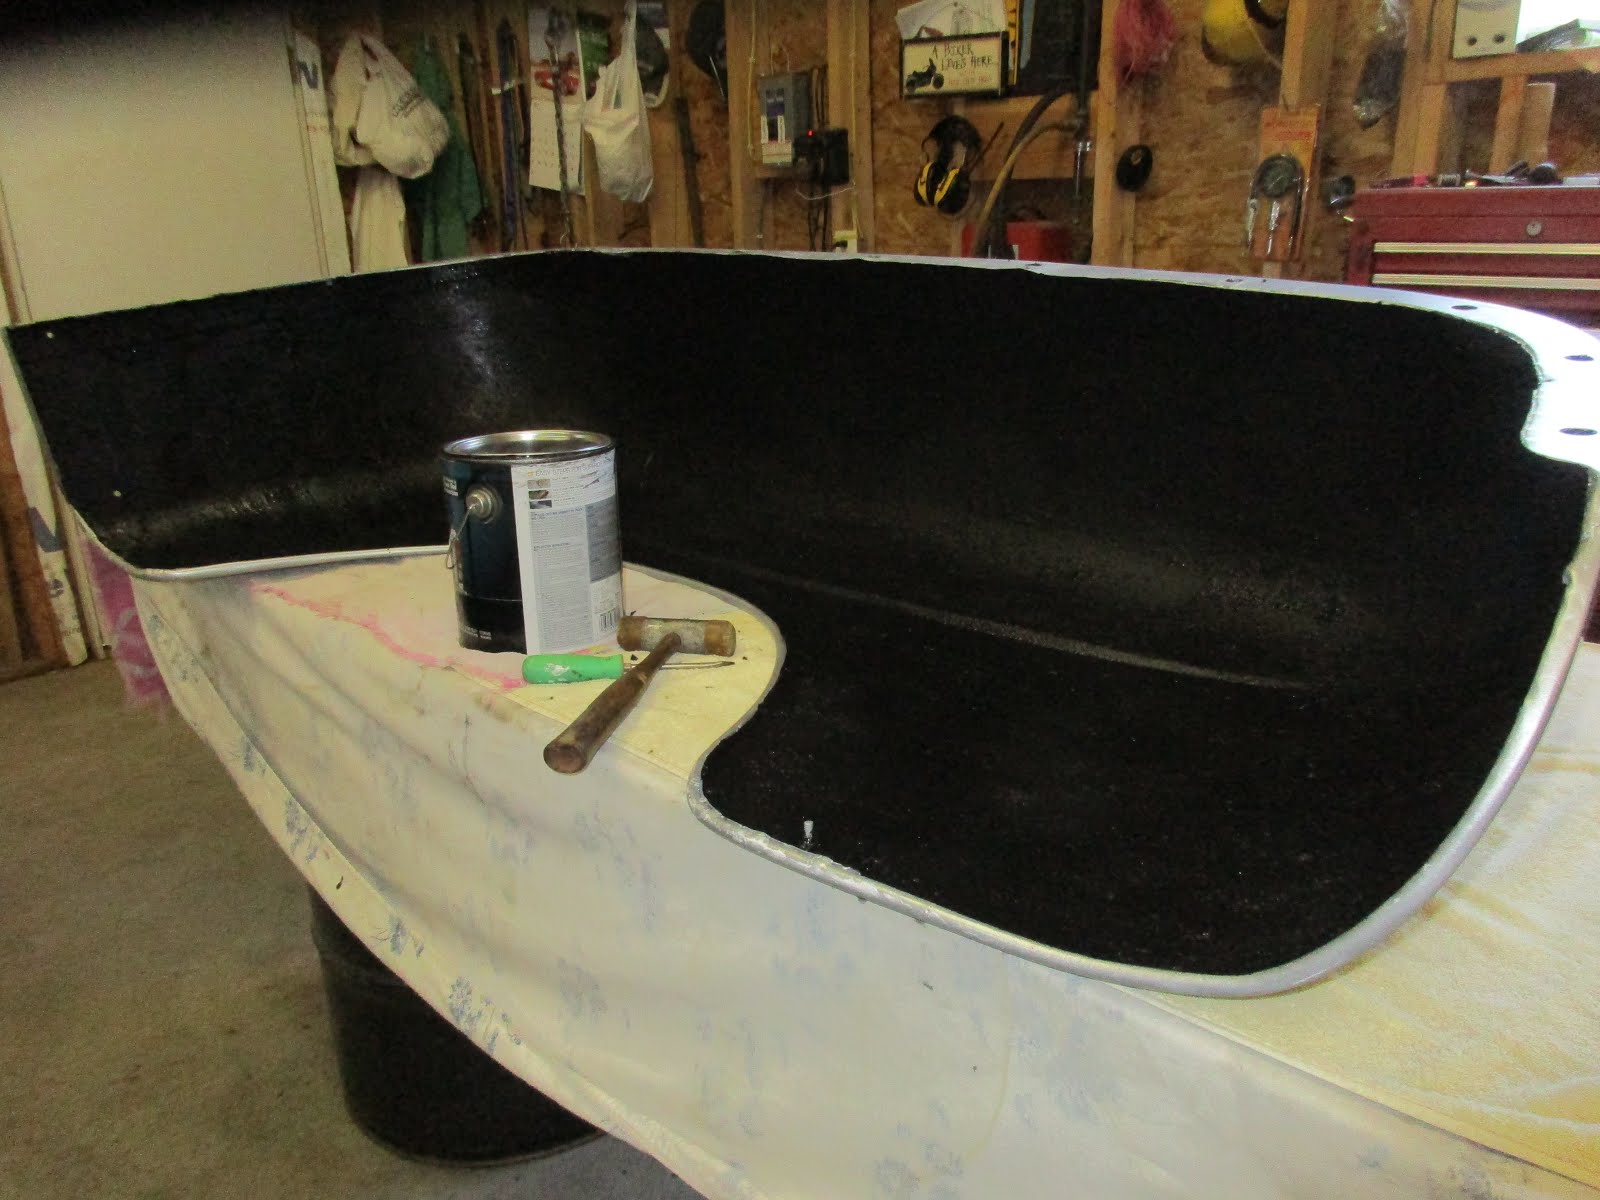
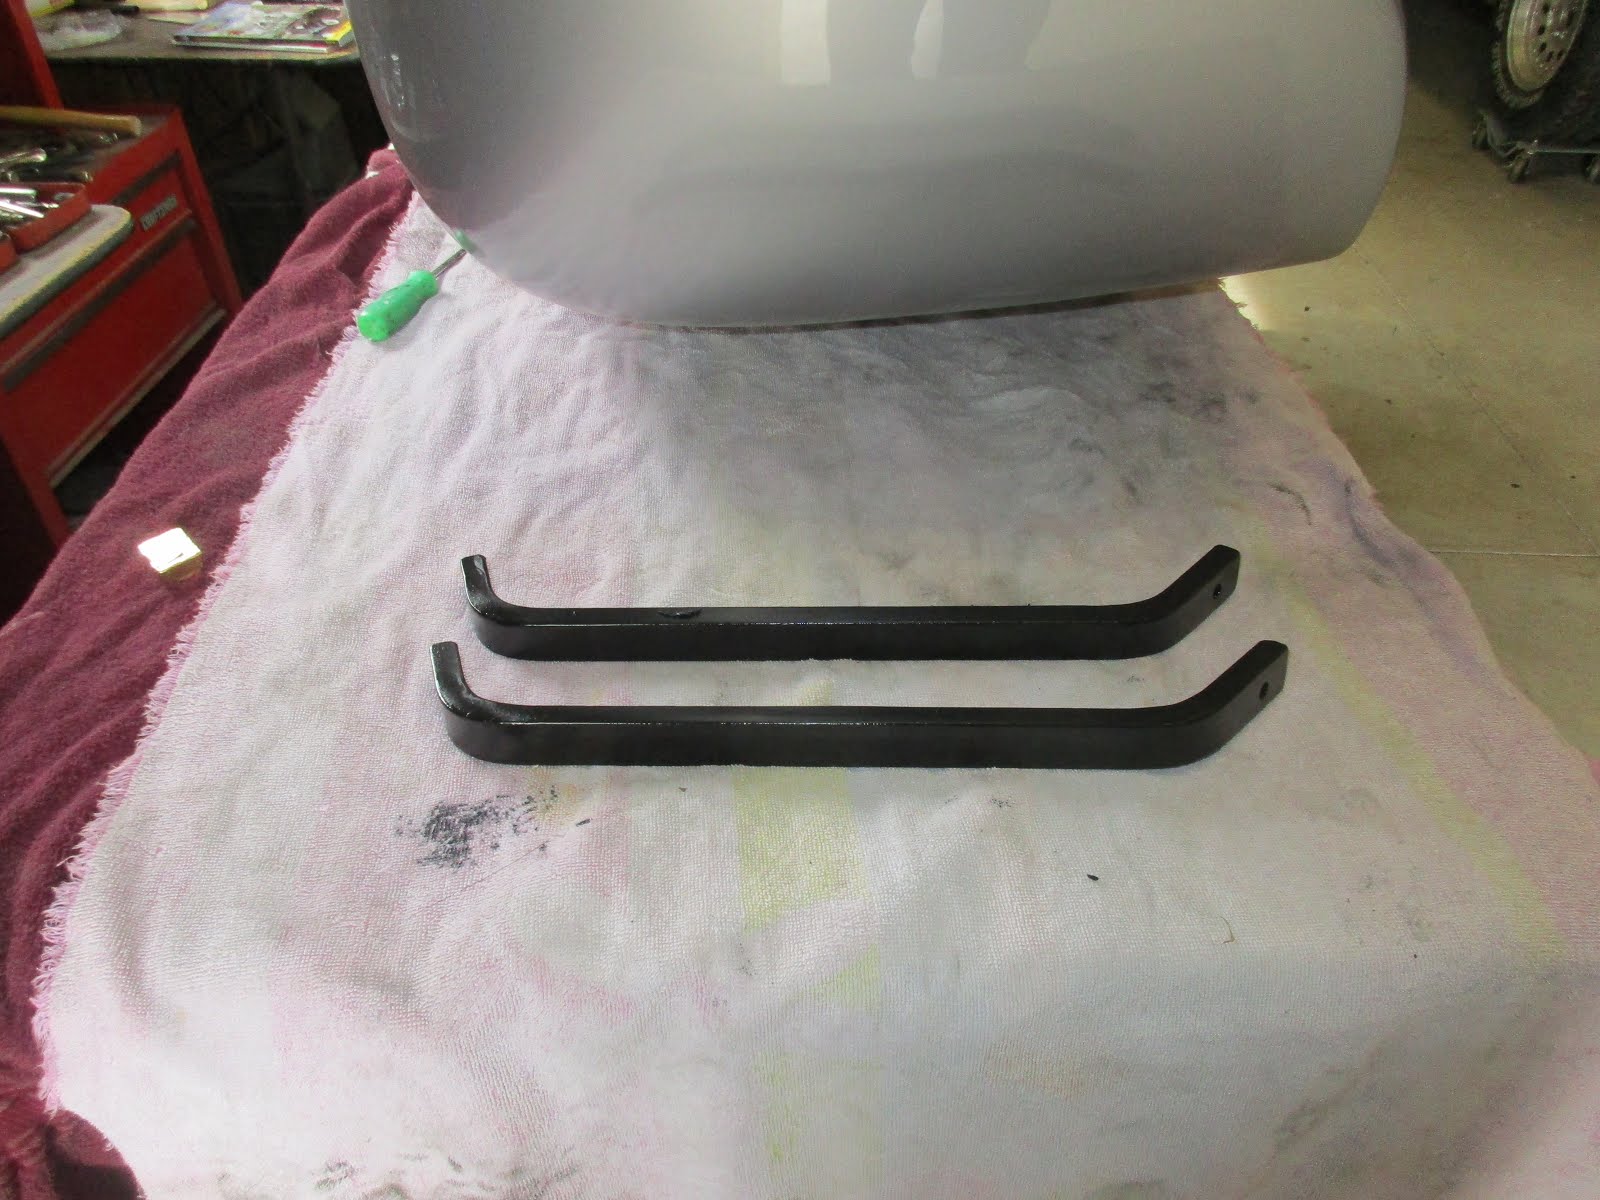
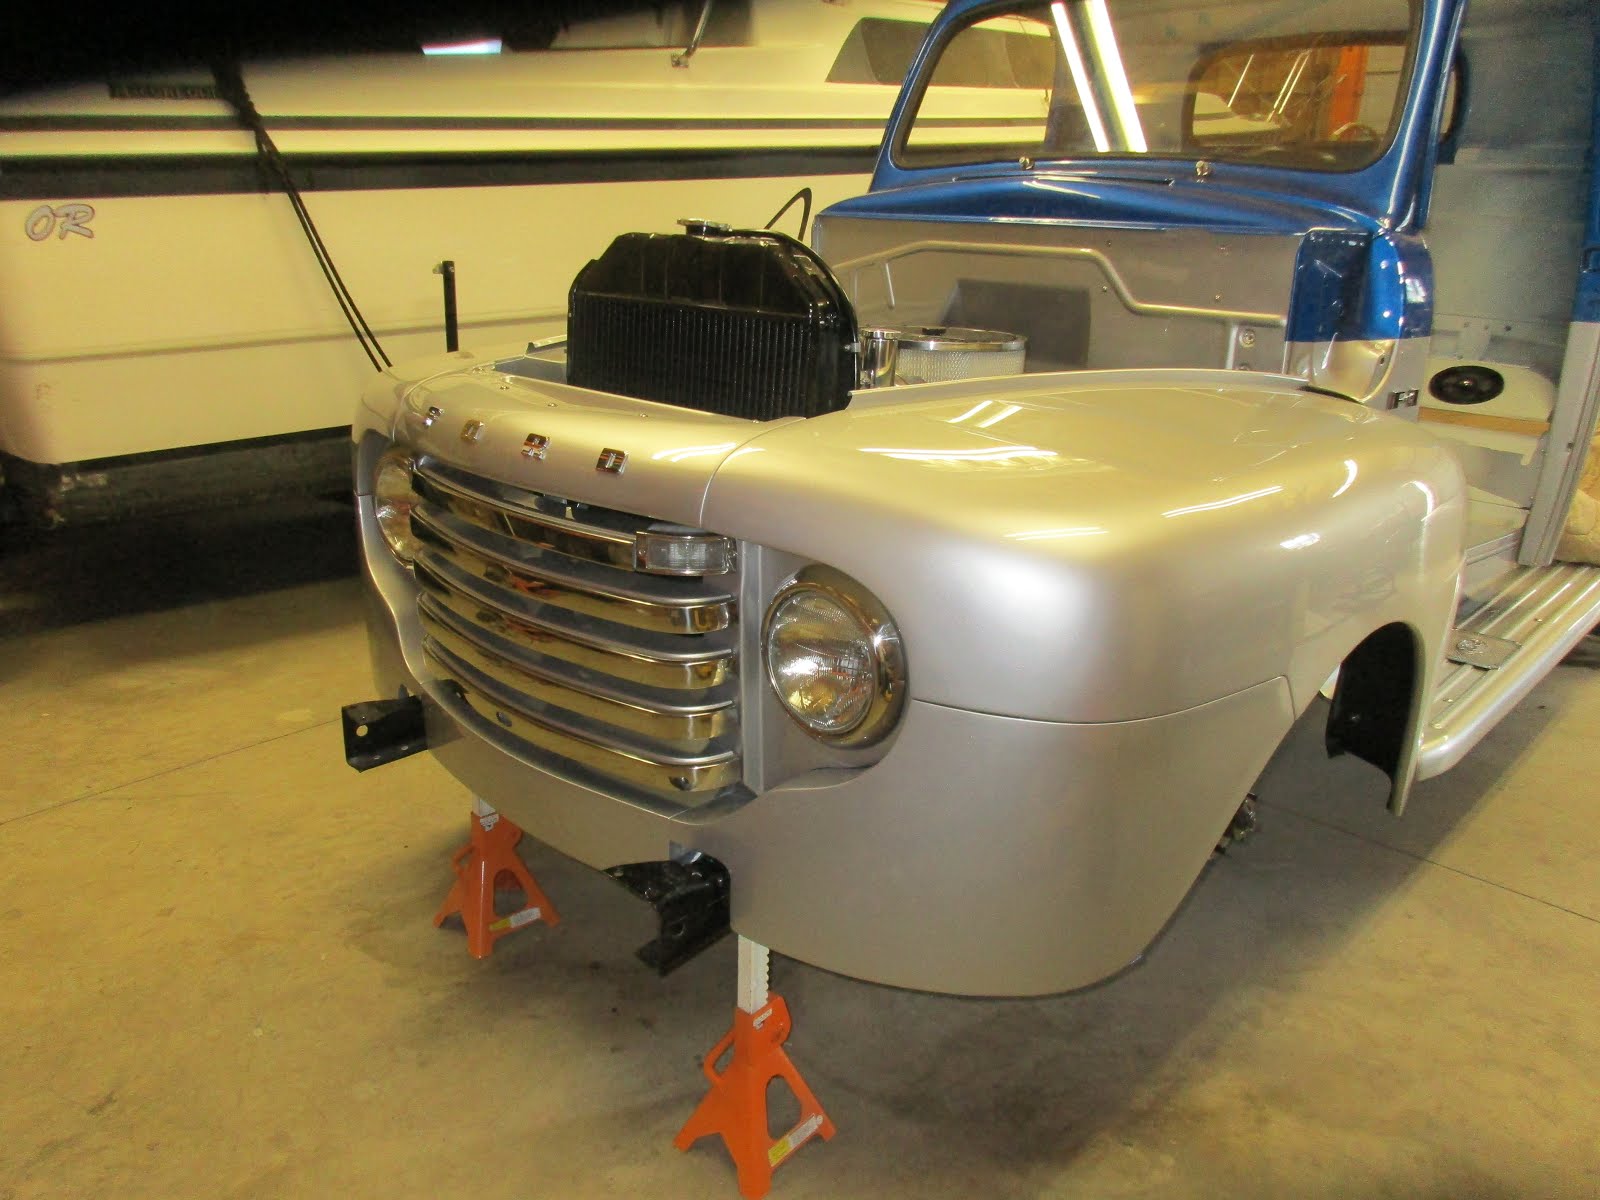
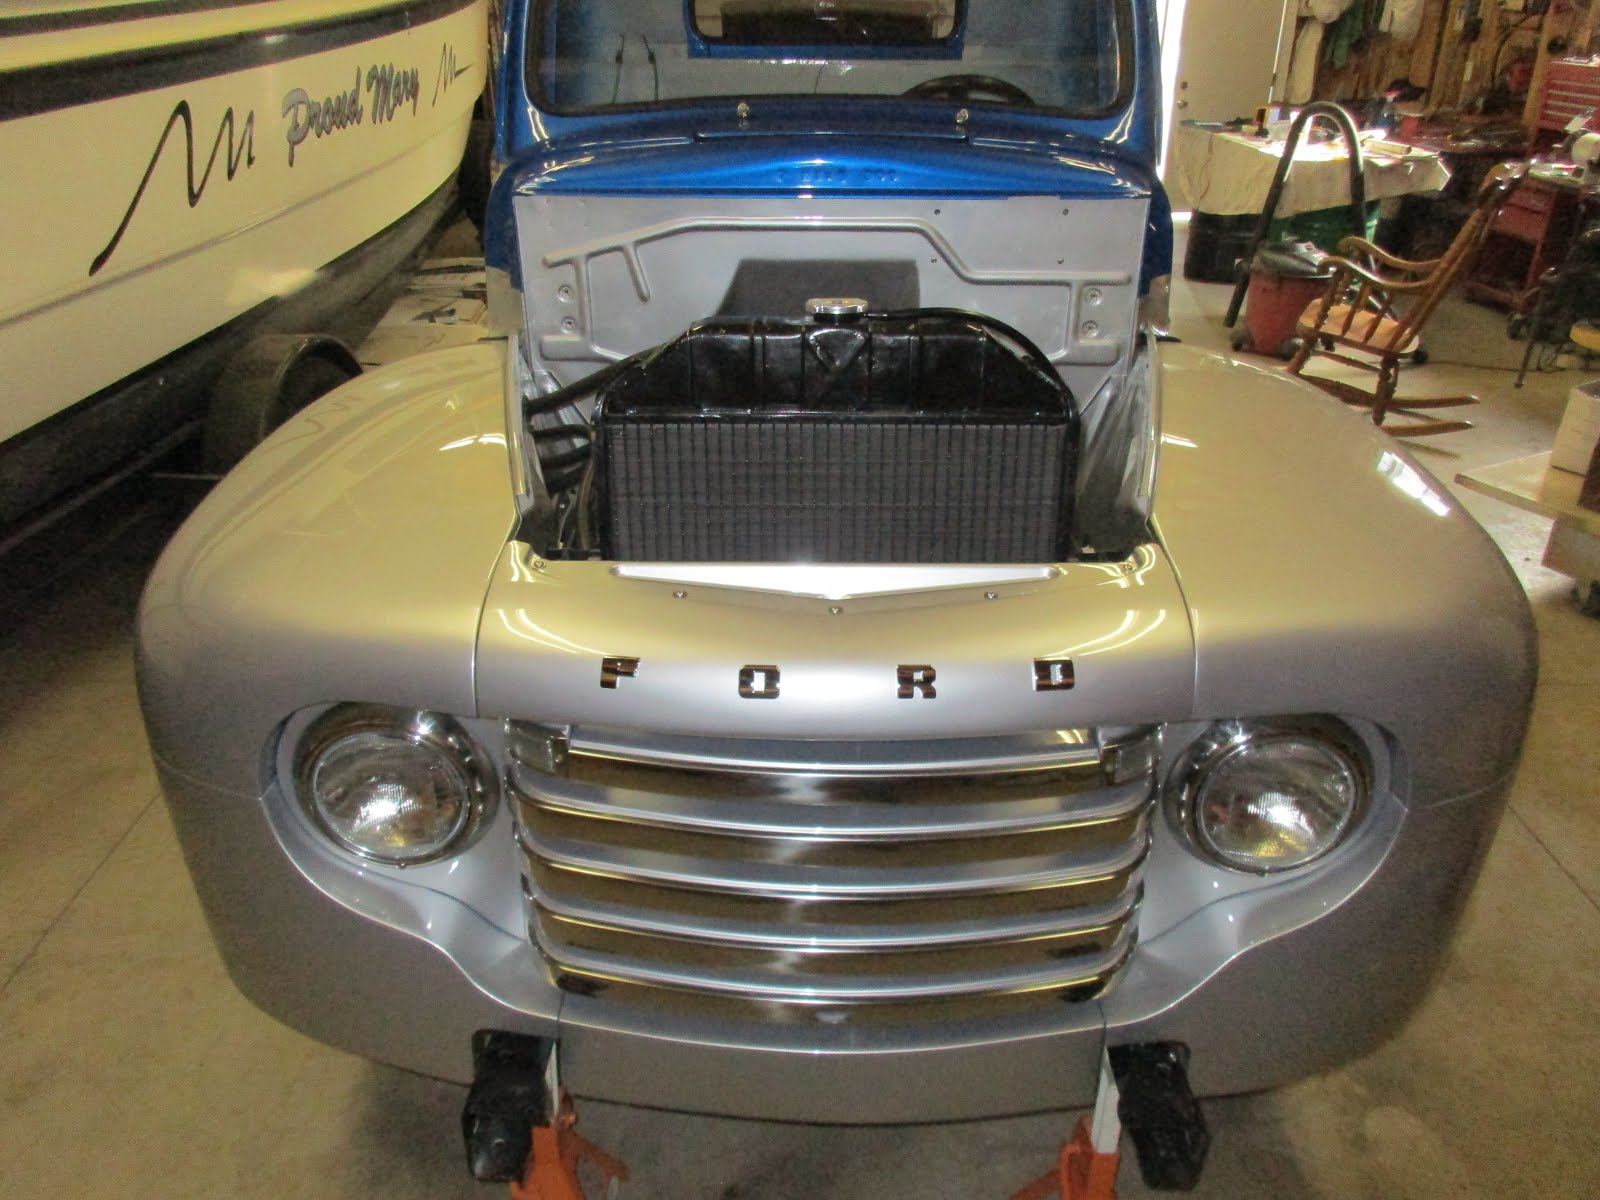
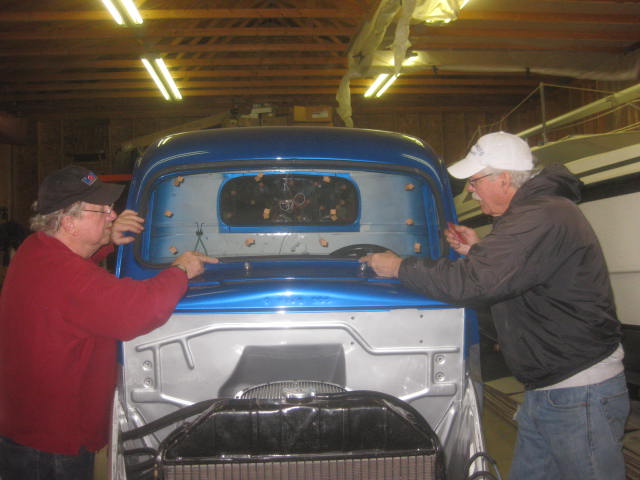
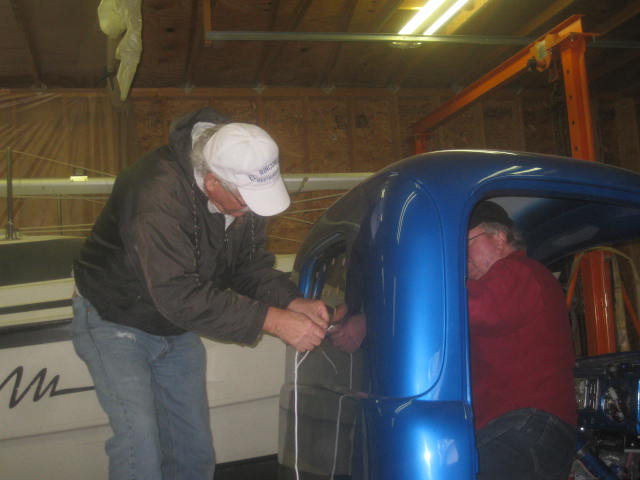
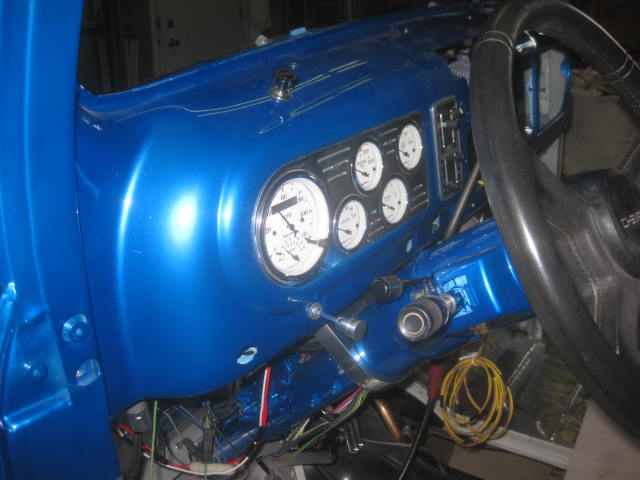
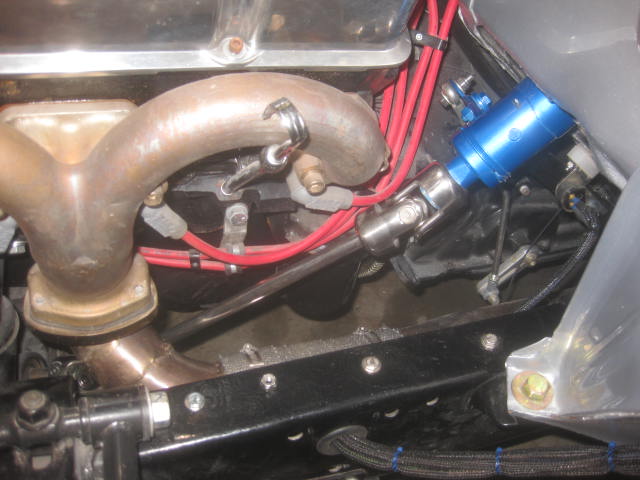
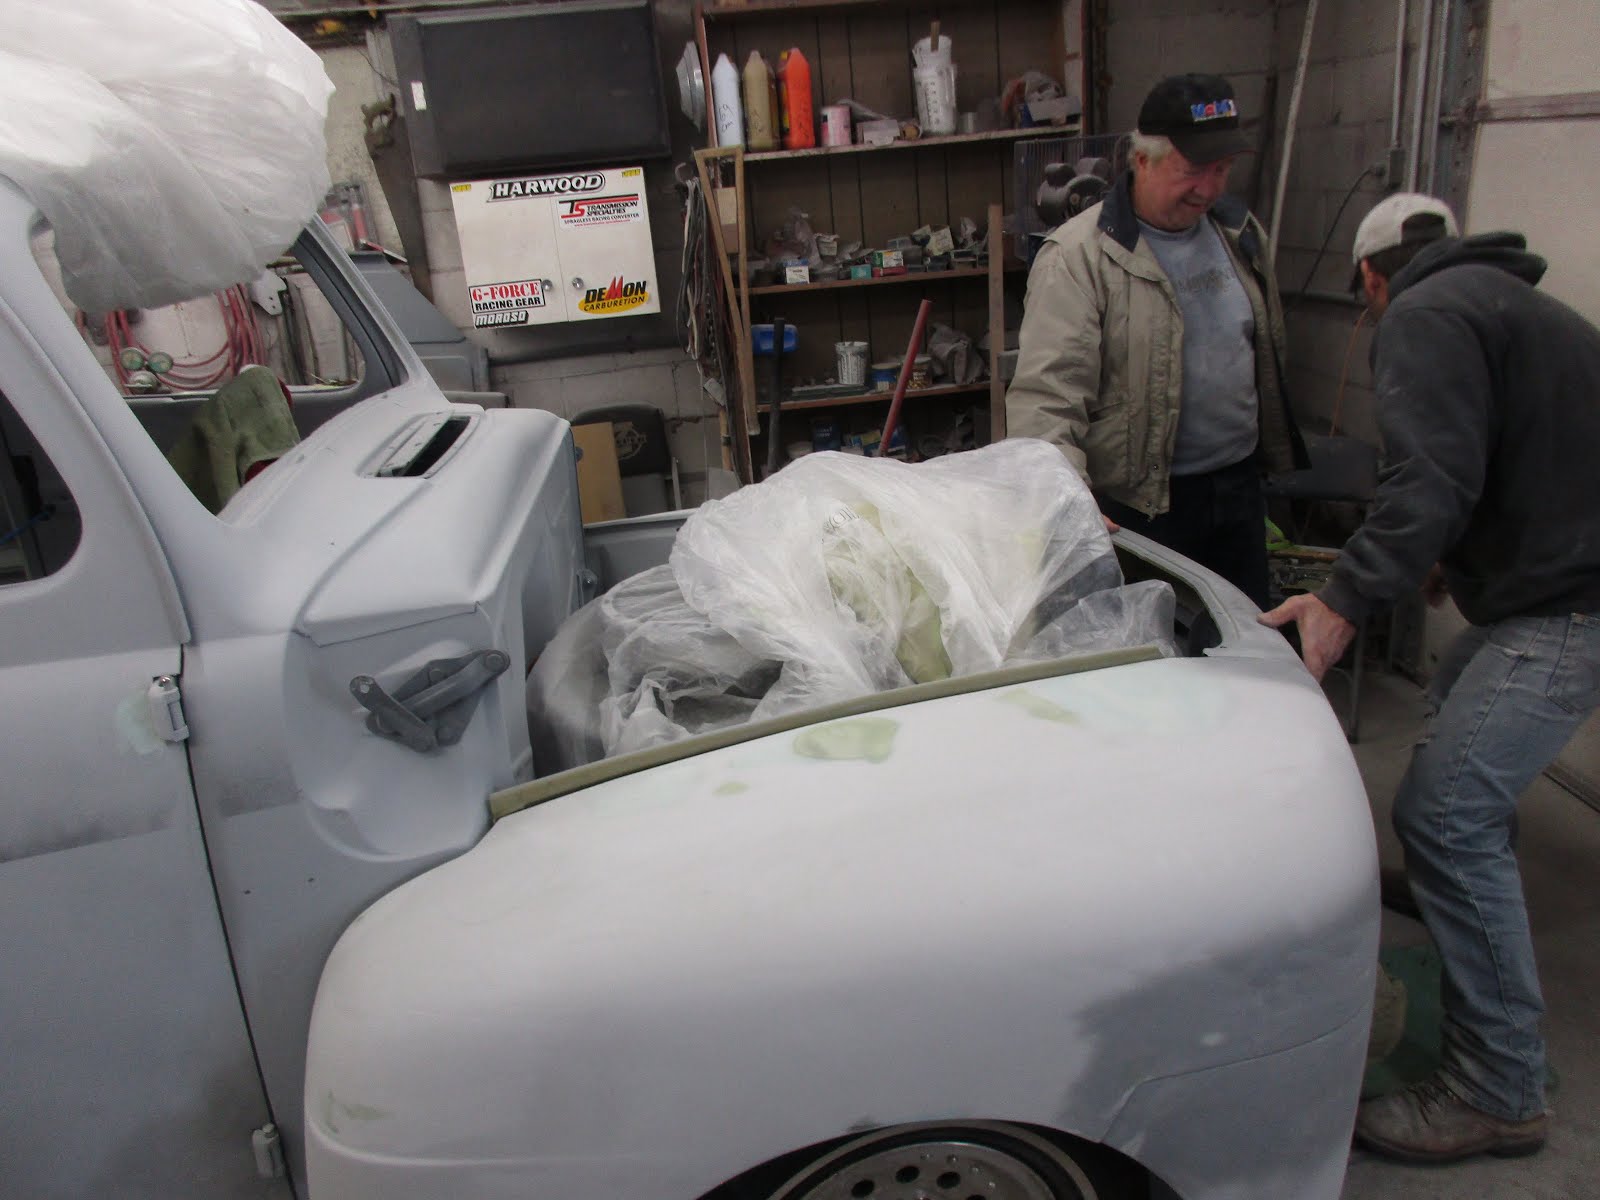
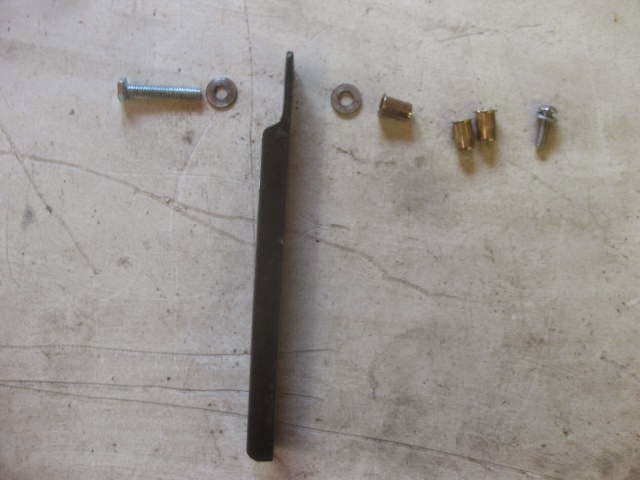
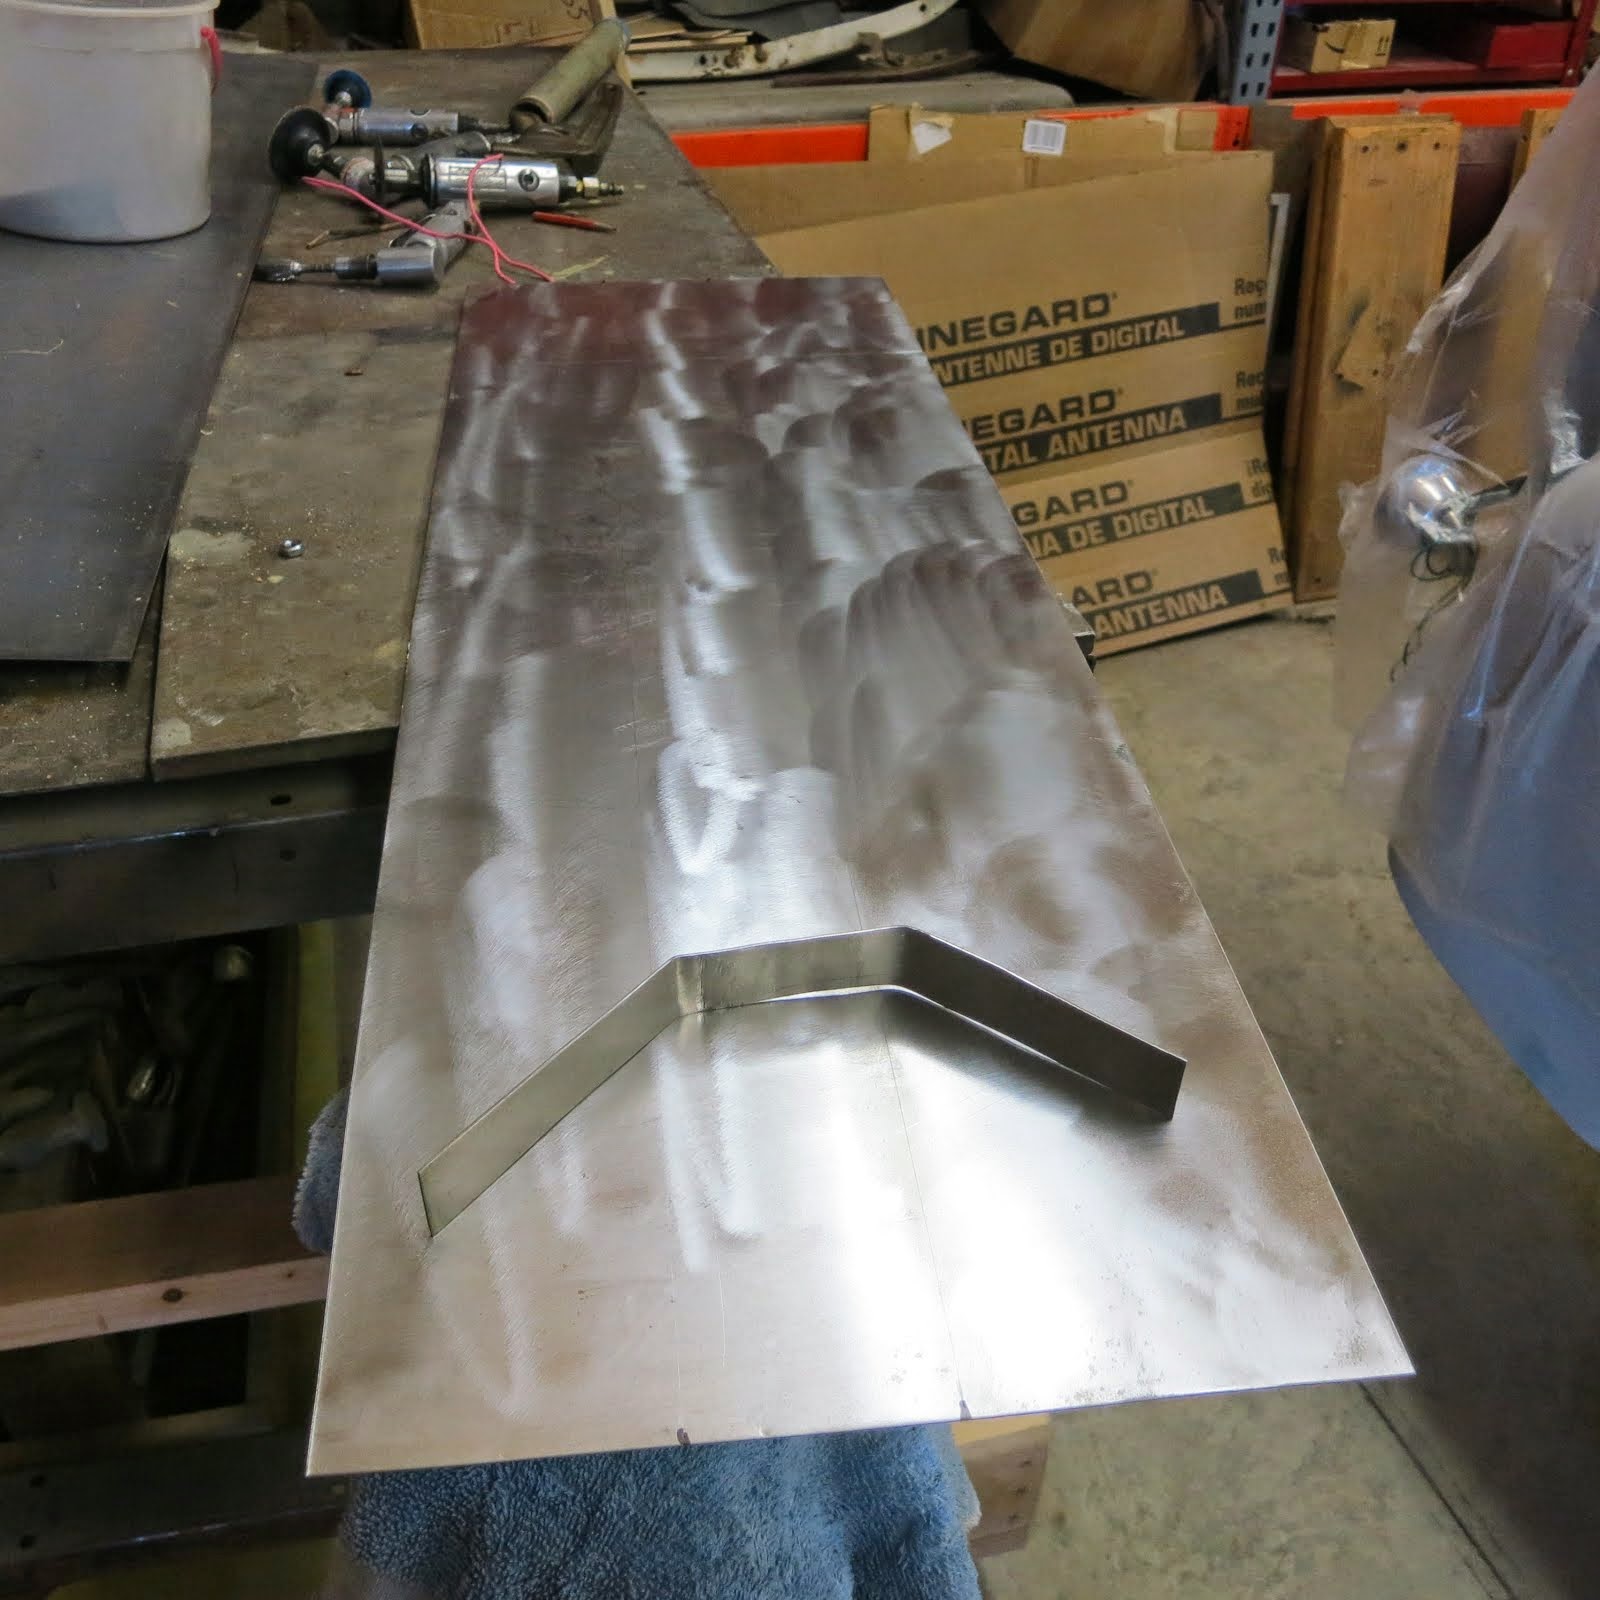
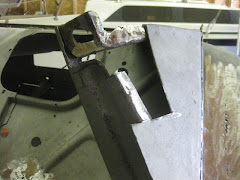
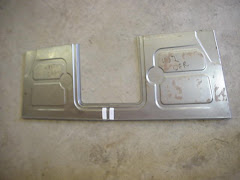
Filled a bunch of holes in the inner fender wells and fixed some rips. Still need some mud work on them but will do that later. The center grill piece needed work and after re-sandblasting it I found one side bracket (one inch angle about 18 inches long) rusty, pitted and partially gone. Fabricated a new piece and welded it in. Put all the sheet metal back on the front with all the bolts in place. I put the left side upper and lower metal fenders temporarily in place to see how it was going to fit and look.
Today I will try my luck at fitting the new fiberglass fenders to the right side. Don't want to drill all those holes in the wrong place. Wish me luck. Gonna rain today.
Wednesday, April 23, 2014

Sunday, April 20, 2014
Something is not right
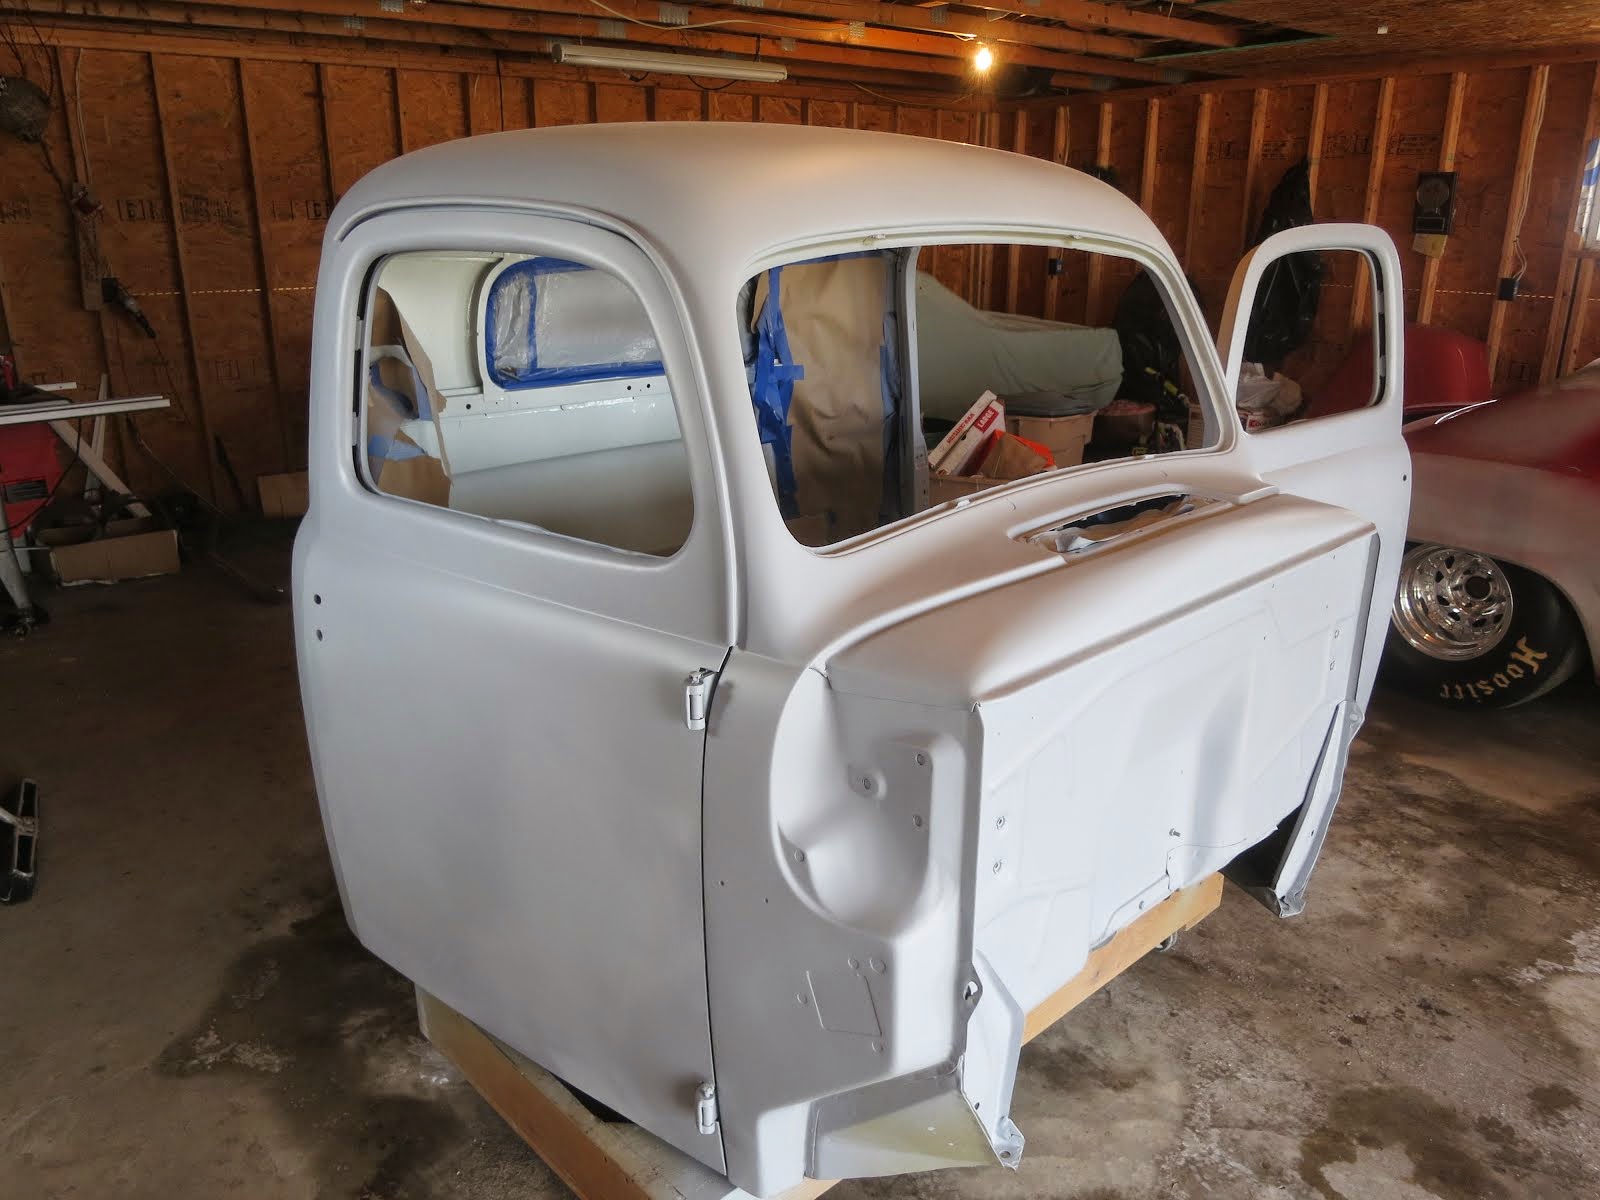
Weather is finally starting to cooperate. Had to do some yard honey do's first but went back to the garage this last week. Something wasn't looking right with the front mock-up. The front wheels were no where near being centered in either the metal or fiberglass fenders. I decided I needed to put the cab back on and start from square one. My friend Bob came down and after taking all the sheet metal back off the front end, we got Nancy to help us put the cab back on. The inner fender wells were not lining up correctly. We measured the distance between the front and back wheels to make sure the new front suspension hadn't altered measurements. Come to find out, with Bob's help, that I had attached the inner fenders to the wrong holes. They have three different sets of holes punched for different engines. (V8" and straight 6's). Also had to loosen up the radiator frame to bring the right holes in alignment. Looking better now. I have been filling holes that are not needed in the inner panels and will try to make them look better than they are now. They are rust pitted and mounting holes are elongated and ripped out. After I get them straightened out, then I can start adding other front end sheet metal. Looks more like a truck with the cab back on.
Tuesday, April 1, 2014
Will this cold weather ever end?
Did a two week stint in Washington DC, house sitting in February, and taking care of a great Yellow Lab. Saw a lot of museums, war memorials and the capitol. Didn't see anyone working in the capitol except the tour guides. Typical I think. Still, it was a great gig.
Anyway, did get a couple of days in on the F1 this last week. I thought I would update the blog this morning as it is still 35 degrees out.
Began by mocking up the front end sheet metal. I started doing a little patch work on one of the lower fenders. If it turns out somewhat decent I may try to tackle the main front fenders. Yes, I did buy fiberglass ones but may change my mind again. Would be nice to say it is ALL metal. We will see just how good my skills are improving.
Now, when are those Canadians gonna quit pushing that cold air south.?
Anyway, did get a couple of days in on the F1 this last week. I thought I would update the blog this morning as it is still 35 degrees out.
Began by mocking up the front end sheet metal. I started doing a little patch work on one of the lower fenders. If it turns out somewhat decent I may try to tackle the main front fenders. Yes, I did buy fiberglass ones but may change my mind again. Would be nice to say it is ALL metal. We will see just how good my skills are improving.
Now, when are those Canadians gonna quit pushing that cold air south.?
Monday, January 27, 2014
Back from Panama
Spent 5 weeks in Darkland Bay, near Bocas Tel Toro Panama, house setting and taking care of a great dog named Turbo over Christmas and New years. The weather was great.
Got home a couple weeks ago to very cold weather. Been working on two more rocking chairs in my wood shop until the weather breaks. Looks like a couple more weeks of cold ahead. Just finished gluing the back legs to the seats and while waiting for the glue to dry, I am working on the back splats. Long way to go on the chairs yet.
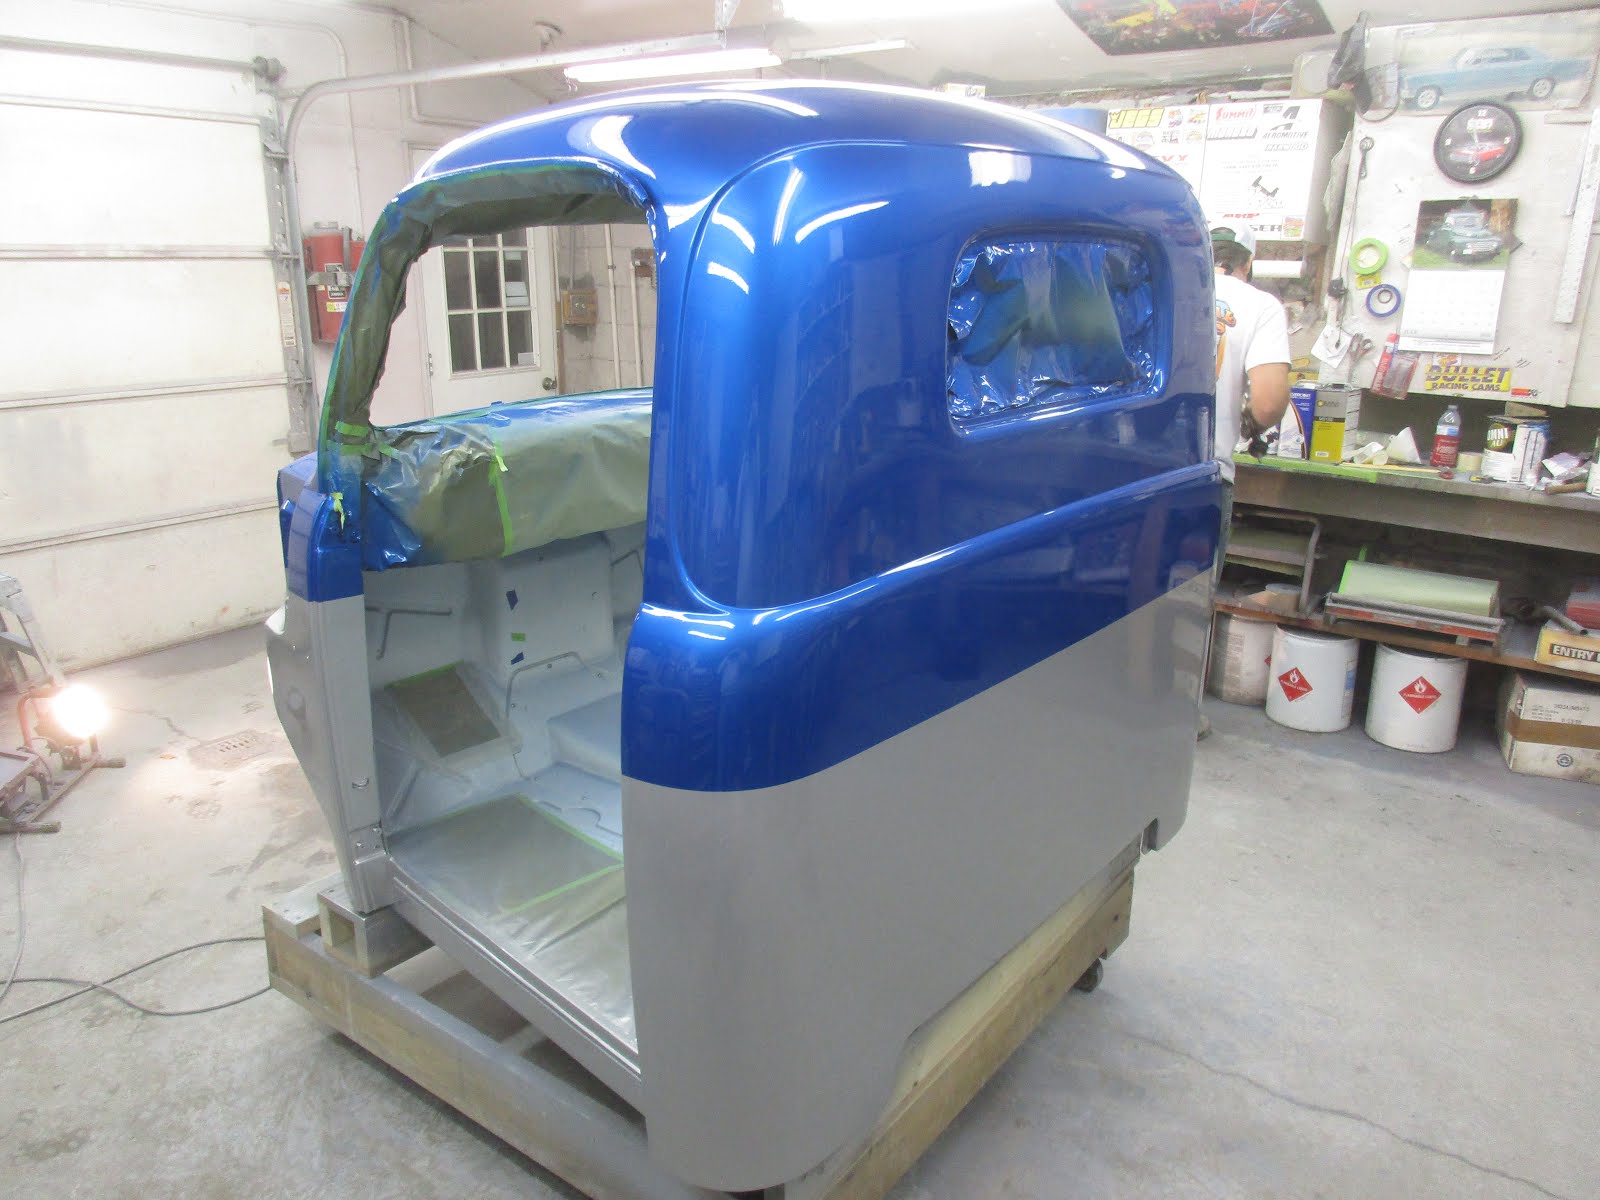
Got some good news on the truck. Made arrangements to paint the truck this spring or summer. Will do the cab first so I can get it back on the frame and start the wiring. Would like to get the engine started and broke in this year. The fellow that will do the painting is Jeff Crow. He lives about 40 miles south of me in Warsaw Illinois. He does beautiful work. This was arranged with the help of Bob Ertzinger and Tony Cetta, two very good friends. The color has been decided and will be Mercedes Iridium Silver. I've decided on a single color. I was going to do a two tone with dark blue on top. Decided against that and will do some pin striping instead. Anxious to get started again. The front sheet metal needs to be addressed and the hood still needs to be sandblasted. A lot of work to do before the painting gets started.
Oh yes, I still have the bed to do too. Oh yes, and Nancy wants to do more traveling this year.
I may have to start working a second shift. I think the pay is the same.
Got home a couple weeks ago to very cold weather. Been working on two more rocking chairs in my wood shop until the weather breaks. Looks like a couple more weeks of cold ahead. Just finished gluing the back legs to the seats and while waiting for the glue to dry, I am working on the back splats. Long way to go on the chairs yet.
Got some good news on the truck. Made arrangements to paint the truck this spring or summer. Will do the cab first so I can get it back on the frame and start the wiring. Would like to get the engine started and broke in this year. The fellow that will do the painting is Jeff Crow. He lives about 40 miles south of me in Warsaw Illinois. He does beautiful work. This was arranged with the help of Bob Ertzinger and Tony Cetta, two very good friends. The color has been decided and will be Mercedes Iridium Silver. I've decided on a single color. I was going to do a two tone with dark blue on top. Decided against that and will do some pin striping instead. Anxious to get started again. The front sheet metal needs to be addressed and the hood still needs to be sandblasted. A lot of work to do before the painting gets started.
Oh yes, I still have the bed to do too. Oh yes, and Nancy wants to do more traveling this year.
I may have to start working a second shift. I think the pay is the same.
Monday, November 25, 2013
Hitch is in
Finished installing the trailer hitch last week before the cold weather hit. Had to modify it a little to get it to fit. Cut off 8 inches of the forward mounting tangs and used those parts to beef up the other two frame mounting points on each side. Pretty strong now and if nothing else, it protects the gas tank somewhat. The weather has kept me inside and working on wood projects for a while.
Need to turn the chassis around in the garage so I can work on the front sheet metal. I would like to put in new front inner fender well panels. The existing ones have quite a few factory holes that would need to be welded up, and one side has a lot of rust pits. I think new metal would look nicer. The top of those pieces are curved and the outer fenders attach to them. I need to figure out how to make new metal while possibly incorporating the top part of those curves. Head scratching time.
Headed to Panama after Thanksgiving for another house setting job for a month. Will be back the second week of January. Gonna be colder then. Hope you all have a great Christmas.
Need to turn the chassis around in the garage so I can work on the front sheet metal. I would like to put in new front inner fender well panels. The existing ones have quite a few factory holes that would need to be welded up, and one side has a lot of rust pits. I think new metal would look nicer. The top of those pieces are curved and the outer fenders attach to them. I need to figure out how to make new metal while possibly incorporating the top part of those curves. Head scratching time.
Headed to Panama after Thanksgiving for another house setting job for a month. Will be back the second week of January. Gonna be colder then. Hope you all have a great Christmas.
Saturday, November 16, 2013
New Stainless Bumpers and Grill Trim
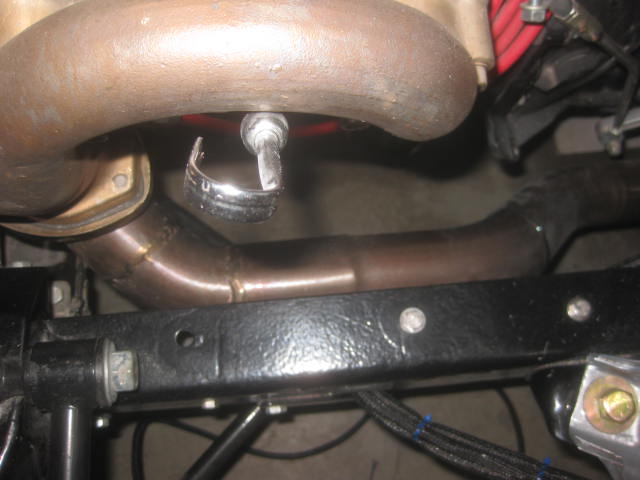
The new stainless steel bumpers and grill trim arrived this week. All from Dennis Carpenter. Very happy with the bumpers. They are polished to a higher gloss than I expected. I also didn't know how the grill trim was going to be mounted to the grill. There are a nice bunch of very simple stainless clips that slide into crimps in the back of each trim piece. A 3/16" threaded stud is welded to the clip and holes will need to be drilled in the grill shell for the clips.
Mounted the back bumper temporarily to get positive measurements for a trailer hitch. Looks good there, and I just ordered a Draw Tite hitch from Amazon. Should be here next week. Now I need to get back out and bump some more metal. Rain is here today but it's still warm out.
Mounted the back bumper temporarily to get positive measurements for a trailer hitch. Looks good there, and I just ordered a Draw Tite hitch from Amazon. Should be here next week. Now I need to get back out and bump some more metal. Rain is here today but it's still warm out.
Saturday, November 9, 2013
Gone Again
Did a three week stint in the New England States. Had a great time seeing the coast and eating all the seafood I wanted. Great stuff. Hit the fall colors just about right. Next, headed to Panama again for a 3 week house setting job in December. Should be better this time. (I hope.)
Got a little done on some of the front end sheet metal. Pounded out a lot of dents and cut out some cancer. Put some new pieces in and fixed some torn bolt holes. The weather is going below freezing this next week so that will slow things down again. Going to order the front and back bumpers in stainless steel soon. I need the back bumper to take measurements for a trailer hitch. I will also order the stainless steel grill bars for the front end at the same time. All that, except for the hitch, should come from Dennis Carpenter Ford Parts. Got to get the cab painted this next spring so I can start the wiring and interior stuff. How long is this going to take????
Got a little done on some of the front end sheet metal. Pounded out a lot of dents and cut out some cancer. Put some new pieces in and fixed some torn bolt holes. The weather is going below freezing this next week so that will slow things down again. Going to order the front and back bumpers in stainless steel soon. I need the back bumper to take measurements for a trailer hitch. I will also order the stainless steel grill bars for the front end at the same time. All that, except for the hitch, should come from Dennis Carpenter Ford Parts. Got to get the cab painted this next spring so I can start the wiring and interior stuff. How long is this going to take????
Sunday, October 6, 2013
Side Tracked Again
About time I got this updated again. Got side tracked again with a few things, but got some work done on the back fenders. Had more Cancer to cut out on one and then built some backer plates for the mounting flanges. Decided to sandblast all the flash rust off again this morning. Got both fenders done before it started raining. Need some mud work and sanding on both. Then I will shoot them with the first coat of primer. Have a little more mudding to do on the cab and then some touch up primer for it. Not much time left to do outside work as winter is fast approaching. Got to move the boat back in the garage also. Oh yes and we leave for New England for three weeks next Saturday. Also going back to Panama again in December for a better house setting job for a month.
will this truck ever get finished???
will this truck ever get finished???
Tuesday, September 10, 2013
Inside of Cab Masked
Masked off the interior of the cab so I can shoot the next coat of filler primer. Had to mask the inside of the dash and just above the front windshield. This area will get painted just like the exterior. Still have a little spot mudding to do before I shoot it again. Going to cool down tomorrow so will mud then and maybe shoot it the next morning if the weather cooperates.
Thursday, September 5, 2013
Cab Interior Painted
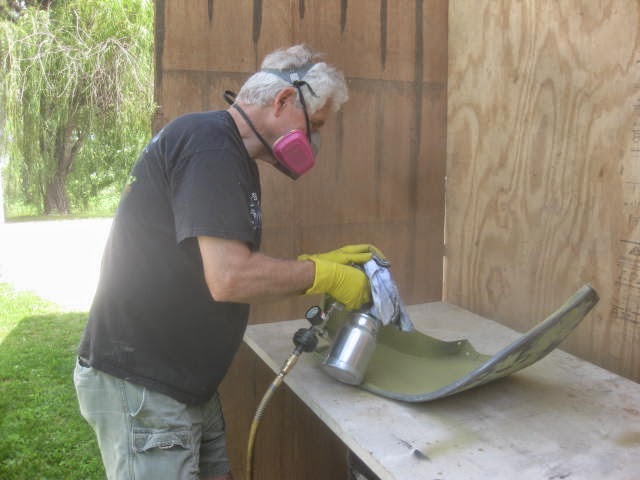
After shooting the whole cab inside and out with etching primer, I painted all of the interior with DuPont Centari Acrylic Enamel. When talking to my car guys group, they told me ,first, Paint it a light color. This will make it easier to see up under the dash when doing the wiring etc, I chose a very white color that really brightens up the interior. The boys said to just paint it with a brush as it will all be covered up later anyway with upholstery or carpeting. Also you can get into some of the cracks and crevasses easier with a brush. I put on three coats and that should protect the inside longer than I will be around. The Centari white was mixed two to one with a DuPont reducer and one part hardener.
I may have lost a few more brain cells from the toluene smell, but that stuff sure dries fast and hard.
You can see in the photo's that I got a little sloppy and will have to sand some off the exterior. Minor problem. Next I have to do a little more mud filling in spots I missed and then mask off the interior and shoot the outside with the filler primer.
Winter is coming, gotta hurry up.
I may have lost a few more brain cells from the toluene smell, but that stuff sure dries fast and hard.
You can see in the photo's that I got a little sloppy and will have to sand some off the exterior. Minor problem. Next I have to do a little more mud filling in spots I missed and then mask off the interior and shoot the outside with the filler primer.
Winter is coming, gotta hurry up.
Tuesday, September 3, 2013
First Etching Primer On
Well, since it was going to only get up to 77 degrees today I thought this should be the day I jump in and shoot the first coats of Etching primer. I think I have let this painting get to me and have procrastinated long enough. First I wiped the cab down one more time this morning with PRE ( a wax and grease remover) from Eastwood. Read the directions again on the primer can and mixed up the first batch of primer and reducer one to one. (This is all DuPont stuff.) I had stapled a piece of cardboard to the wall to use as a test for fine tuning the spray. Sprayed the first batch up under the dash and firewall and emptied the gun there. To make a long story short I mixed enough batches to prime the whole cab inside and out at least two times. Some areas probably more. I used one half gallon each of the primer and reducer. It was both easier and harder than I though it would be. I had to mix up more paint than I thought. I had a hell of a lot more overspray in the air while painting than I thought there would be. After mixing, the primer was a lot thinner than I thought it would be. It sprayed easier than I thought, and I think I covered everything pretty good. I have found at least 4 runs I need to sand out.
Hope I don't have to sand all this crap back off.
Hope I don't have to sand all this crap back off.
Saturday, August 24, 2013
Poor Man's Paint Booth
Well, I stapled up some plastic to the rafters in the big garage, to be used as a paint booth. I made it 12 feet square and it looks like I will have plenty of room to move around the cab while shooting it with primer. Even made room for a fan that sets in the window to draw out overspray.
It's been in the 90's and very humid right now so will have to wait a few days to shoot it.
Still have some more mudding and sanding to do, but the booth is ready. This is truly going to be an interesting experience for me as I have never painted anything before. I think the understanding of runs and orange peel is soon to come. BUT, gotta do it, gotta do it.
It's been in the 90's and very humid right now so will have to wait a few days to shoot it.
Still have some more mudding and sanding to do, but the booth is ready. This is truly going to be an interesting experience for me as I have never painted anything before. I think the understanding of runs and orange peel is soon to come. BUT, gotta do it, gotta do it.
Sunday, August 18, 2013
Re-sandblasting, Mudding and sanding the Cab
After flipping the cab back over, I set up me little blasting tent out front of the garage and re-blasted both the inside and outside of the cab. It took a lot of blowing out the crannies and crevasses to get all the sand back out and it still is leaking out in places.
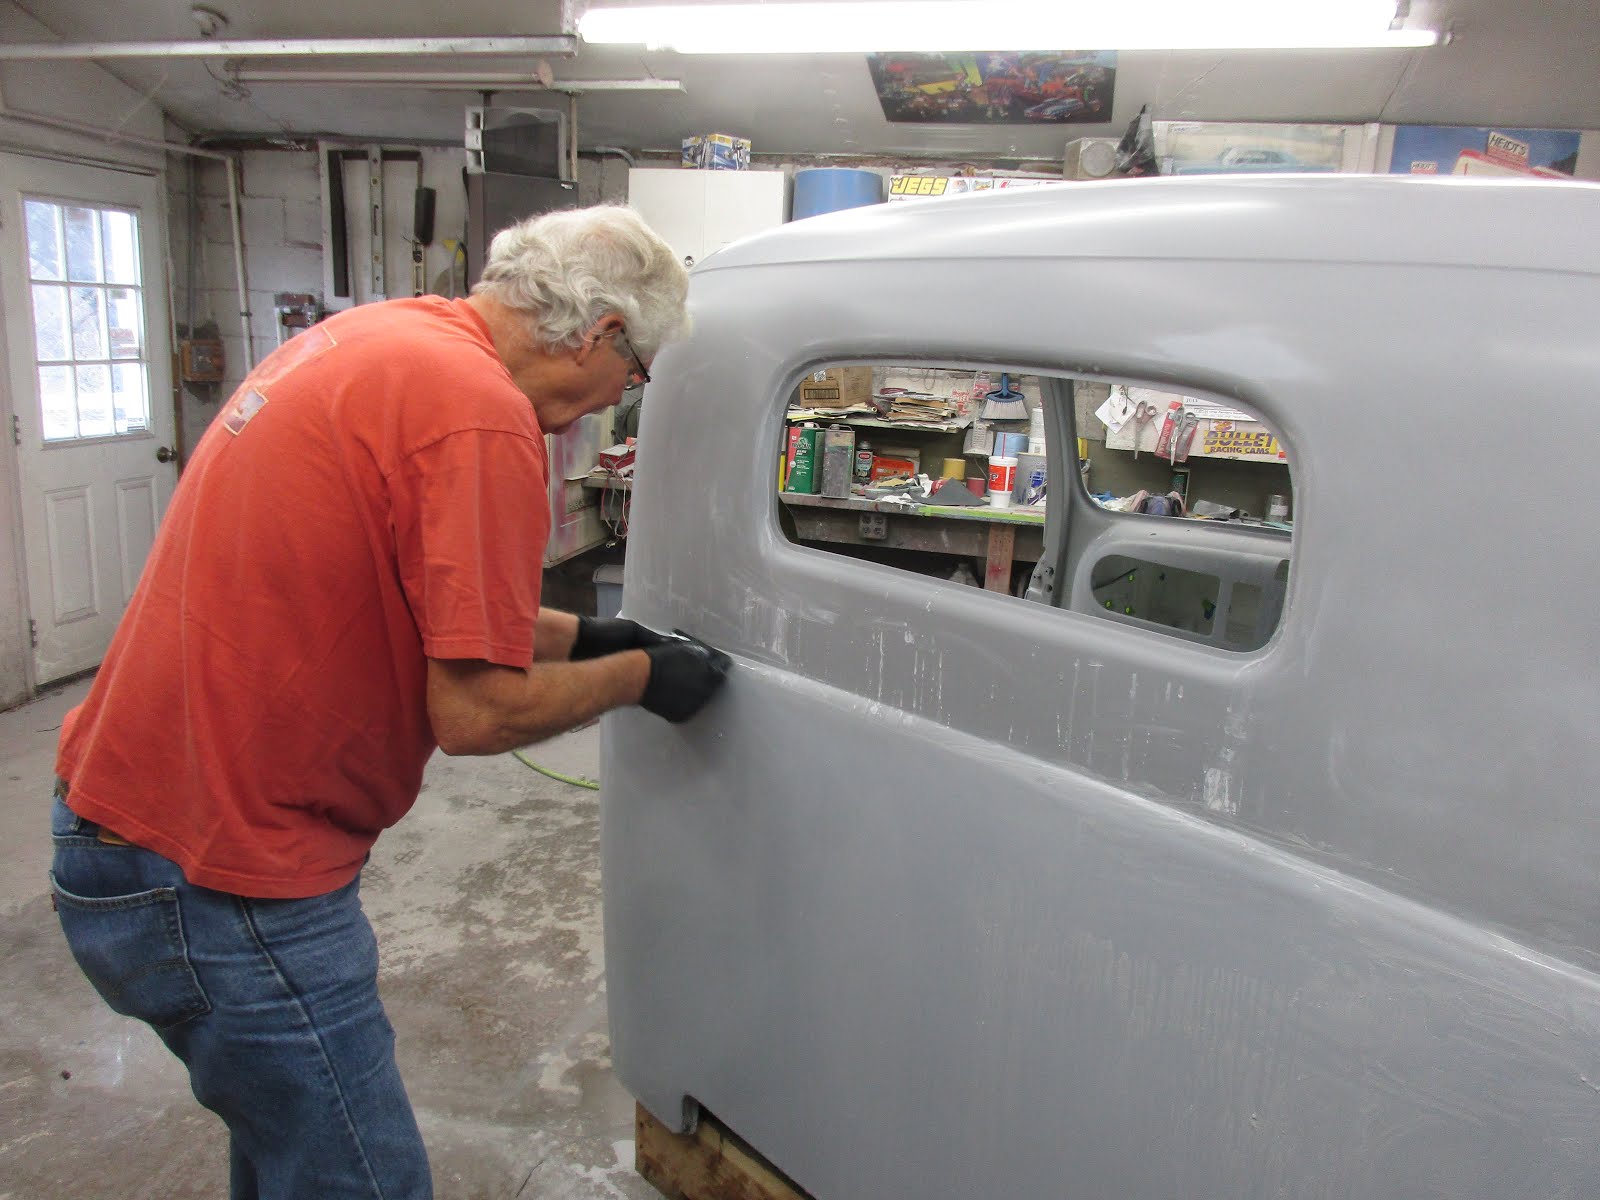
I did a bunch of mudding on the inside firewall where I had welded up holes and the floor interior, to try to flatten it out as best as I could. I decided the interior doesn't need too much sanding as most of it will be covered up anyway It's not bad, just not perfect. I am now working on the exterior, trying to get it ready for primer. More mudding and sanding. I want to prime both inside and outside. Then I will paint the interior with a DuPont Centari white paint color for protection. This too will eventually all be covered with Dynamat and upholstery. All that will be my first test with a spray gun. WHOOT, WHOOT.
I did a bunch of mudding on the inside firewall where I had welded up holes and the floor interior, to try to flatten it out as best as I could. I decided the interior doesn't need too much sanding as most of it will be covered up anyway It's not bad, just not perfect. I am now working on the exterior, trying to get it ready for primer. More mudding and sanding. I want to prime both inside and outside. Then I will paint the interior with a DuPont Centari white paint color for protection. This too will eventually all be covered with Dynamat and upholstery. All that will be my first test with a spray gun. WHOOT, WHOOT.
Bottom Painted
Bob Ertzinger, (No Job Johnny), came down last week and helped me get the bottom ready for paint. He is shown with a paint gun in hand, but we used Spray cans instead. The product is made by 3M Company and called Professional Grade Rubberized Coating. I used five and a half cans for at least 3 full coats. This should give it good rust protection and help some with the noise level. I first used a product from Eastwood called PRE to clean and prep the bottom.
Next I will flip it back over and re-sandblast the whole cab inside and out.
Next I will flip it back over and re-sandblast the whole cab inside and out.
Saturday, August 10, 2013
Seat belts are in.
Got the seat belts installed and decided not to weld in the bottom plates. Pulled everything back off and now ready to do a quick cleanup sandblast to the bottom so I can paint it.
Got the fiberglass front fenders this week. They are made by BEBOPS and sold through Yogi's. Yogi himself helped me out by having BEBOPS bring them to the Nationals show in Kentucky last weekend, and then He transported them back to his shop in Monticello. Then my son-in-law Quinn, who works for Yogi's, took them home to Marion and I got them from him on Tuesday. Saved me shipping costs . Great service from Yogi's. Thanks a bunch.
When my company leaves the first of the week, I will take the cab outside and do the blasting.
Anxious to finally get a little paint on the old baby.
Got the fiberglass front fenders this week. They are made by BEBOPS and sold through Yogi's. Yogi himself helped me out by having BEBOPS bring them to the Nationals show in Kentucky last weekend, and then He transported them back to his shop in Monticello. Then my son-in-law Quinn, who works for Yogi's, took them home to Marion and I got them from him on Tuesday. Saved me shipping costs . Great service from Yogi's. Thanks a bunch.
When my company leaves the first of the week, I will take the cab outside and do the blasting.
Anxious to finally get a little paint on the old baby.
Thursday, July 18, 2013
Side tracked again
Well, family business comes first.
Moved my sister from Indianapolis to Coeur d' alene, Idaho. Then had grandson Parker for 2 1/2 weeks. Plus a few other distractions.
Now it is 95 degrees out with 94% humidity. Nothing in life is perfect.
I did finally bite the bullet and ordered fiberglass front fenders for the F1, and seat belts for both the F1 and the Model T. All coming from Yogi's through my son-in-law Quinn. Great place to deal with. Nice to have a relative working there.
Dug out the F1 bed last week and decided to remove the metal bed. I want to replace it with a piece of aluminum diamond plate. The factory did a great job of welding it in every 6 inches. Took a while to cut all the welds out. Now the clean up begins. I started sandblasting it a couple days ago, but the heat got to me. Will let the weather cool down a bit before I continue.
Fenders probably wont get here until August, but don't need them right away anyway. Will get the seat belts this weekend and can install them in the cab next. Then I can weld those nuts to the bottom of the cab and re sandblast the bottom floor. THEN maybe I can get it undercoated.
Moved my sister from Indianapolis to Coeur d' alene, Idaho. Then had grandson Parker for 2 1/2 weeks. Plus a few other distractions.
Now it is 95 degrees out with 94% humidity. Nothing in life is perfect.
I did finally bite the bullet and ordered fiberglass front fenders for the F1, and seat belts for both the F1 and the Model T. All coming from Yogi's through my son-in-law Quinn. Great place to deal with. Nice to have a relative working there.
Dug out the F1 bed last week and decided to remove the metal bed. I want to replace it with a piece of aluminum diamond plate. The factory did a great job of welding it in every 6 inches. Took a while to cut all the welds out. Now the clean up begins. I started sandblasting it a couple days ago, but the heat got to me. Will let the weather cool down a bit before I continue.
Fenders probably wont get here until August, but don't need them right away anyway. Will get the seat belts this weekend and can install them in the cab next. Then I can weld those nuts to the bottom of the cab and re sandblast the bottom floor. THEN maybe I can get it undercoated.
Sunday, May 26, 2013
Pushing Forward
Got side tracked a few times again, but got the seat belt brackets welded in. Drilled bigger holes in the transmission cover so I could use 1/4 inch bolts and nuts to hold it down. I will weld the nuts down on the bottom when the cab comes off again. Pulled all of the stuff out of the cab getting ready to pull it for bottom cleanup and welding. Also will paint the bottom before going back on.
Been working in the rear fenders, cutting out the cancer and replacing with good metal. Will mud over the top of that to smooth it all up.
My friend No Job Johnny showed up this morning and we pulled the cab off. Now to finish welding some pin holes and nuts on the bottom and clean it up for primer and bottom coat.
Been raining here dogs and hogs. Maybe I should work on the boat instead.
Been working in the rear fenders, cutting out the cancer and replacing with good metal. Will mud over the top of that to smooth it all up.
My friend No Job Johnny showed up this morning and we pulled the cab off. Now to finish welding some pin holes and nuts on the bottom and clean it up for primer and bottom coat.
Been raining here dogs and hogs. Maybe I should work on the boat instead.
Wednesday, May 8, 2013
Busy, but back again
Got side tracked with the 26 T, but back on the F1 the last couple of days. Made some brackets for the main fuse block and finally made a decision on where to place it. There wasn't enough room in the left kick panel (my first choice), so I finally mounted it on the firewall behind the gauges. Should be convenient for all wiring. I was going for a slick firewall in the engine compartment but decided 4 bolt heads would be okay.
I also installed some glass guide pieces in the doors to compensate for removing the wing windows. The mock fiberboard seems to roll up and down okay. We'll see what happens when the cats whiskers and guide pieces go in. That may stiffen things up a bit.
Going to weld in the brackets I made for the top support of the safety belts. More welding to do on pin holes in the cab, then a complete cleanup of the cab again before the primer. Also almost time to remove the cab and seal and paint the bottom of the cab. A lot more to come.
I also installed some glass guide pieces in the doors to compensate for removing the wing windows. The mock fiberboard seems to roll up and down okay. We'll see what happens when the cats whiskers and guide pieces go in. That may stiffen things up a bit.
Going to weld in the brackets I made for the top support of the safety belts. More welding to do on pin holes in the cab, then a complete cleanup of the cab again before the primer. Also almost time to remove the cab and seal and paint the bottom of the cab. A lot more to come.
Okay, so I got side tracked
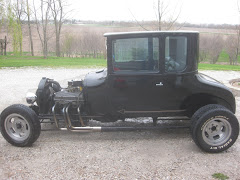
I got side tracked, a little. Seems that I have been over three years without a rod ride while working on the F1. A couple of months ago I started looking for A T Bucket. I found a 1926 Tall T Coupe in Texas a couple of weeks ago. I just wanted a driver for a while. Got it for a good price and decided to have it transported from Port Mansfield (about 50 miles from Brownsville) to Wever. Made arraingments and no transport takers for five days. I got a little bajiggity and decided to go get it myself. Friend Bob decided to go with me. To make a long story short, we drove a total of 2600 miles round trip in 4 days. three of it in the rain. Anyway, it's here and titled in Iowa now. Got insurance on it yesterday. Had some problems with the brakes and replaced the master cylinder twice, new calipers on the front and new brake lines on the front. It stops good now. Has a 1958 283 chevy in it that came out of a Chris Craft boat. Got a 350 automatic behind it and a Ford Nine inch in the rear. Should be fun for a couple of years. As I said, just a driver. Now back to the F1.
Thursday, April 18, 2013
Seats Out and New Master Cylinder Cover
Pulled the seats out to get to some of the little things left to do on the inside of the cab. Inlarged the access hole in the floor to ge to the brake master cylinder and made a cover for the hole. Will weld the nuts on the bottom of the floor pan when I remove the cab for the last time.
Now I need to figure out where to put the wiring fuse box and build a mounting bracket for the fuse block.
Wish this rain and cold weather would go away. more high winds coming tonight.
Now I need to figure out where to put the wiring fuse box and build a mounting bracket for the fuse block.
Wish this rain and cold weather would go away. more high winds coming tonight.
Monday, April 15, 2013
Finally warming up
Even though it's been a very cold March and April, I have been busy. When it was too cold to work in the garage on the F1, I started building two more rocking chairs. Doing glue-ups on the rockers and the back braces now. Most of the rough cut out is done. A lot of machining and finishing to do yet.
Had been working on the F1 doors. Got the cancer cut out of the drivers door and new pieces welded in and ready for a little mud work. Got the doors hung about a week ago and got cold again.
My friend Bob came down today and we got the doors aligned. Had to bend one of the hinges on each door to get them lined up fairly close. We also figured out how to put an aligning piece in the door for the window to track straight. You can see by the picture that I have eliminated the wing windows and went to a one piece window. Both doors line up good and both new latches work great.
Next, going to figure out where to put the the wireing harness fuse block. I think a bracket can be made and fit in the left kick panel.
I probably will be complaining about the heat soon.
Oh, I almost forgot, I bought a 1926 Model T Coupe with a 283 in it off E-BAY Last week. Located about 80 miles East of Brownsville Texas. I thought about going to pick it up myself but have changed my mind and will have a transportation company bring it to me.
It's not a show car, just a driver. Should be fun for a while. I'll post a picture when it get's here. Might take a week or two.
Now it's back to work.
Had been working on the F1 doors. Got the cancer cut out of the drivers door and new pieces welded in and ready for a little mud work. Got the doors hung about a week ago and got cold again.
My friend Bob came down today and we got the doors aligned. Had to bend one of the hinges on each door to get them lined up fairly close. We also figured out how to put an aligning piece in the door for the window to track straight. You can see by the picture that I have eliminated the wing windows and went to a one piece window. Both doors line up good and both new latches work great.
Next, going to figure out where to put the the wireing harness fuse block. I think a bracket can be made and fit in the left kick panel.
I probably will be complaining about the heat soon.
Oh, I almost forgot, I bought a 1926 Model T Coupe with a 283 in it off E-BAY Last week. Located about 80 miles East of Brownsville Texas. I thought about going to pick it up myself but have changed my mind and will have a transportation company bring it to me.
It's not a show car, just a driver. Should be fun for a while. I'll post a picture when it get's here. Might take a week or two.
Now it's back to work.
Monday, March 18, 2013
Hey Baby it's cold outside.
Been almost a month since I've been out in the garage working on the F1. I caught up on some of my reading and then thought, I need to do something else to keep myself busy. Well, It's been about three years since i've done any woodworking. I think might have had a little mental block after I caught a couple of finger tips in a blade kick back while working on a project for my daughter. Anyway, I decided the wood I had setting in my garage for a few years, slated for a couple more rocking chairs, needed to come inside and get acclimatized. The last couple weeks i've laid out and rough cut pieces of sycamore and black walnut for two more chairs. It's been good getting back to my old familiar wood tools, and the smell of fresh sawdust is close to sausage gravy. I have all the parts cut out except the pieces for the rockers and the back splats, and I did some glue- ups for the seats and the back rests. Looks like the weather will stay cold for at least another week, then I will use this as a rainy day project and get back to the Ford. I can never say I have nothing to do.
Thursday, February 21, 2013
Altman Easy Door Latches
Been working on the new Altman door latches between cold weather and snow storms. Cut out the area stated in the template directions with a die grinder cutoff wheel on the door edge and installed the latches. The 1/4 inch nuts holding the mounting plate are hard to get too so used some J&B Weld to hold them in place. Seems to work okay so far. The latches worked okay before mounting in the door but the looseness of the operating arms needs to be tightened up. After installing everything on the drivers door, I mounted it on the cab. The door shuts and latches great but doesn't open worth a hoot yet. More tweaking to do. I think they will be a great added safety feature when I get them figured out.
Big storm here today and snowing as we speak. We need to shoot the ground hog.


Big storm here today and snowing as we speak. We need to shoot the ground hog.


Thursday, February 7, 2013
Time to get started again
Well, back from Panama a little early. Was an interesting trip. Bugs got me bad, and i'm a little skinnier now.
Anyway, back to the F1. Wanted to try to eliminate the wing windows on the doors. Took all the guts out and cut a template for a full piece of glass out of hardboard. Had to cut the top metal anchor spot for the guide rail off with a hacksaw so the full piece of glass would go up through the slot in the door. wasn't sure the glass would go inside the door with out a bunch of cutting somewhere. It's a tight fit but will go in and turn inside. I also thought I might have to add more length to the bar at the bottom that pushes the glass up, but that seems to work okay also. May have to put a guide piece inside on the wing window side. Works good so far.
Ordered a new set of made for 48 Ford F1 bear claw door latches by Altman Easy Latches from Speedway yesterday and they arrived today. There a little pricey, but at least they are made in the USA. Started laying out the drivers door and will work on it this weekend. Looks like a good safety addition to the doors.
Anyway, back to the F1. Wanted to try to eliminate the wing windows on the doors. Took all the guts out and cut a template for a full piece of glass out of hardboard. Had to cut the top metal anchor spot for the guide rail off with a hacksaw so the full piece of glass would go up through the slot in the door. wasn't sure the glass would go inside the door with out a bunch of cutting somewhere. It's a tight fit but will go in and turn inside. I also thought I might have to add more length to the bar at the bottom that pushes the glass up, but that seems to work okay also. May have to put a guide piece inside on the wing window side. Works good so far.
Ordered a new set of made for 48 Ford F1 bear claw door latches by Altman Easy Latches from Speedway yesterday and they arrived today. There a little pricey, but at least they are made in the USA. Started laying out the drivers door and will work on it this weekend. Looks like a good safety addition to the doors.
Sunday, December 9, 2012
Last entry of 2012
Well it's been a fast last couple of weeks. Wasn't able to get much done on the Ford but did get a small patch done on the passenger door. Still have another one to finish up and the filling process to do.
Got the flu a couple of days ago so that stopped everything except the orfice flow. I believe I may have seen my pancreas a couple of times. Back on the mend now and finishing the packing for Panama. Should be home around March 14th, just in time for some more body work.
Hope whomever is reading this stuff has great holidays. As I stated before, if your interested in what we are doing, Check out Nancy's blog at: nharless.blogspot.com.
See you in the spring.
Got the flu a couple of days ago so that stopped everything except the orfice flow. I believe I may have seen my pancreas a couple of times. Back on the mend now and finishing the packing for Panama. Should be home around March 14th, just in time for some more body work.
Hope whomever is reading this stuff has great holidays. As I stated before, if your interested in what we are doing, Check out Nancy's blog at: nharless.blogspot.com.
See you in the spring.
Tuesday, November 27, 2012
Door Repair
Well, got through Thanksgiving after four kinds of pie and lots of gravy. I wonder what cherry pie wrapped in bacon and smothered in gravy would taste like. Hummmm!
Gotten down right cold outside, but I did finish getting the three rusted hinge pins out of the doors. What a job that was. Lots of penetrating oil and a big hammer with a drift pin and some drilling.
Had to cut out a rusty spot on the front bottom of the drivers door. The pictures show the sequence. I first made a patch out of 18 gauge and marked the spot to cut out. Used a die grinder with a cutoff blade to open up the hole. Hand fit the new piece and spot welded it in. Then filled in between the spot welds. After that it was grinding time. then went over it all with body filler. Still have more filling and sanding to do before the first primer goes on.
Started working on the passenger door. Got all the paint off. I have the same spot in that door to repair, plus the inside corner is rotted out. Will fix both bad places that at the same time and do some body filler on that one as well.
Only have two more weeks to get some stuff done before we head to Panama. We will be in Bocas Del Toro, house setting a place in the rain forest for three months. It is all off the grid, but does have Internet access. If your interested, Nancy has set up a blog that you can follow our time there. It is:
www.nharless.blogspot.com.
Lots of Howler monkeys, birds and jungle. The house sets above Dolphin bay on the Atlantic side, close to the Costa Rica border. There are two dogs (Gelli amd Indy) who will take care of us. Hope to get some fishing in and spending time trying to figure out how to get this truck done faster. I guess it would help if I stayed home.
NAW, I'm going to Boogie til I puke!
Gotten down right cold outside, but I did finish getting the three rusted hinge pins out of the doors. What a job that was. Lots of penetrating oil and a big hammer with a drift pin and some drilling.
Had to cut out a rusty spot on the front bottom of the drivers door. The pictures show the sequence. I first made a patch out of 18 gauge and marked the spot to cut out. Used a die grinder with a cutoff blade to open up the hole. Hand fit the new piece and spot welded it in. Then filled in between the spot welds. After that it was grinding time. then went over it all with body filler. Still have more filling and sanding to do before the first primer goes on.
Started working on the passenger door. Got all the paint off. I have the same spot in that door to repair, plus the inside corner is rotted out. Will fix both bad places that at the same time and do some body filler on that one as well.
Only have two more weeks to get some stuff done before we head to Panama. We will be in Bocas Del Toro, house setting a place in the rain forest for three months. It is all off the grid, but does have Internet access. If your interested, Nancy has set up a blog that you can follow our time there. It is:
www.nharless.blogspot.com.
Lots of Howler monkeys, birds and jungle. The house sets above Dolphin bay on the Atlantic side, close to the Costa Rica border. There are two dogs (Gelli amd Indy) who will take care of us. Hope to get some fishing in and spending time trying to figure out how to get this truck done faster. I guess it would help if I stayed home.
NAW, I'm going to Boogie til I puke!
Sunday, November 18, 2012
Plug Wires, Doors & New vise Station
After getting the new roll of MSD plug Wiring, I had to cut the three new wires to length and use a small tool to squeeze the ends on the wires before the boots went on. I have been moving back and forth for three years using my vise, when needed, that's in the garage attached to the house. I finally took time to build a spot on the end of my welding bench in the big garage and moved it there. A lot more convenient now and used it to put the new ends on the wires. Put some dielectric grease in the boots and all went together nicely. Got the rerouting done. Have to make a couple more small brackets to keep them from rubbing in a couple of places.
Took the passenger door back off and got the windows and most of the guts out. Should get it sandblasted today. The hinge pins are rusted in so have to drill them out. (I have new stainless ones).
The weather is still nice, so will blast while I can.
Hope you all have a nice Thanksgiving. I'm looking forward to the gravy.
Wait a minute, is anyone reading this stuff???
Took the passenger door back off and got the windows and most of the guts out. Should get it sandblasted today. The hinge pins are rusted in so have to drill them out. (I have new stainless ones).
The weather is still nice, so will blast while I can.
Hope you all have a nice Thanksgiving. I'm looking forward to the gravy.
Wait a minute, is anyone reading this stuff???
Thursday, November 8, 2012
Sandblasting Doors
Got the MSD wire kit yesterday so now I can build the last three sparkplug wires. Need some dielectric grease to help slip the boots on and will get that tomorrow when I go to town.
Figured out how to get the door handles off with the help of Google. Made a wedge tool out of wood so I could hold down the spring loaded covers around the handles. Then it's just a matter of knocking out the pin that holds it all together. Interesting that I found a cut off nail in one of them. The pins now cost 50 cents apiece. Got them ordered, plus new hinge pins.
Got all the guts, (window roller device) out of the drivers door and sandblasted it today. It's not in too bad of shape. A small patch needs to be applied towards the bottom.
Since I rebuilt the fitting in the bottom of my sandblaster last week, and now have all the valves regulated correctly, it works a lot better and using less sand.
Never give up, and Boogie Til Ya Puke.
Figured out how to get the door handles off with the help of Google. Made a wedge tool out of wood so I could hold down the spring loaded covers around the handles. Then it's just a matter of knocking out the pin that holds it all together. Interesting that I found a cut off nail in one of them. The pins now cost 50 cents apiece. Got them ordered, plus new hinge pins.
Got all the guts, (window roller device) out of the drivers door and sandblasted it today. It's not in too bad of shape. A small patch needs to be applied towards the bottom.
Since I rebuilt the fitting in the bottom of my sandblaster last week, and now have all the valves regulated correctly, it works a lot better and using less sand.
Never give up, and Boogie Til Ya Puke.
Saturday, November 3, 2012
Door Hinge Pins are a bugger
Finished up welding the patches on the left rear fender and put the first coat of filler on it. Will take it into my workshop in the house and finish up sanding when the weather gets colder.
Got a new welding helmet that has automatic darkening. Should have gotten one of these to start with. It's a middle of the road Miller. Works great.
Had Dean Long come help me put the passenger door on so I could see if the bear claw latches I have will work. Looks like the pair I have will take too much reworking of the door. (they were given to me so not out anything). Found some made to fit bolt in's on line that look great and easy to install, but the $350 price tag says we will stick with the originals.
Started taking the drivers door apart so I can sandblast it. I spent three hours getting one of the hinge pins out. It was thoroughly rusted in. I beat, chiseled, beat,(a few expletives here) and finally drilled the pin out. Also got the glass and wing window out. Got to figure out how to get the door handles and window roller handle off so I can get the rest of the mechanism out. This door is in pretty good shape. Needs one small patch at the inside bottom.
The new electric heater I bought looks like it's going to work out fine. It was very comfortable in the garage today. We'll see what happens when it really gets cold out.
Ordered a 25' roll of MSD sparkplug wire and end fittings today. The routing of the plug wires wasn't working out the way I had routed them around the Ram Horn exhaust. I needed three longer plug wires so had to go this way. Should be a lot less noticeable with the new routing.
Yo the lowly turtle, it only makes progress when it sticks it's head out.
Got a new welding helmet that has automatic darkening. Should have gotten one of these to start with. It's a middle of the road Miller. Works great.
Had Dean Long come help me put the passenger door on so I could see if the bear claw latches I have will work. Looks like the pair I have will take too much reworking of the door. (they were given to me so not out anything). Found some made to fit bolt in's on line that look great and easy to install, but the $350 price tag says we will stick with the originals.
Started taking the drivers door apart so I can sandblast it. I spent three hours getting one of the hinge pins out. It was thoroughly rusted in. I beat, chiseled, beat,(a few expletives here) and finally drilled the pin out. Also got the glass and wing window out. Got to figure out how to get the door handles and window roller handle off so I can get the rest of the mechanism out. This door is in pretty good shape. Needs one small patch at the inside bottom.
The new electric heater I bought looks like it's going to work out fine. It was very comfortable in the garage today. We'll see what happens when it really gets cold out.
Ordered a 25' roll of MSD sparkplug wire and end fittings today. The routing of the plug wires wasn't working out the way I had routed them around the Ram Horn exhaust. I needed three longer plug wires so had to go this way. Should be a lot less noticeable with the new routing.
Yo the lowly turtle, it only makes progress when it sticks it's head out.
Saturday, October 27, 2012
Frustration and progress
Had some problems doing the spot welding on the new metal I was replacing on the rear fender I had sandblasted. Got real frustrating. I had depleted the Argon gas needed for the MIG welding, so took the bottle in for a refill. Talked to Sam, the welding GURU and salesman at AIRGAS in Burlington. Explained to him what was happening and he gave me some tips to try. I was basicly running on the automatic setting on the welder. Sam told me that wasn't always the right setting for the metal I was welding. I came home and did some fiddling with the controls. Took me a while to get dialed in correctly but all seems better now. As you can see in the pictures, thing are getting better. This all slowed me down considerably, (plus some other things,) but I'm back on the fender and slowly progressing.
Also bought a small 240V electric heater and in the process of installing it so I can work a little longer while it's getting colder.
There is a tunnel and i'm looking for the light at the end. I think it's a long tunnel.
Also bought a small 240V electric heater and in the process of installing it so I can work a little longer while it's getting colder.
There is a tunnel and i'm looking for the light at the end. I think it's a long tunnel.
Tuesday, October 9, 2012
Sandblasting, WHOOT, WHOOT.
Time to hit the sheetmetal. Started beating out some smaller dents in some of the front sheetmetal. Need to weld up some holes and put in some repair pieces.
Got the sandblaster out yesterday and worked on the right rear fender. It's the one with the least amount of rusted out metal. It's pretty clean now, but have to cut out some cancer and weld in some new metal. Three more fenders to to blast. Got the hood and doors to look forward to also. Somewhere there is a song that says "Life is but a dream". You dream a lot while sandblasting.
Got the sandblaster out yesterday and worked on the right rear fender. It's the one with the least amount of rusted out metal. It's pretty clean now, but have to cut out some cancer and weld in some new metal. Three more fenders to to blast. Got the hood and doors to look forward to also. Somewhere there is a song that says "Life is but a dream". You dream a lot while sandblasting.
Saturday, October 6, 2012
Transmission Cooler finished
Took the transmission cooler and brackets apart. Trimed the brackets and guard to size and painted all the parts. Finished installing everything. It tuckes up on the frame behind the passenger running board. Looks like it is pretty well protected up under there. Time will tell if I made the right decision by putting it there instead of in front of the radiator. The thermostatic controled fan is not wired up yet, that will come later.
Getting colder out now so got to get the front fenders sandblasted before it gets too late. Got to start beating and welding some sheetmetal now.
WOW, where did the summer go???
Getting colder out now so got to get the front fenders sandblasted before it gets too late. Got to start beating and welding some sheetmetal now.
WOW, where did the summer go???
Thursday, October 4, 2012
Transmission cooler and tin work
Got a nice B&M transmission cooler from Tony Cetta. It is thermostat controlled with a fan mounted to the front of the cooler. I didn't want to put it in front of the radiator, as the airconditioner condenser is already mounted there. My thoughts were, too much blockage through the radiator.
Decided to mount it on the frame behind the passenger side running board. Made a couple of brackets to hang it off the frame. Couldn't figure out what fittings were needed coming out of the transmission for the cooling lines. Found a website that did the same as I was doing with great pictures and all the numbers for the fittings and lines. (GOOGLE is great). Got them all from Summit Racing on Monday and installed it all on Tuesday. Decided I needed a guard to protect the cooler and fan from any road rash. Bought a piece of perforated metal and made the guard. Still have to make some end pieces for the guard and then paint all the parts.
No Job Johnny came down and helped me work on straightening one of the running boards and also fitting the floor cover for the transmission.
Going to try to get some more sandblasting done on metal parts before the weather turns bad.
I think the running gear is very close to starting the engine. If not this fall, next spring for sure.
Decided to mount it on the frame behind the passenger side running board. Made a couple of brackets to hang it off the frame. Couldn't figure out what fittings were needed coming out of the transmission for the cooling lines. Found a website that did the same as I was doing with great pictures and all the numbers for the fittings and lines. (GOOGLE is great). Got them all from Summit Racing on Monday and installed it all on Tuesday. Decided I needed a guard to protect the cooler and fan from any road rash. Bought a piece of perforated metal and made the guard. Still have to make some end pieces for the guard and then paint all the parts.
No Job Johnny came down and helped me work on straightening one of the running boards and also fitting the floor cover for the transmission.
Going to try to get some more sandblasting done on metal parts before the weather turns bad.
I think the running gear is very close to starting the engine. If not this fall, next spring for sure.
Wednesday, September 19, 2012
Power Steering hoses an d Adjusting Valve
Had to get away from the A/C for a while, so started to run the power steering hoses and pressure reducing valve. The Mustang Two rack runs at a lower pressure than the Chevy power steering pump I installed, so I had to put a pressure reducing valve in the lines. I got the kit from Yogi's but it is actually made by Heidt's. The hose is a stainless steel wire mesh covered tubing. They warn you that when working with the mesh that it can poke into your fingers. BIG UNDERSTATEMENT! While making up the four hoses I must have stabbed myself a dozen times. Anyway, made a bracket and mounted the reducing valve to the frame. Finished making up the hoses and hooked everything up today. The reducing valve allowes you to adjust the feel of the steering, hard or soft.
Now I have to find a place for my transmission cooler.
Now I have to find a place for my transmission cooler.
Thursday, September 13, 2012
More procrastination and a little work
The heat has finally subsided, but more interuptions came along. Nancy headed to London with my daughter Shannon and grandson Parker for two weeks, soooo, good time for a road trip on the Harley. Headed to Topeka to see Rubber Toes and do a little cruisin. Headed south out of Topeka for some pie and broke my clutch cable 120 miles from Toes house. Nursed it back to Topeka doing some fancy synchronized shifting without the clutch, and started calling around for a new cable. Had to go to Olatha, (60 miles away) for a new one. Toes and all his tools and knowledge helped me get the new one installed. Headed back home the next day with rain looking me in the face. Toes rode with me to Atchison and a half mile later it started raining. 300 miles of rain. At least it wasn't cold, and I made it home okay.
The girls and Parker got back home and the grandson helped me do some more work on the airconditioning. Got all the holes drilled and hoses run, including the dryer. Yop can see the dryer in the picture mounted on the right inner fender panel below the AC pump.
Still have to make a bracket for the heater valve that will fit behind the right kick panel in the cab.
Maybe next week i'll get more done.
The girls and Parker got back home and the grandson helped me do some more work on the airconditioning. Got all the holes drilled and hoses run, including the dryer. Yop can see the dryer in the picture mounted on the right inner fender panel below the AC pump.
Still have to make a bracket for the heater valve that will fit behind the right kick panel in the cab.
Maybe next week i'll get more done.
Tuesday, August 28, 2012
Heat Procrastination
Well, been a little too hot to work in the shop for a while, but I did get some sandblasting done on the running boards and I got the holes cut in the cab for the AC hoses. I have some of the hoses mocked up and now making some brackets out of the 2 1/2" stainless steel exhaust pipe to hold the dryer. The dryer keeps moisture out of the system. It's a little hard to explain so when I get it installed a picture will help. Hopefully the heat will subside soon.
Thursday, August 16, 2012
Back to the AC
Went ahead with the decision to put the AC controls between the gauges and the radio face plate. I layed out the area to be cut on some masking tape and then drilled 4 holes in the corner areas Next I cut the hole out with a die grinder and a cutting disc. Cleaned up the burr's and everything fit fine.
I think it all lines up symmetrically with the gauges, radio and the ash tray Almost like it was put there 64 years ago
Need to start to laying out the hose routes now. Also need to get some heater hose. It wasn't included in the kit. Found they didn't include a couple of fittings that was supposed to be in the kit for the AC hoses, so need to call Vintage Air and straighten that out. More drillin and cuttin coming up.
I think it all lines up symmetrically with the gauges, radio and the ash tray Almost like it was put there 64 years ago
Need to start to laying out the hose routes now. Also need to get some heater hose. It wasn't included in the kit. Found they didn't include a couple of fittings that was supposed to be in the kit for the AC hoses, so need to call Vintage Air and straighten that out. More drillin and cuttin coming up.
Tuesday, August 14, 2012
A/C and Other Stuff
Got the A/C box mounted under the dash. Had to make 3 out of 4 brackets, but that isn't unusual when it's not a sure fit system. Spent way too long trying to fit the controlls in the area where the ash tray mount is. Didn't like the way I did it, so will ponder that some more. May put it between the gauges and the radio. Looks like it might fit there.
While rummaging around in some of the old parts boxes I found I had forgotten to install the front shocks. Mounted them yesterday.
Working on the front inner fender panels today. Had to cut out and make room where the new front suspension was installed.
Decided to do some more sandblasting today as the weather is finally getting cooler. Worked on the left running board. Need more sand. Will get that tomorrow. Got to get plugging on the sheetmetal.
While rummaging around in some of the old parts boxes I found I had forgotten to install the front shocks. Mounted them yesterday.
Working on the front inner fender panels today. Had to cut out and make room where the new front suspension was installed.
Decided to do some more sandblasting today as the weather is finally getting cooler. Worked on the left running board. Need more sand. Will get that tomorrow. Got to get plugging on the sheetmetal.
Friday, August 10, 2012
Defroster Vents
The defroster vents supplied by Vintage Air are plastic and not as wide as the original ones. I would have had to weld up the old holes in the dash and drill two new ones for mounting the new vents. I decided to use the old ones and then found out the old vent hose was 1-3/4", while the new hose is 2" in diameter. After some head scratching I remembered I had some 2" exhaust pipe left over and found it just slipped over the old vent pipes. They were a little loose, so I mixed up some metal filler and packed it inside. When it dried, I sanded the rough spots out and painted them. They will work great and will be a lot sturdier. Plus they are original equipment. Not that that makes any difference now.
Got to install the main box under the dash next.
Got to install the main box under the dash next.
Tuesday, August 7, 2012
Installing the Air Conditioning
Opened all the boxes for the Air Conditioning today, an actually sat down and read the instructions. I already had the pump installed on the engine, so next I installed the condenser in front of the radiator. Didn't like the brackes that were furnished so made my own out of 1/8" x 1/2" flatbar. Drilled three 3/16" mounting holes in each and gave each a couple of 45 degree bends for a small offset to bring the condenser about 1/2" away from the radiator. Next I have to install the defroster vents in the dash.
Monday, August 6, 2012
Driveway Rake
Stayed out of the garage for a while because of the heat. While resting in the cool of the airconditioning I decided I need to make a rake to smooth out the area where they tore up my lawn while installing the new septic system. I thought it might also work as a driveway groomer.
I had some scrap angle iron laying around so cut some 3/8 bar stock and rebar 2 inches long (45 Pieces) and welded them to two 45" long 2" x 1/4 inch pieces of angle iron. Had to buy some 1/4" x 1-1/2" angle iron for the side pieces and the runners that hold the 8 x 16 concrete weight blocks.
Tried it out yesterday and this morning after adding three weight blocks. Works great, and no welds broke.
As you can see, my best helper is also a great tester.
I had some scrap angle iron laying around so cut some 3/8 bar stock and rebar 2 inches long (45 Pieces) and welded them to two 45" long 2" x 1/4 inch pieces of angle iron. Had to buy some 1/4" x 1-1/2" angle iron for the side pieces and the runners that hold the 8 x 16 concrete weight blocks.
Tried it out yesterday and this morning after adding three weight blocks. Works great, and no welds broke.
As you can see, my best helper is also a great tester.
Tuesday, July 24, 2012
More Good Help
Had a great time in Niagra Falls and Nancy renewed my contract, so I'm good again for a while.
It's been very very hot here in the midwest the past month and the lack of rain is causing havoc with the corn and soybean crops. It also means I spend less time in the garage.
My oldest son Joe showed up from Washington State Saturday and is here for a little more than a week while his wife Louise and her twin sister Linda are doing the RAGBRIA. It's a hot one this year.
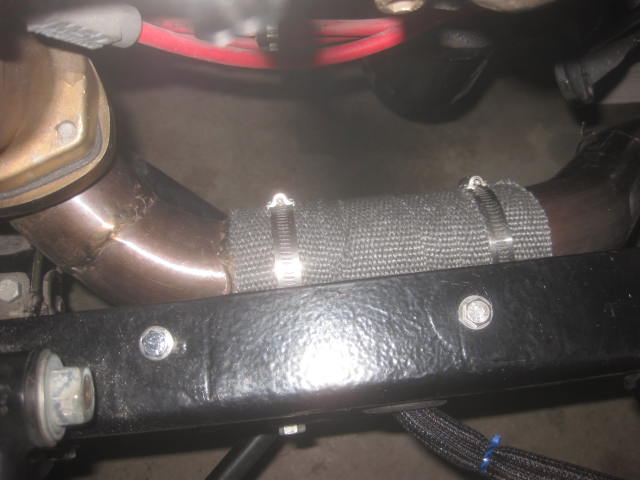
Joe has been helping me on the truck and today we installed the new Edelbrock aircleaner. We also put some heat shielding on the brake lines that run close to the exhaust system. We then finished up the rear axle vent and put on some front sheetmetal for mockup.
Will wait for it to cool down a while before continuing on. I think mounting the Air conditioner condenser will be next. Have to build some brackets for it first.
It's been very very hot here in the midwest the past month and the lack of rain is causing havoc with the corn and soybean crops. It also means I spend less time in the garage.
My oldest son Joe showed up from Washington State Saturday and is here for a little more than a week while his wife Louise and her twin sister Linda are doing the RAGBRIA. It's a hot one this year.
Joe has been helping me on the truck and today we installed the new Edelbrock aircleaner. We also put some heat shielding on the brake lines that run close to the exhaust system. We then finished up the rear axle vent and put on some front sheetmetal for mockup.
Will wait for it to cool down a while before continuing on. I think mounting the Air conditioner condenser will be next. Have to build some brackets for it first.
Saturday, July 14, 2012
30 Years of Pure Bliss
Finished up installing the transmission kickdown cable and made a few clamps to tie things down.
July 17th is our 30th anniversary, so going to take my honey Nancy (AKA Babycakes) to Niagrra Falls
Good time for a break and I think I got a few points for this one. She said she might renew my contract.
July 17th is our 30th anniversary, so going to take my honey Nancy (AKA Babycakes) to Niagrra Falls
Good time for a break and I think I got a few points for this one. She said she might renew my contract.
Thursday, July 12, 2012
New Yogi Parts on
After mocking up all the parts I got from Yogi's, I took it all back apart and primed and painted the brackets gloss black. Put it all back together. Still need the hoses for the power steering and the pully doesn't quite line up yet , so have to sort that out.
Mounted the Carb bracket and put the throttle linkage and Transmission kickdown linkage together. Drilled the firewall for the gas pedal and linkage cable.
Ertzinger showed up and we put the distributor in for mockup of the plug wires. Still have to sort out the routing and buy some plug wire separators.
Opened the wiring box while it was hot outside. Started wiring the gauges but didn't get to far with that yet. That whole wiring project shoud be interesting. Especially for an old plumber
Mounted the Carb bracket and put the throttle linkage and Transmission kickdown linkage together. Drilled the firewall for the gas pedal and linkage cable.
Ertzinger showed up and we put the distributor in for mockup of the plug wires. Still have to sort out the routing and buy some plug wire separators.
Opened the wiring box while it was hot outside. Started wiring the gauges but didn't get to far with that yet. That whole wiring project shoud be interesting. Especially for an old plumber
Thursday, July 5, 2012
More New Parts
Decided to go to the Good Guys Car Show in Des moines last weekend. I wanted to see a lot of cars, but mainly talk to vendors and try to pick up some pointers and parts. Ended up at the YOGI'S display and delt with Yogi himself. He gave me a lot of pointers and and a good deal on the parts I bought from him. Got all the stuff for Air Conditioning, Power Steering pump and brackets, Throttle cable, pedal and braclets, American Autowire Kit for wiring the whole truck. Kickdown cable for the tranny. Alternator bracket and a few other do da's. He gave me 10 percent off and free shipping and threw in a hat and 2 shirts. Nice guy and helped stear me in the right direction. Boxes came Tuesday. Sorted it all out this morning and started putting the air conditioning compressor and brackets on and the power steering pump and brackets to see how the fit was going to be. I have to take it all back apart to paint the brackes after making sure it all fits. It's so hot here now that I was dripping sweat all over the engine so came in to cool off. I think I will look at the wiring kit and see if I can wire up the gauge panel here in the house.
Whew, time for a libation.
Whew, time for a libation.
Tuesday, June 26, 2012
Transmission Linkage fixed
All it takes is time and patients, and maybe a libation or two. Did some tweeking on the column shaft extension I had made and shortened the rod about 1/4 inch and it all came together. Got 6 nice solid shifts. Need to get some stainless one inch bolts to replace the mockup ones I used to put it together and paint the column and that should be finished.
Continuing on with some of the sheetmetal. Have to cut out some rusted area in the front lower fender panel and weld a new piece in. There's a couple of other spots on this piece that need replacing also. Then try some skim coating with body filler. There is a lot of sheetmetal work to do.
Continuing on with some of the sheetmetal. Have to cut out some rusted area in the front lower fender panel and weld a new piece in. There's a couple of other spots on this piece that need replacing also. Then try some skim coating with body filler. There is a lot of sheetmetal work to do.
Saturday, June 23, 2012
Transmission linkage sucks
Taking a break from sandblasting, I thought I might hook up the transmission linkage I got from CCP. This looked very straight forward with minimal thought. Now I wished I had paid more attention in Geomerty class in High School. The brake lever didn't seem to be a problem til I hooked things up and found it in the way. Okay, we can overcome these small obsticals. With a small bend in the shifting rod, wha-la, Brake lever out of the way. Next I found with the 700r4 transmisson, you have an overdrive gear which means you need to move the shift lever one more position. It got humorous after a while as I was moving the steering column up and down, twisting it and moving the shifting rod everywhere. On the floor, In the cab, back to the floor, you get the idea. I haven't figured out (yet) how to get that last shift position. I made an extension for the column lever, rebent the shift lever a few times and now have moved on the doing some hammering and mud work on some sheetmetal. I will let my brain and the shift mechanism cool down for a while. I think it's going to rain.
Friday, June 15, 2012
Sandblasting Again
Got two new clamps I was missing for the exhaust and put them on. Took all the bolts out of the clamps (Stainless Steel) and coated them with anti-sieze, then cranked them all down tight.
Started sandblasting the sheetmetal parts for the front end. Lots of little pieces. Need to get the metal work going. Going to test my hammer skills on small dings. Summer is almost half over.
Started sandblasting the sheetmetal parts for the front end. Lots of little pieces. Need to get the metal work going. Going to test my hammer skills on small dings. Summer is almost half over.
Saturday, June 9, 2012
Back Home from the Dragon
Had the best ride yet this year. 3000 miles and 13 states. Rode "The Dragon" 4 times. Many, many bikes there. Some go fast and some go faster. Was great. Can't wait til next year. Where you say???. We don't know yet.
Back to the F1. Got the exhaust J hook hangers installed. I'm checking with the experts to see if I need to apply 2 more hangers. Pretty solid with out them so may just wait and see. Had to order 2 more step clamps. They should be here Tuesday. That should finish the exhaust system
Started doin some sandblasting on the grill parts and the front lower fenders.
By the way, I have to bite the bullet and will put in a whole new septic system. An unwanted venture at this time. Bids are out and back. They should start within two weeks.
Back to the F1. Got the exhaust J hook hangers installed. I'm checking with the experts to see if I need to apply 2 more hangers. Pretty solid with out them so may just wait and see. Had to order 2 more step clamps. They should be here Tuesday. That should finish the exhaust system
Started doin some sandblasting on the grill parts and the front lower fenders.
By the way, I have to bite the bullet and will put in a whole new septic system. An unwanted venture at this time. Bids are out and back. They should start within two weeks.
Sunday, May 20, 2012
J Hooks manifold clamps
Had a problem with our septic system this week plus a few other things slowed me down.
I bought a 3 foot length of 3/8" stainless steel rod and four 6" SS 3/8" bolts and with some help from Rubber Toes (Roger Droz and No Job Johnney ( Bob Ertzinger) we used a propane torch to heat the rods to make J hooks for hangers for the exhaust system.
You may notice that Roger and Bob seem to have had too many jello shots.
Anyway, the 6th annual Old Dogs Motorcycle trip starts tomorrow and Rubber Toes , Two Gallon (Dennis Patrick) and I will head to the "Tail of the Dragon" in North Carolina. We've tried to go there the last two years and weather turned us in another direction. The first hurricane of the season is there right now, but should be gone by the time we get there. The "Dragon" is a 11 mile streach with 318 curves. Shoud be a Whoot.
Will weld up the J hooks when we get back.
Boogie til ya puke!
I bought a 3 foot length of 3/8" stainless steel rod and four 6" SS 3/8" bolts and with some help from Rubber Toes (Roger Droz and No Job Johnney ( Bob Ertzinger) we used a propane torch to heat the rods to make J hooks for hangers for the exhaust system.
You may notice that Roger and Bob seem to have had too many jello shots.
Anyway, the 6th annual Old Dogs Motorcycle trip starts tomorrow and Rubber Toes , Two Gallon (Dennis Patrick) and I will head to the "Tail of the Dragon" in North Carolina. We've tried to go there the last two years and weather turned us in another direction. The first hurricane of the season is there right now, but should be gone by the time we get there. The "Dragon" is a 11 mile streach with 318 curves. Shoud be a Whoot.
Will weld up the J hooks when we get back.
Boogie til ya puke!
Subscribe to:
Posts (Atom)