Thursday, May 7, 2015
Seat Frame Repair
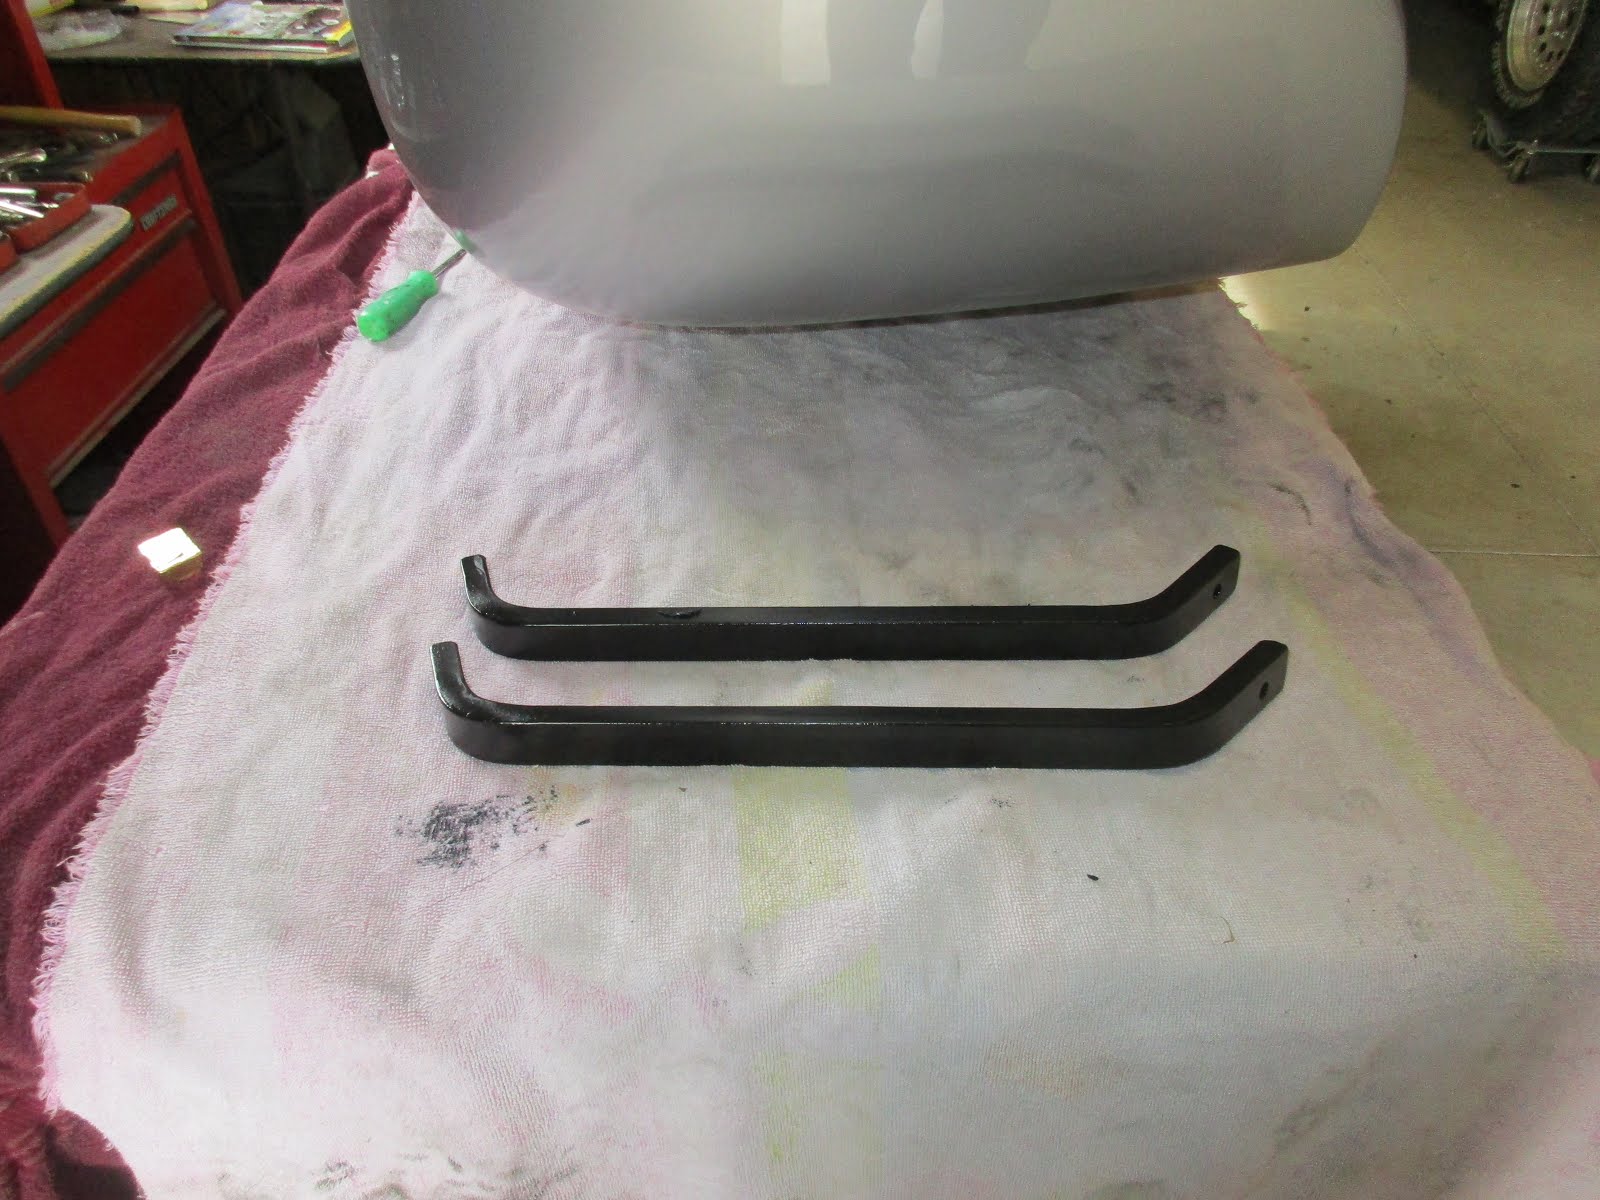
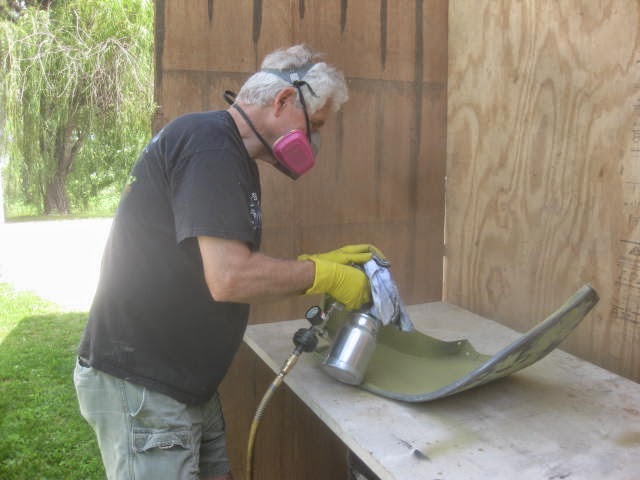
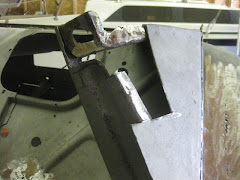
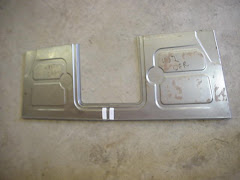
Took the seat frame all apart and sandblasted it. Primed it and shot it with a metallic silver coat of paint. Hope that will blend in with the colors later. Will take the burlap off the back springs and clean them up next. Then I will attack the seat bottom.

Tuesday, May 5, 2015
Spring busy
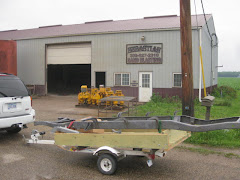
When the weather changes for the better, you have to multi-task. Lawns mowed, garden is plowed and planted. Canoe is fixed and waxed. Trailer is ready for the canoe and Kayak. Harley is ready for next weeks "Old Dogs on Hogs" Ride.
I did get some things done on the F1 in the interim. Installed the steering column to check if the new wheels and tires will fit on the front. Don't have the tires yet, but soon I hope. The rollers I have on it now fit fine and are 28 inch in diameter. The new wheels and tires will have the same diameter and offset. Should fit fine. Also mounted the stainless running board steps.
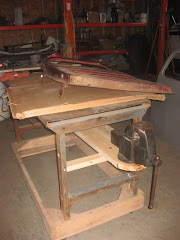
Was going to put the bench seat back in to see how much room I will have behind it now that the gas tank has been reposition under the bed. Found the drivers side of the mounting hardware was all broken down. Took the frame and seat apart and worked it back in shape with a hammer and a little welding and grinding. The two mounting sides are in primer now and still have to sandblast the frame and prime it. Looking to mount the stereo system and battery behind the seat.
Harley ride to Texas and Louisiana starts next week. Looks like we may be riding in the rain again.
(But who cares.)
I did get some things done on the F1 in the interim. Installed the steering column to check if the new wheels and tires will fit on the front. Don't have the tires yet, but soon I hope. The rollers I have on it now fit fine and are 28 inch in diameter. The new wheels and tires will have the same diameter and offset. Should fit fine. Also mounted the stainless running board steps.
Was going to put the bench seat back in to see how much room I will have behind it now that the gas tank has been reposition under the bed. Found the drivers side of the mounting hardware was all broken down. Took the frame and seat apart and worked it back in shape with a hammer and a little welding and grinding. The two mounting sides are in primer now and still have to sandblast the frame and prime it. Looking to mount the stereo system and battery behind the seat.
Harley ride to Texas and Louisiana starts next week. Looks like we may be riding in the rain again.
(But who cares.)
Saturday, April 25, 2015
Back to the Stainless and Chrome
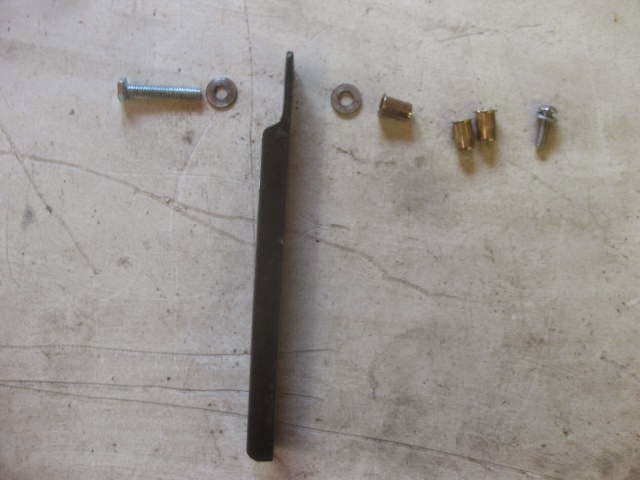
Cold and rainy again today so went back to polishing the stainless steel and chrome for the hood and lights. The handle in the nose that opens the hood is a bit pitted and no one makes a new one. Might have to get that one and the dummy handle on the other side re-chromed. Although you can buy a new one for the dummy side but not the main one. Go figure. I do have to say the handle that opens the hood is a bit more complicated and therefore may be cost prohibitive to make. You can see in the picture that I do have some extra pieces. I will use the best ones and put the others on E-BAY after the truck is done to recoup some of my costs. (A drop in the bucket. Small laughter in the background).
Friday, April 24, 2015
Nutserts or Quick Nuts or Speed Nuts or----
Found the door catches. Had to make some new rubber bumpers for them out of a solid piece of rubber I found in the garage. Put them in temporarily so the doors don't swing all the way open and mare the primed finish.
Moving on, I wanted to clean up the back end of the bed by making all the Screw heads the same. I bought some Nutserts from Amazon and later found out Farm King supplies them (They call them Quick Nuts). Also called Speed Nuts. They sell a tool for installing them for about $80 bucks and more. Went on You Tube and found a way to make a tool out of flatbar in about 10 minutes. I used a piece of "C" channel and ground the ears off one end. Then I drilled a 1/4 inch hole in that end for a 1/4 inch bolt. With a couple of washers added, I then used my 3/8 drill to set the Nutserts in the sheetmetal. Quick and easy and seems very strong too. Now all the screws at the back of the bed are 1/4 inch stainless steel button head Allen screws. Should look symmetrical now. No chains hanging off the back.
Moving on, I wanted to clean up the back end of the bed by making all the Screw heads the same. I bought some Nutserts from Amazon and later found out Farm King supplies them (They call them Quick Nuts). Also called Speed Nuts. They sell a tool for installing them for about $80 bucks and more. Went on You Tube and found a way to make a tool out of flatbar in about 10 minutes. I used a piece of "C" channel and ground the ears off one end. Then I drilled a 1/4 inch hole in that end for a 1/4 inch bolt. With a couple of washers added, I then used my 3/8 drill to set the Nutserts in the sheetmetal. Quick and easy and seems very strong too. Now all the screws at the back of the bed are 1/4 inch stainless steel button head Allen screws. Should look symmetrical now. No chains hanging off the back.
Tuesday, April 14, 2015
Roll Pan Finished
Got the roll pan finished and primed. I like this 3/4 one better than the full flat piece I was going to put on. This covers the hitch and doesn't look as clunky as the full sheet did. The two side pieces I welded on bolt to the upper and lower holes of the bumper bracket, so no added bolts to contend with. It's a little tricky getting in place, just have to know the secret.
Now I'm looking for my door stop brackets. Can't find them. Gotta be here somewhere.
By the way, Spring is here and everything is greening up. My favorite time of the year. Time to get the Harley out for a spin.
Now I'm looking for my door stop brackets. Can't find them. Gotta be here somewhere.
By the way, Spring is here and everything is greening up. My favorite time of the year. Time to get the Harley out for a spin.
Sunday, April 12, 2015
Back from France
Got back from France last Monday and had a great trip. Took Daughter Becky and family Phil and Granddaughter Hannah with us. We were all amazed. Did a Viking trip down the Seine River. Put it on your bucket list.
Back to the F1. Started making a roll pan to cover as much of the trailer hitch as possible.
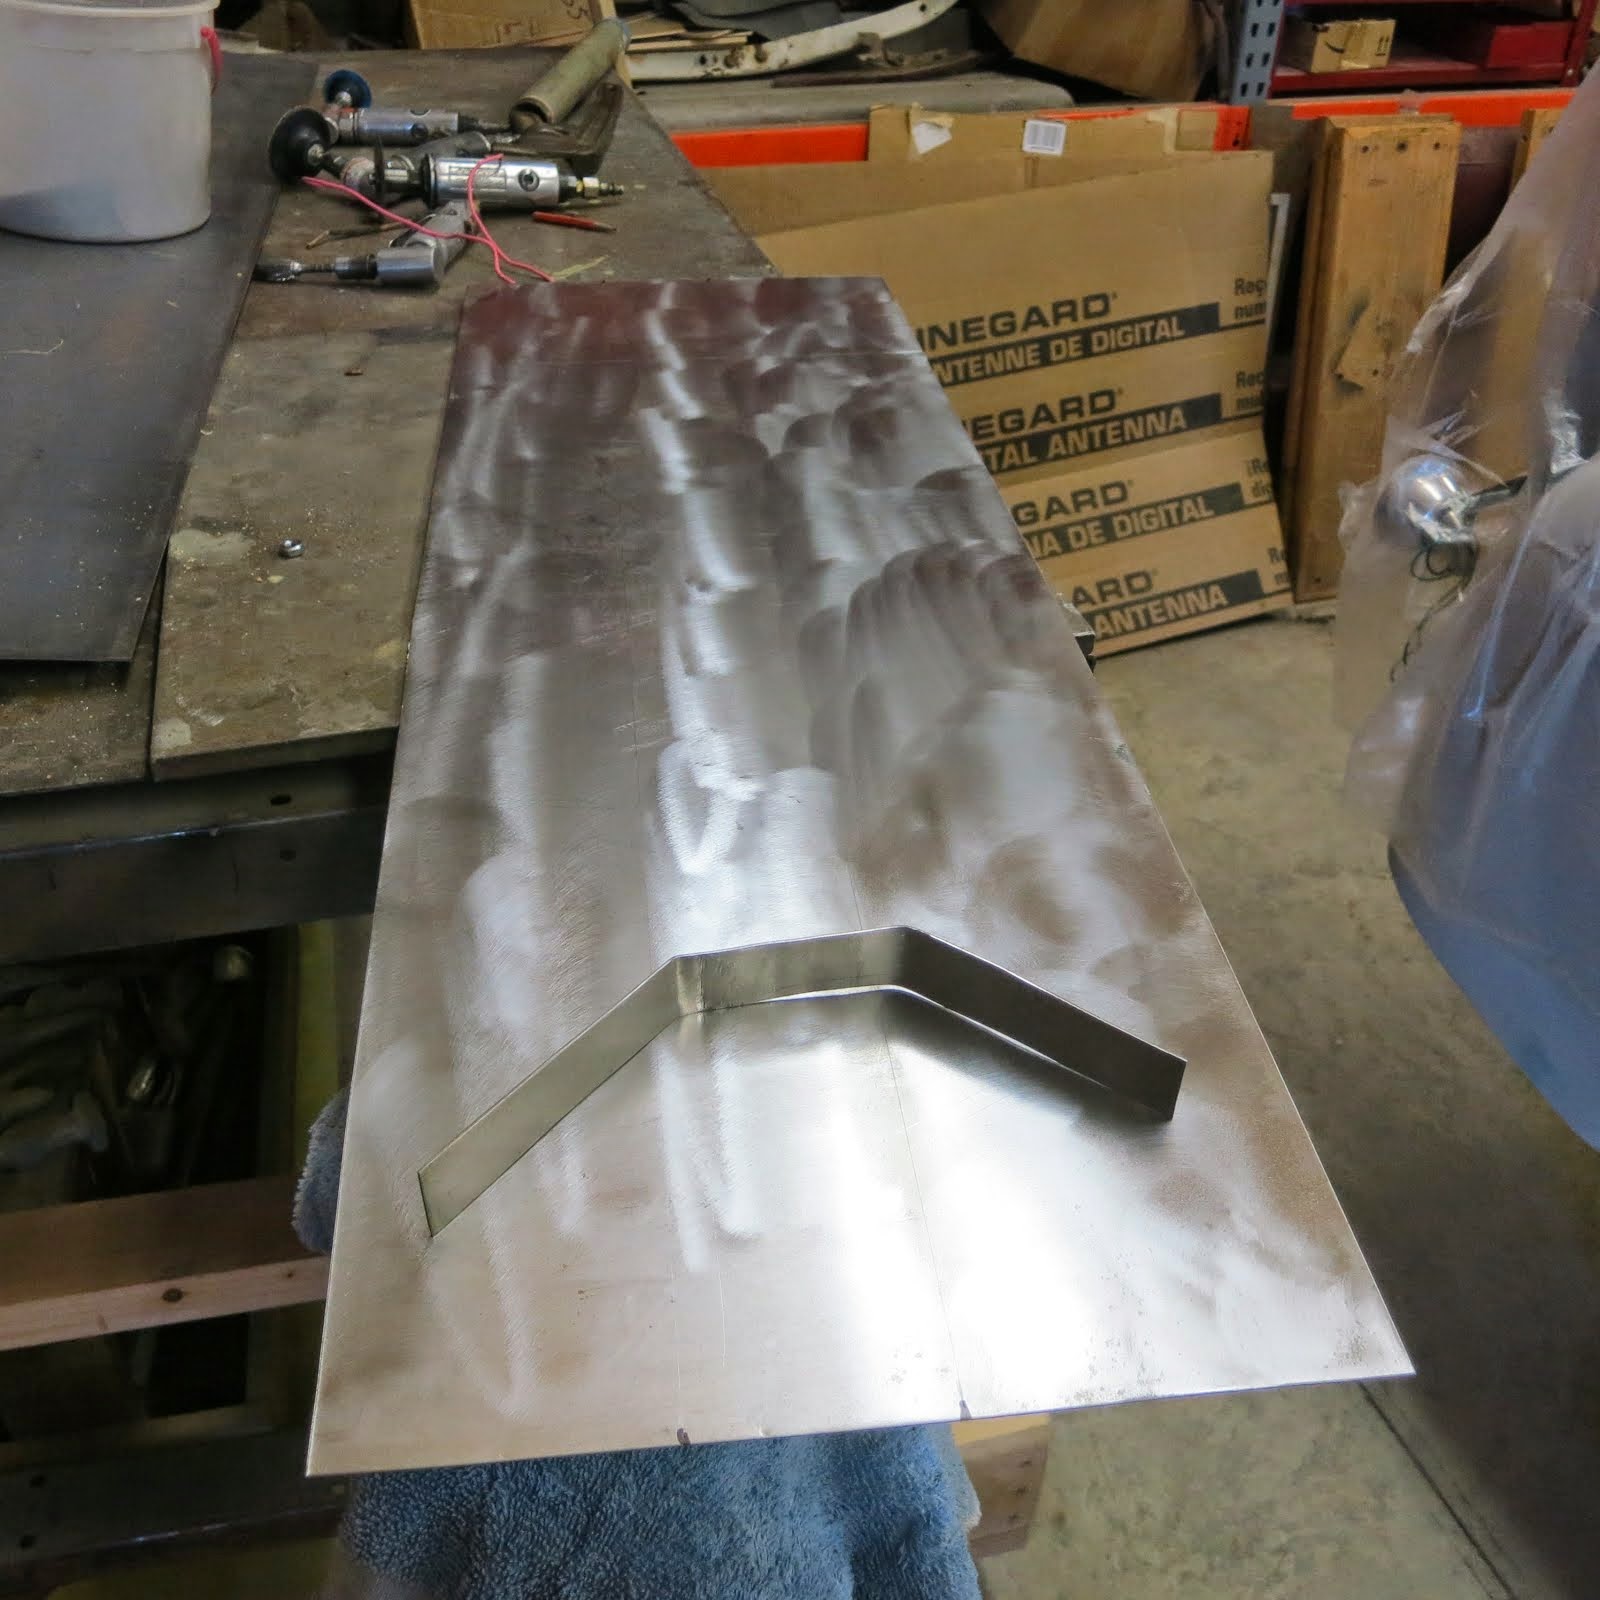
Cut a sheet of 18 gauge metal and took it to my friend Jim Luther who has a small finger brake. He put a couple of 45 degree bends in it for me. After some head scratching on how to mount it, I came up with using the existing bolts that hold the bumper brackets and bumper on. I still have the left side piece to weld in and see if it will fit. Hope to finish it up today.
More to come.
Back to the F1. Started making a roll pan to cover as much of the trailer hitch as possible.
Cut a sheet of 18 gauge metal and took it to my friend Jim Luther who has a small finger brake. He put a couple of 45 degree bends in it for me. After some head scratching on how to mount it, I came up with using the existing bolts that hold the bumper brackets and bumper on. I still have the left side piece to weld in and see if it will fit. Hope to finish it up today.
More to come.
Thursday, March 26, 2015
Daddies Little Fatty is Back Home
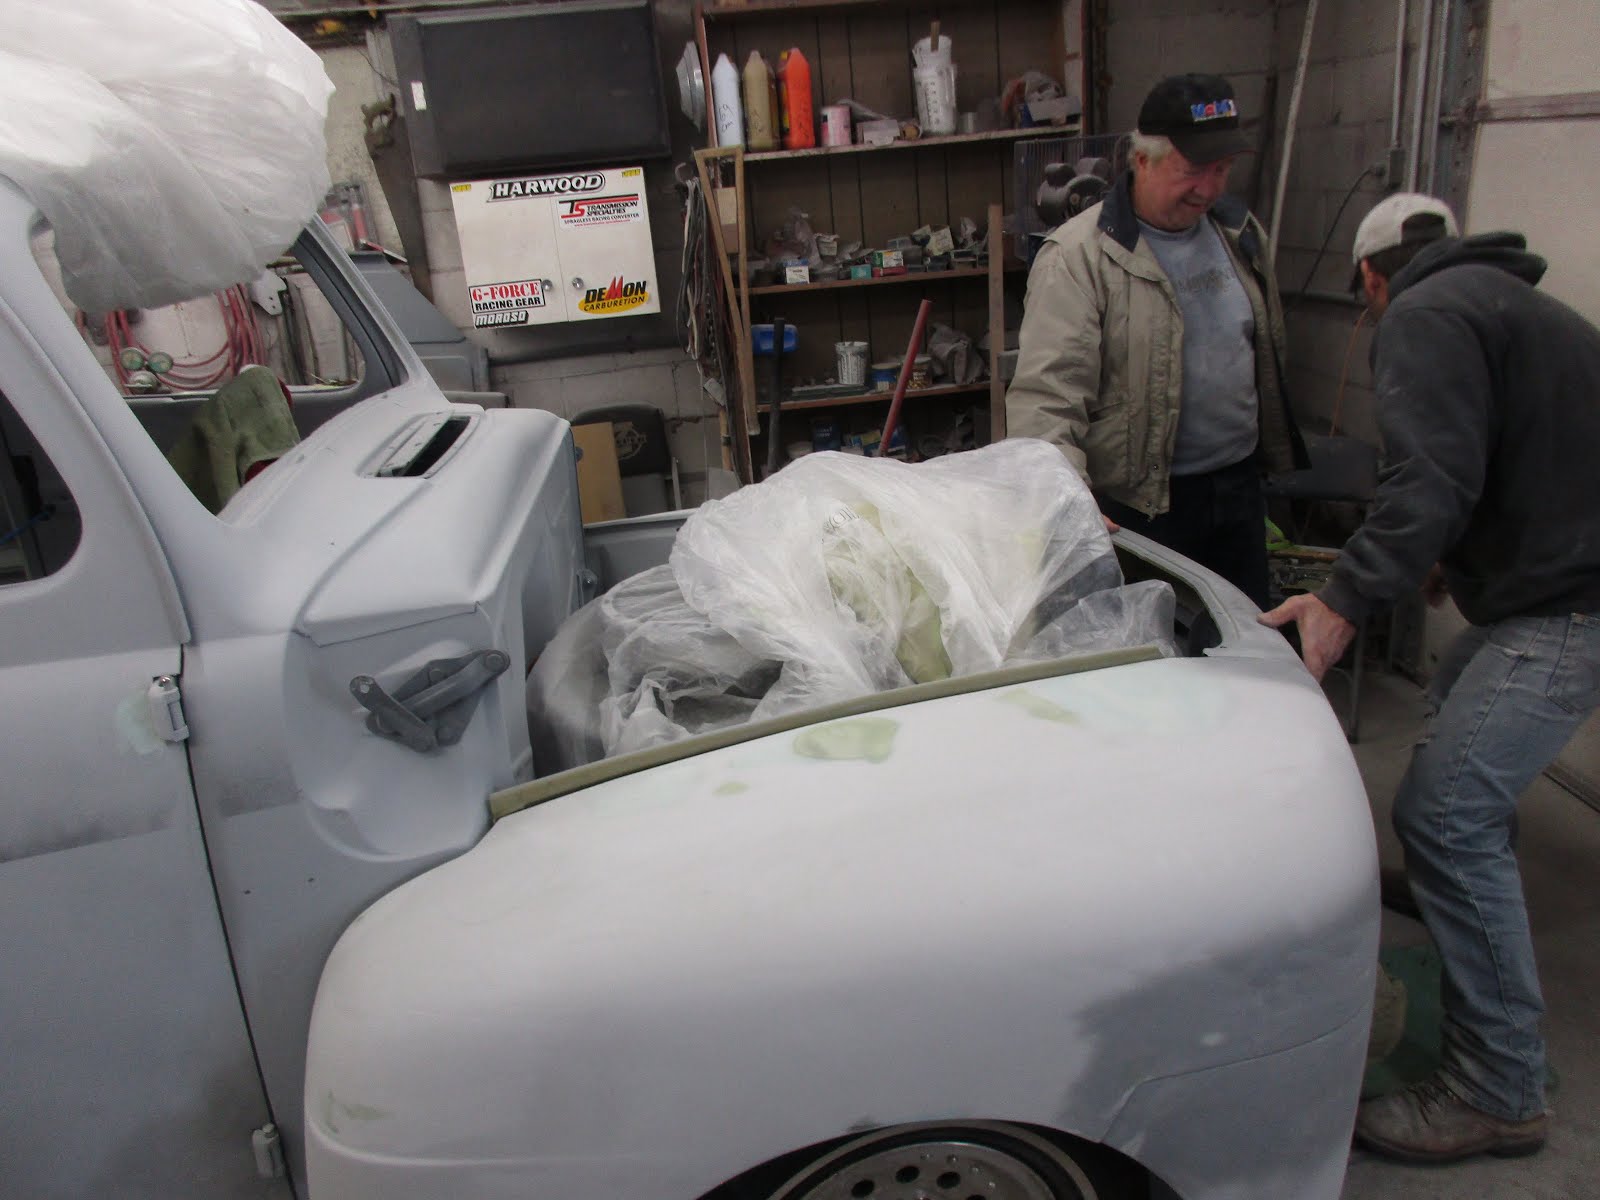
Jeff and Tony brought the F1 back today on a trailer. Jeff has another truck to paint ahead of mine. He was doing the body work and prep on mine until the other guy was ready. He will probably come back and get it sometime in August or September. Meanwhile I will continue to do some of the multitude of little things that need to be done. The plan now is to have it painted by November.
Jeff has done a great job on the body work. Things are lining up and gaps are looking good.. Still a ways to go, but This little Fatty has come a long way from a farm truck. And she gets prettier every day.
Jeff has done a great job on the body work. Things are lining up and gaps are looking good.. Still a ways to go, but This little Fatty has come a long way from a farm truck. And she gets prettier every day.
Monday, March 23, 2015
Stainless Trim
Well, since the truck is down in Warsaw, and it's cold out again, I decided I better get to polishing up some of the stainless trim. Some of the pieces are salvageable, but had to order the F-1 pieces and the F-O-R-D pieces that go on the front just below the hood. Looks like the side strips will be okay and the parking light trim will be alright. There are a few other items I left down in Warsaw that needs to be addressed like the headlight rings.
Headed to Paris for a week, so another break. (Love these breaks). Spring should have sprung by the time we get back.
Headed to Paris for a week, so another break. (Love these breaks). Spring should have sprung by the time we get back.
Wednesday, March 18, 2015
The Bed goes together
Jeff, Tony and I put the bed back together after Jeff primed it. Also put the rear fenders on and the running boards. Took some time to get everything even close. Also aligned the cab doors. It's all in the prep work folks. A lot of work gets done before the paint goes on. Still more hours to make sure everything is right. She is looking like a truck again, but still a long way to go.
Tuesday, March 17, 2015
Putting the body together for final fit
Jeff , Tony, Bob and I put the cab back on the chassis yesterday, and then added all the front end parts. Took a bit of tweaking to get fenders hood grill running boards all together. Jeff will now do the final massaging of the body parts and get it ready for paint.
Tomorrow I will take down the headlight buckets and some other small parts that will need painting.
Jeff also primed all the parts for the bed yesterday. We will put the bed back together tomorrow and set it back on the chassis. Daddies Little Fatty is lookin good.
Tomorrow I will take down the headlight buckets and some other small parts that will need painting.
Jeff also primed all the parts for the bed yesterday. We will put the bed back together tomorrow and set it back on the chassis. Daddies Little Fatty is lookin good.
First Start on engine.
Been a busy week. Bob, Van and Jim came down for the first start on the engine. Jim and Van did the top dead center and timing first. Got the battery hooked up and took a few cranks to get her started. Fired up and sounded good. Ran it for 20 minutes for break in time. That was a very happy moment. Good oil pressure. had a couple of water leaks at the head plugs. Pulled the plugs later after cool down and put some sealant on the plugs and cranked them down tight. I had pulled the thermostat out for the run in and replaced it after cool down and draining the water. Added half and half anti-freeze and water back in. Had a leak at the hose clamp on the goose neck that was just a tighten job. Pulled the oil filter off and cut it apart to check for any filing from bearings or camshaft. Had a very small amount of shiny filings, but nothing significant. Was very happy to get this part done. Thanks for all the help boys.
Next is bleed the brakes.
I wanted the run the engine one more time after I had good brakes so I could shift the transmission and check that it was working and the rear-end would turn over all right.
Next day Nancy helped me bleed the brakes. I found four leaks. I had to change one short piece of brake line and just needed to tighten up the other two.
Jeff (the Painter) called and wanted to come pick up the chassis that afternoon. Bob showed up and we started the engine again. All worked well.
Tony and Jeff showed up with a trailer and we loaded it up and sent it off to Warsaw for a final put together and tweaking. Will do that tomorrow.
Next is bleed the brakes.
I wanted the run the engine one more time after I had good brakes so I could shift the transmission and check that it was working and the rear-end would turn over all right.
Next day Nancy helped me bleed the brakes. I found four leaks. I had to change one short piece of brake line and just needed to tighten up the other two.
Jeff (the Painter) called and wanted to come pick up the chassis that afternoon. Bob showed up and we started the engine again. All worked well.
Tony and Jeff showed up with a trailer and we loaded it up and sent it off to Warsaw for a final put together and tweaking. Will do that tomorrow.
Tuesday, March 10, 2015
Got back from Pensacola Saturday March 7th and brought sunshine and heat with us. Was a great two month. Really enjoyed it and Nancy's knee got some healing time in.
Went down to see how the body work was coming on the F1. Jeff Crow has done an amazing job on most of the metal work. This guy is amazing. He can make any piece of lumpy metal look straight. We decided that now I will bring the chassis down to him and we will put all the sheet metal together one last time to check fit and gaps and so forth.
First I want to get the engine fired up to make sure it runs and fix any leaks necessary.
Spent the rest of today wiring up gauges and putting fluids in. General get it ready to fire up.
Van Aldershof and Jim Luther will come down tomorrow along with Bob Ertzinger to help me fire it up and do the run in. First fire up, cross your fingers.
Went down to see how the body work was coming on the F1. Jeff Crow has done an amazing job on most of the metal work. This guy is amazing. He can make any piece of lumpy metal look straight. We decided that now I will bring the chassis down to him and we will put all the sheet metal together one last time to check fit and gaps and so forth.
First I want to get the engine fired up to make sure it runs and fix any leaks necessary.
Spent the rest of today wiring up gauges and putting fluids in. General get it ready to fire up.
Van Aldershof and Jim Luther will come down tomorrow along with Bob Ertzinger to help me fire it up and do the run in. First fire up, cross your fingers.
Monday, January 5, 2015
Grill Bars
Since the weather has gotten colder, I decided to do a little inside project. I remembered I bought Stainless Steel Bling covers for the front grill bars. I had forgotten I did not drill the holes for the attachment clips. I wanted that done before the grill is painted. Measured all the bars and drilled the 1/4 inch holes for the clips. Got it all back apart now and ready for paint.
It was one degree temperature out this morning and tonight it is snowing. Suppose to get to 11 below zero by Wednesday. Thursday we leave for Pensacola FL for two months. Hope winter is over by the time we get back. The painting should be progressing well by then.
See you in the spring, I'm running for the sun.
It was one degree temperature out this morning and tonight it is snowing. Suppose to get to 11 below zero by Wednesday. Thursday we leave for Pensacola FL for two months. Hope winter is over by the time we get back. The painting should be progressing well by then.
See you in the spring, I'm running for the sun.
Saturday, January 3, 2015
Roll Pan
After a little research, decided to try to make a roll pan. The reason for this is to try to cover as much of the trailer hitch as possible. I also think I want the license plate to be just above the hitch in the middle of the roll pan. Did a quick mock-up with a piece of peg board. Thought I might buy one off E-BAY, but went to a local metal shop and had them break a piece for me. I think the straight piece will cover the hitch better than a rolled one. The tail gate has a 1 1/4" rolled piece on the top and bottom. I bought a piece of 1" conduit and sliced one quarter out of it and will tack it on the corner to match the tail gate. Cold weather has set in so I left it here until it warms up.
Thursday, December 25, 2014
Paint Colors Choosen
Finally made the decision on the paint colors.
The bottom of the truck will be painted Mercedes Iridium Silver and the top half and dash will be painted Bright Atlantic Blue. That is a Ford color. I personally think it will look nice when completed. Hopefully should be completely painted by this coming summer. This sample doesn't show the metallic in both paints. It really pops in the sun
Merry Christmas to you all. Been another great year.
The bottom of the truck will be painted Mercedes Iridium Silver and the top half and dash will be painted Bright Atlantic Blue. That is a Ford color. I personally think it will look nice when completed. Hopefully should be completely painted by this coming summer. This sample doesn't show the metallic in both paints. It really pops in the sun
Merry Christmas to you all. Been another great year.
Tuesday, December 23, 2014
Preping cab for paint
Went to Quincy last week to get some 1/2 pints of paint to do a test spray. Got the silver and three different colors of blue for Jeff to sample spray. Jeff has part of the cab body work done and the doors are close to being ready for paint. He will spray all the colors on a panel and then call me to come down for a look see.
The silver will be Mercedes Iridium Silver. The three choices for the blue are a Mercedes dark blue, One called Laser Blue, which is a newer Chevy color, and one call Brilliant Atlantic Blue which is a Ford color.
Did a little more research on a roll pan for the rear of the truck bed. May buy one off E-BAY and modify it. Got to put my thinking cap on for this one.
The silver will be Mercedes Iridium Silver. The three choices for the blue are a Mercedes dark blue, One called Laser Blue, which is a newer Chevy color, and one call Brilliant Atlantic Blue which is a Ford color.
Did a little more research on a roll pan for the rear of the truck bed. May buy one off E-BAY and modify it. Got to put my thinking cap on for this one.
Monday, December 15, 2014
Bed Panels back together
Spent the last two warm days putting the bed back together. I first cleaned up the cross pieces the bed mounts on and welded in some caged nuts to make putting it together a little easier. Then I brought the pieces in and painted them black to match the frame.
Got all the panels attached and welded up the top round holes in the tailgate to smooth it up.
While I was waiting for paint to dry, I mounted the radiator overflow tank I got from Yogi's. Fits off the drivers side of the fan guard. Looks pretty good there.
After looking at the rear of the box, I'm thinking maybe it needs a roll pan. I think I can make one myself, but I don't have any way to roll the metal. I will have to look into that.
Looks like the good weather is gone, so will have to find things to do inside for a while.
Got all the panels attached and welded up the top round holes in the tailgate to smooth it up.
While I was waiting for paint to dry, I mounted the radiator overflow tank I got from Yogi's. Fits off the drivers side of the fan guard. Looks pretty good there.
After looking at the rear of the box, I'm thinking maybe it needs a roll pan. I think I can make one myself, but I don't have any way to roll the metal. I will have to look into that.
Looks like the good weather is gone, so will have to find things to do inside for a while.
Tuesday, December 9, 2014
Cab goes to Paint
Got a call from my painter Sunday night and he said to bring the cab down .
Called my friends Bob Ertzinger and Dean Long to help me pull the cab back off the chassis and load it on my little trailer. They showed up this morning in 32 degree weather and loaded the cab and cab doors. Picked up Tony Cetta on the way for more beef to unload everthing. Tony has been very instrumental in getting this paint job done. The painter, Jeff Crow, lives and works out of his home just south of Warsaw Illinois. We got the cab and doors unloaded and in Jeff's work area about noon today. Lots of talk about the job and colors and some other car stuff BS. Jeff will smooth out everything and block sand til he drops. He may have to wait until spring to actually shoot the cab. It's got to be a warm day when that happens.
When the Cab is done, we will bring the chassis down along with the bed attached for the next phase. Fenders and hood will follow.
I finished doing the welding on the truck bed yesterday and now need to put it back together on the chassis.
I may bring the bench seat in next and start pulling it apart. Need to figure out the upholstery soon.
Would like to rebuild the seat for a more cushy ride.
I'm a happy boy today. "Daddy's Little Fatty" may run this next year. Whoot, Whoot!
Called my friends Bob Ertzinger and Dean Long to help me pull the cab back off the chassis and load it on my little trailer. They showed up this morning in 32 degree weather and loaded the cab and cab doors. Picked up Tony Cetta on the way for more beef to unload everthing. Tony has been very instrumental in getting this paint job done. The painter, Jeff Crow, lives and works out of his home just south of Warsaw Illinois. We got the cab and doors unloaded and in Jeff's work area about noon today. Lots of talk about the job and colors and some other car stuff BS. Jeff will smooth out everything and block sand til he drops. He may have to wait until spring to actually shoot the cab. It's got to be a warm day when that happens.
When the Cab is done, we will bring the chassis down along with the bed attached for the next phase. Fenders and hood will follow.
I finished doing the welding on the truck bed yesterday and now need to put it back together on the chassis.
I may bring the bench seat in next and start pulling it apart. Need to figure out the upholstery soon.
Would like to rebuild the seat for a more cushy ride.
I'm a happy boy today. "Daddy's Little Fatty" may run this next year. Whoot, Whoot!
Wednesday, December 3, 2014
Bed Boards Finished
I ended up putting four coats of the spray Spar Urethane on the bed boards, sanding with a 500 grit pad in-between coats. I was going to wax them today but after doing the back of one board, it kind of dulled the finish a little so I thought, that's enough on these boards. Lets move on.
The cold got me last week and I didn't finish welding the tear drops in the drivers side bed panel. The weather person says 40 degrees today so we will see. I would like to get that finished up.
Then maybe some polishing stainless pieces.
Oh the joy.
The cold got me last week and I didn't finish welding the tear drops in the drivers side bed panel. The weather person says 40 degrees today so we will see. I would like to get that finished up.
Then maybe some polishing stainless pieces.
Oh the joy.
Sunday, November 30, 2014
Beside Teardrops
Made some filler pieces for the front and back of the bedsides. They are called teardrops. Got the right side done yesterday and finishing up the left side today.
Have to make a trip into town to get some Helmsman Spar Urethane spray. I first bought a quart of it and was going to use that on the bed boards with a paint brush. I had a couple of spray cans left over from another project and thought the spray would even out better with less foreign particles being injected in the surface. After re-sanding the last POR-15 coat I sprayed the first coat on the back of the boards. Right away, I noticed the finish was flattening out. I looked at the can and saw it said semi gloss. Soooo, now I'm headed to town. Mistakes have been made. Now to straighten them up. (again).
Have to make a trip into town to get some Helmsman Spar Urethane spray. I first bought a quart of it and was going to use that on the bed boards with a paint brush. I had a couple of spray cans left over from another project and thought the spray would even out better with less foreign particles being injected in the surface. After re-sanding the last POR-15 coat I sprayed the first coat on the back of the boards. Right away, I noticed the finish was flattening out. I looked at the can and saw it said semi gloss. Soooo, now I'm headed to town. Mistakes have been made. Now to straighten them up. (again).
Monday, November 24, 2014
Workin the Doors
Painted the insides of the cab doors with Internal frame spray from Eastwood. They send you a special flexible tube that hooks to the spray can and the nozzle has 4 holes in it to give a bigger spray pattern. The flexible tube lets you get into the corners.
I also sprayed the window roller pieces with some green I had left over from another project. May have to change that or re-spray them with a different color even though they wont be seen inside the door. I would know what was in there. Maybe bad dreams.
Back to the bed boards soon for the Spar Urethane.
I also sprayed the window roller pieces with some green I had left over from another project. May have to change that or re-spray them with a different color even though they wont be seen inside the door. I would know what was in there. Maybe bad dreams.
Back to the bed boards soon for the Spar Urethane.
Saturday, November 22, 2014
POR-15 on bed boards
Got the three coats of POR-15 applied to the bed boards . Now I have to let them cure for 4 or 5 days. Then I will sand again lightly and put 2 or three coats of Spar Urethane on them.
Meanwhile, I brought the cab doors in today. Will clean up the interior and paint with a rust preventative I got at Eastwood. Need to do a little more work on the doors before their ready for paint.
Meanwhile, I brought the cab doors in today. Will clean up the interior and paint with a rust preventative I got at Eastwood. Need to do a little more work on the doors before their ready for paint.
Wednesday, November 19, 2014
Sanding the bed boards
Got a little way laid again. My best helper (Nancy), had a total right knee replacement last week and I am now the caregiver. She is doing great with her recuperation. Should be back on the vacuum cleaner soon.
Got the sanding done on the bed boards and will start the finish process tomorrow.
I will put on three coats of POR-15 Clear Coat at four to five hour intervals. Sanding with 220 grit in-between coats. That has to set and cure for about four or five days. Then we add three more coats of Helmsman Clear Gloss Spar Urethane, sanding lightly in-between coats. Then they can be set aside for final installation.
After that the cab doors come inside to get the interior of the doors painted for rust protection.
Man, it's cold outside.
Got the sanding done on the bed boards and will start the finish process tomorrow.
I will put on three coats of POR-15 Clear Coat at four to five hour intervals. Sanding with 220 grit in-between coats. That has to set and cure for about four or five days. Then we add three more coats of Helmsman Clear Gloss Spar Urethane, sanding lightly in-between coats. Then they can be set aside for final installation.
After that the cab doors come inside to get the interior of the doors painted for rust protection.
Man, it's cold outside.
Tuesday, November 4, 2014
Gas Filler and Tailgate Straps
Got the holes drilled in the hood for the Stainless side strips. The hood looks good now except I found one spot welded nut missing, so have to weld another in it's place. Then the hood is ready to go to the painter.
Worked on installing the pop-up fuel door in the bed. Made some router jigs to inlay the door into the wood bed. I think it turned out pretty good.
Also applied the tailgate straps that keep the tailgate from flopping all the way down. That was a fairly simple operation. I don't know how strong the straps are, but seem pretty tough. Anyway, nobody should be setting on it. If they do, their toast.
Took all the wood bed pieces back out and will put a finish on them in my wood shop, later, where it is warmer.
Need to put a coat of rust proof paint on the inside of the doors next.
Winter is catching up with me. Not many good days left. Hurry, Hurry, Hurry.
Worked on installing the pop-up fuel door in the bed. Made some router jigs to inlay the door into the wood bed. I think it turned out pretty good.
Also applied the tailgate straps that keep the tailgate from flopping all the way down. That was a fairly simple operation. I don't know how strong the straps are, but seem pretty tough. Anyway, nobody should be setting on it. If they do, their toast.
Took all the wood bed pieces back out and will put a finish on them in my wood shop, later, where it is warmer.
Need to put a coat of rust proof paint on the inside of the doors next.
Winter is catching up with me. Not many good days left. Hurry, Hurry, Hurry.
Tuesday, October 28, 2014
The Good Hood
Finished sandblasting the top of the hood yesterday and blasted the rest of the hood parts today. That may be the last of the sandblasting on this project, and that won't hurt my feelings. Found out the holes for the side stainless pieces on the hood were welded up on this one. Now have to decide if I want the bling or go without it. Think I like it with the bling, so will have to re-drill the holes.
Tailgate straps from Yogi's came in the mail today so will have to attach them and inlay the fuel door in the wood bed. Also making some teardrops to weld on the ends of the bed sides when I take it back apart.
Tailgate straps from Yogi's came in the mail today so will have to attach them and inlay the fuel door in the wood bed. Also making some teardrops to weld on the ends of the bed sides when I take it back apart.
Sunday, October 26, 2014
Replacement Hood
Got the replacement hood this last week. Came in by bus from Sioux City. Looks better than the first one I had pictures of. Unwrapped it and got the bottom side sandblasted a couple days ago. Took yesterday off and Bob and I took the original Ford rear box to Ottumwa where we met a nice guy named Doug and his dad, who bought the box for his Ford F1 project. Doug also brought picture of the Cobra replica that he built. All I can say is it looks awesome. Had a good time chatting with him and his dad about gearhead stuff. Another good road trip.
Gonna take Nancy for a Harley ride today as the weather is still great. Looks like I will have to buy lunch also. Then I will sandblast the top of the hood.
.
Gonna take Nancy for a Harley ride today as the weather is still great. Looks like I will have to buy lunch also. Then I will sandblast the top of the hood.
.
Wednesday, October 22, 2014
Bed and Fenders
My friend Bob came down and helped me yesterday and we got a lot more done. Got the new shorter gas tank fill neck and installed it. The gas cap will be under to bed boards now. Ordered a billet flip up gas cover that I will inlay into the bed boards. Also ordered some tailgate straps to keep the tailgate from flopping all the way down. Got the new tailgate spring loaded latches installed. I like them really well.. Have to make some round and teardrop filler pieces for the ends of the box and tailgate. I will weld them in and smooth them up. Once all that is done, I can take the box all back apart and clean it up for paint..
The replacement hood should be here tomorrow. The guy said he sent me a better one than the one he sent pictures of. We'll see tomorrow. It's got to be better than the one I have now.
The replacement hood should be here tomorrow. The guy said he sent me a better one than the one he sent pictures of. We'll see tomorrow. It's got to be better than the one I have now.
Friday, October 17, 2014
Some parts here and some parts coming
Got the rubber pads that go between the frame and bed and the special bolts and washers for mounting the bed. Got the tailgate latches ordered. I found out they are actually for aircraft canopies. Found a hood in Alvord, Iowa. Should be coming by bus the first of next week. Looks pretty good in the pictures. Will see how good it is after I sandblast it next week. I still need to decide on a hinge or cable set up to hold the tailgate when it is open and then get it ordered.
Meanwhile I have been working on the back fenders again. The old bed had a bead in the side panels and the new bed is flat. The fenders were made to fit the bead. Sooo, I had to weld in a 1/4 inch wide adder piece along the edge of both fenders. About 70 inches of welding on both sides of the adder pieces. Then a whole lot of grinding after the welding. Not perfect, but I think they will work. I put on the first coat of filler and need to smooth that out.
New shorter gas tank neck should be here tomorrow and then I can finish fitting the red oak boards.
Car show in Quincy tomorrow. I'm going. Someday I will drive my truck there.
Meanwhile I have been working on the back fenders again. The old bed had a bead in the side panels and the new bed is flat. The fenders were made to fit the bead. Sooo, I had to weld in a 1/4 inch wide adder piece along the edge of both fenders. About 70 inches of welding on both sides of the adder pieces. Then a whole lot of grinding after the welding. Not perfect, but I think they will work. I put on the first coat of filler and need to smooth that out.
New shorter gas tank neck should be here tomorrow and then I can finish fitting the red oak boards.
Car show in Quincy tomorrow. I'm going. Someday I will drive my truck there.
Friday, October 10, 2014
New Bed
Started putting the new bed together this week. Got all the metal mounted and drilled holes to mount the front piece to the side pieces. Cross and tail pieces are in. Mounted the tail gate. Want to use some kind of hidden tailgate latches and do away with the chains. Researching that now. As you can see in the pictures, I had my best helper on duty again. She even put on her apron so she wouldn't get dirty.
Did a mock-up on the red oak flooring. Looks to be nice wood. Got the two outside pieces laying in place. now have to drill a bunch of mounting holes along each side. All the rest of the mounting bolts will go in-between the boards. The stainless skid runners have a protective coating on them now so they won't get marked up.
Ordered the pads that go between the bed and frame and four other special bolts and washers for hold downs.
Looks like I will have to get a shorter gas tank fill neck to go under the wood floor. Then will have to make a trap door to access the fill.
Still trying to find a different hood. No luck yet, but have a lot of feelers out.
I'm glad I went with the new bed. It's been nice getting back at it
Did a mock-up on the red oak flooring. Looks to be nice wood. Got the two outside pieces laying in place. now have to drill a bunch of mounting holes along each side. All the rest of the mounting bolts will go in-between the boards. The stainless skid runners have a protective coating on them now so they won't get marked up.
Ordered the pads that go between the bed and frame and four other special bolts and washers for hold downs.
Looks like I will have to get a shorter gas tank fill neck to go under the wood floor. Then will have to make a trap door to access the fill.
Still trying to find a different hood. No luck yet, but have a lot of feelers out.
I'm glad I went with the new bed. It's been nice getting back at it
Tuesday, October 7, 2014
Time to get started again
Well, I was a great summer. Spent 2 months on Lake Pend O'reille in northern Idaho on Nancy's sailboat. Saw lots of family and friends and had a great time.
Finally got back in the garage last week. Got the hood sandblasted and found some disturbing things under the paint and Bondo. Big patch on the nose that I think I can live with. The worst part is a lot of rusted through pin holes showed up. Been doing some research on how to fix them. I'm afraid to start welding them up as I might blow bigger holes than is there now. Most of them are about the size of a pencil lead or smaller. There's a bunch of them all over the hood. Not just in one spot. I have even started looking for a new hood on the internet. No luck yet. While I try to figure that out, I will start putting the new bed together. It has some surface rust that also needs attention. Will start on that tomorrow.
Painting may start soon????
Finally got back in the garage last week. Got the hood sandblasted and found some disturbing things under the paint and Bondo. Big patch on the nose that I think I can live with. The worst part is a lot of rusted through pin holes showed up. Been doing some research on how to fix them. I'm afraid to start welding them up as I might blow bigger holes than is there now. Most of them are about the size of a pencil lead or smaller. There's a bunch of them all over the hood. Not just in one spot. I have even started looking for a new hood on the internet. No luck yet. While I try to figure that out, I will start putting the new bed together. It has some surface rust that also needs attention. Will start on that tomorrow.
Painting may start soon????
Thursday, July 10, 2014
Time for some play time.
Tomorrow Nancy and I head to Idaho with the sailboat for two months. Been working this last week on getting the boat ready for the trip. When we return in September I think the painting will start on the F1. A little more work on finalizing the colors but should end up being silver on the bottom and blue on the top.
We will be at Pond Oreille lake just north of Coeur 'd alene, Idaho and about 45 miles East of Spokane where three of our kids live.
If anyone is reading this, hope you have a great summer. We will be back in a couple of months.
We will be at Pond Oreille lake just north of Coeur 'd alene, Idaho and about 45 miles East of Spokane where three of our kids live.
If anyone is reading this, hope you have a great summer. We will be back in a couple of months.
Wednesday, July 2, 2014
A little primer finally
As stated before, I have been working the mud on the front fenders. Lots of mud and lots of sanding.
My friend Bob came down yesterday and we set up a temporary paint booth outside to do some priming. Bob was the mixer and I was the painter. We shot the front inner fender wells, the upper and lower front fenders and a few other front end pieces before we ran out of primer. Sure was a lot easier with the two of us. At least this will keep the rust away for a while until the real painter gets going. That should happen within a few months.
Now I need to take the hood apart and strip all the paint off it. There are still a lot of pieces to get ready and prime yet. At least we got a good start yesterday..
Got to take my grandson Parker home tomorrow or at least to Chicago so he can fly home to Seattle. I think he had a good time here in Iowa.
Forth of July coming up this weekend. Headed to Cedar Rapids to spend the weekend with family.
On the 11th of July we pull the boat out to Idaho for a couple months. Looks like the F1 will sit for a while. Hopefully the real painting will start when we get back in September.
My friend Bob came down yesterday and we set up a temporary paint booth outside to do some priming. Bob was the mixer and I was the painter. We shot the front inner fender wells, the upper and lower front fenders and a few other front end pieces before we ran out of primer. Sure was a lot easier with the two of us. At least this will keep the rust away for a while until the real painter gets going. That should happen within a few months.
Now I need to take the hood apart and strip all the paint off it. There are still a lot of pieces to get ready and prime yet. At least we got a good start yesterday..
Got to take my grandson Parker home tomorrow or at least to Chicago so he can fly home to Seattle. I think he had a good time here in Iowa.
Forth of July coming up this weekend. Headed to Cedar Rapids to spend the weekend with family.
On the 11th of July we pull the boat out to Idaho for a couple months. Looks like the F1 will sit for a while. Hopefully the real painting will start when we get back in September.
Wednesday, June 25, 2014
More Fender Work
Well, Hannah and I did jump out of a plane last week and it was a gas. I think Hannah will remember that the rest of her life. It was the second time for me and yes, I would do it again.
More work on the fenders. Doing some mud work with Evercote Metal 2 Metal. Had to get another quart today. Will apply more today and then some sanding. Then I will prime them and get them ready for the painter. He will do more mudding, sanding and blocking before the actual paint is applied.
Got the grandson Parker here from Seattle for a couple of weeks, so a few more distractions ahead.
More work on the fenders. Doing some mud work with Evercote Metal 2 Metal. Had to get another quart today. Will apply more today and then some sanding. Then I will prime them and get them ready for the painter. He will do more mudding, sanding and blocking before the actual paint is applied.
Got the grandson Parker here from Seattle for a couple of weeks, so a few more distractions ahead.
Sunday, June 8, 2014
More Fender Repair
Worked on the right fender which has more rusted out areas than the left one. Anyway, have all the rust cut out and new metal welded back in. Needs a lot more grinding and clean up before the mudding begins. Glad I decided to go with the metal fenders. Took more time than I thought to do the repair.
Gonna take a few days off and head to Minneapolis. Gonna jump out of an airplane with my granddaughter Hannah on Wednesday. 14,000 feet. Hannah and I have been planning this for the last 13 years. She's 18 years old now and just graduated from High School.
I wonder how high I will bounce.
These are tandem jumps by the way. We want to make sure someone pulls the cord to open the chutes on the way down. Yes, we are going to film it.
Boogie til ya Puke!
Gonna take a few days off and head to Minneapolis. Gonna jump out of an airplane with my granddaughter Hannah on Wednesday. 14,000 feet. Hannah and I have been planning this for the last 13 years. She's 18 years old now and just graduated from High School.
I wonder how high I will bounce.
These are tandem jumps by the way. We want to make sure someone pulls the cord to open the chutes on the way down. Yes, we are going to film it.
Boogie til ya Puke!
Paint Test
After talking to my friend Tony Cetta, we thought a trip to the paint store would be a good thing to look at chips. My friend Bob and I picked up Tony and headed to Quincy where the store, Jeff the painter, uses is located. Remember I had decided on Mercedes Iridium Silver. Well after looking at about a million chips I decided on a Light silver called Sun Light silver. Can't tell them apart, and it's also less expensive.. On Jeff and Tony's suggestion I bought a half pint to test shoot. We took it to Jeff and he set up an old door panel and shot the color. Jeff says silver is hard to shoot as it can tiger strip and mottle. Even so, he said don't worry about the problems shooting it, just choose the color I want. We also talked again about doing a two tone. After thinking on it for a couple of days and doing more internet research I'm back to two tone blue on top and silver on the bottom If it comes out like I think, I will be awesome.
Thursday, May 22, 2014
Left Front Fender Almost Ready for Mud
Cut, Grind, cut some more, grind, weld, weld, grind, hammer, ----- you get the picture. Test fit of the left front fender went pretty well. needs more clean up and then the mud work.
Meanwhile, I am already started on the right fender. It is in a lot worse shape than the first one.
I will cut, grind, weld, grind, hammer, grind, ---- you get the picture.
Meanwhile, I am already started on the right fender. It is in a lot worse shape than the first one.
I will cut, grind, weld, grind, hammer, grind, ---- you get the picture.
Thursday, May 15, 2014
Metal Work 101
My friend Rubber Toes Droz says " Patients is a waste of time", but in this case, I think it helps. Been working the cancerous metal on the left front top fender the last few days. Sandblasted the fender first, then tackled the bottom back of the fender first. The whole bottom was gone so used the fiberglass ones as a template guide to form new material. That part didn't look to bad and with some Mud filler, we will see. Next came what I thought would be the hardest part to reform. Made a flange first using the fiberglass again as a pattern. Cut out the bad part and hand formed a new piece welding a little at a time. Got the flange all ground down and still have more grinding on the face to do. Will finish up that tomorrow and tackle the last cancer spot. Then it will be test fit time for that side. Still have the right one to go. I think I see a lot of mud (Bondo) in my future.
Tuesday, May 13, 2014
New Truck Bed
Removed all the pieces of the new truck bed from the box and started to do a quick mock-up to make sure all parts were there and initial fitment. Looked like it would be easier to put together by doing it upside down. Got the side pieces together with the three cross pieces. Then came the front panel. It didn't look like it fit at all. Finally, I called Midwest Early Ford and got Brian on the phone and told him my dilemma. Sounds like he has answered the same questions many times. Found out I was going at it all wrong and he got me pointed in the right direction. I asked him why they don't send out directions with the kit? He stated, they just haven't had time to do that and besides they thought other companies would steal their efforts. I thought to myself, so what, you would have a lot less phone calls to deal with. Maybe I should make some up and GIVE them to them. HA. Anyway, I will now let the bed rest (pun intended) until I get the fender situation figured out. Gonna work on the metal ones and see if my skills improve.
Wednesday, May 7, 2014
The good, the good and the not so good
Been up and down with the front fender issue. Don't know how this will work out yet, but I think we are making forward progress. The fenders will probably be a combination of both steel and fiberglass.
Jeff Crow, the fellow that will do the paint and friend Tony Cetta came up to check out how I was coming with the sheet metal, and gave me more tips on fitting the fenders. Also on priming the new bed.
On a brighter note, the new Torq Thrust ll 17x7 PVD wheels are here. I mocked up a shot with Nancy and the wheels, then told her they were a Mothers day present. Now have to decide on tires. Also the new complete truck bed showed up yesterday, from Midwest Early Ford. Just took the lid off the box. Haven't had time to look at it in depth yet, but looks like it is going to be nice.
Enough chit chat, got to get to work or this thing will never get done.
Jeff Crow, the fellow that will do the paint and friend Tony Cetta came up to check out how I was coming with the sheet metal, and gave me more tips on fitting the fenders. Also on priming the new bed.
On a brighter note, the new Torq Thrust ll 17x7 PVD wheels are here. I mocked up a shot with Nancy and the wheels, then told her they were a Mothers day present. Now have to decide on tires. Also the new complete truck bed showed up yesterday, from Midwest Early Ford. Just took the lid off the box. Haven't had time to look at it in depth yet, but looks like it is going to be nice.
Enough chit chat, got to get to work or this thing will never get done.
Monday, April 28, 2014
The fear of fiberglass
My friend Bob came down last week and was helping me work at fitting the front fiberglass fenders. After fumbling with that for a few hours, nothing was going right. It looked like there was no possibility in lining everything up. Told Bob I was frustrated and was going back to repairing the metal fenders. I did some more patch work on the two lower parts as they are smaller and easier to work with. After patch work was done, I bolted them up to the front nose section. Didn't look too bad from 40 feet, but after making a template off the flange of the lower fiberglass piece I could see that the metal ones had been bent so bad and very lumpy, that it was going to take more skill than I had to make them right.
My next idea was to use the fiberglass lower section and the metal top piece.. I did a bunch of measuring and some cutting, (cutting your first fiberglass is a bit scary) and fit them in place. Went pretty good and looked even better than the metal ones. Okay, if they fit pretty good, how about working with the fiberglass top pieces. That's where I am now. Got a few bolts in so far. My friend Roger says "Patience is a waste of time". It does take a lot of time.
Gonna take a break and go play golf tomorrow.
My next idea was to use the fiberglass lower section and the metal top piece.. I did a bunch of measuring and some cutting, (cutting your first fiberglass is a bit scary) and fit them in place. Went pretty good and looked even better than the metal ones. Okay, if they fit pretty good, how about working with the fiberglass top pieces. That's where I am now. Got a few bolts in so far. My friend Roger says "Patience is a waste of time". It does take a lot of time.
Gonna take a break and go play golf tomorrow.
Wednesday, April 23, 2014
Front end metal on
Filled a bunch of holes in the inner fender wells and fixed some rips. Still need some mud work on them but will do that later. The center grill piece needed work and after re-sandblasting it I found one side bracket (one inch angle about 18 inches long) rusty, pitted and partially gone. Fabricated a new piece and welded it in. Put all the sheet metal back on the front with all the bolts in place. I put the left side upper and lower metal fenders temporarily in place to see how it was going to fit and look.
Today I will try my luck at fitting the new fiberglass fenders to the right side. Don't want to drill all those holes in the wrong place. Wish me luck. Gonna rain today.
Today I will try my luck at fitting the new fiberglass fenders to the right side. Don't want to drill all those holes in the wrong place. Wish me luck. Gonna rain today.
Sunday, April 20, 2014
Something is not right
Weather is finally starting to cooperate. Had to do some yard honey do's first but went back to the garage this last week. Something wasn't looking right with the front mock-up. The front wheels were no where near being centered in either the metal or fiberglass fenders. I decided I needed to put the cab back on and start from square one. My friend Bob came down and after taking all the sheet metal back off the front end, we got Nancy to help us put the cab back on. The inner fender wells were not lining up correctly. We measured the distance between the front and back wheels to make sure the new front suspension hadn't altered measurements. Come to find out, with Bob's help, that I had attached the inner fenders to the wrong holes. They have three different sets of holes punched for different engines. (V8" and straight 6's). Also had to loosen up the radiator frame to bring the right holes in alignment. Looking better now. I have been filling holes that are not needed in the inner panels and will try to make them look better than they are now. They are rust pitted and mounting holes are elongated and ripped out. After I get them straightened out, then I can start adding other front end sheet metal. Looks more like a truck with the cab back on.
Tuesday, April 1, 2014
Will this cold weather ever end?
Did a two week stint in Washington DC, house sitting in February, and taking care of a great Yellow Lab. Saw a lot of museums, war memorials and the capitol. Didn't see anyone working in the capitol except the tour guides. Typical I think. Still, it was a great gig.
Anyway, did get a couple of days in on the F1 this last week. I thought I would update the blog this morning as it is still 35 degrees out.
Began by mocking up the front end sheet metal. I started doing a little patch work on one of the lower fenders. If it turns out somewhat decent I may try to tackle the main front fenders. Yes, I did buy fiberglass ones but may change my mind again. Would be nice to say it is ALL metal. We will see just how good my skills are improving.
Now, when are those Canadians gonna quit pushing that cold air south.?
Anyway, did get a couple of days in on the F1 this last week. I thought I would update the blog this morning as it is still 35 degrees out.
Began by mocking up the front end sheet metal. I started doing a little patch work on one of the lower fenders. If it turns out somewhat decent I may try to tackle the main front fenders. Yes, I did buy fiberglass ones but may change my mind again. Would be nice to say it is ALL metal. We will see just how good my skills are improving.
Now, when are those Canadians gonna quit pushing that cold air south.?
Monday, January 27, 2014
Back from Panama
Spent 5 weeks in Darkland Bay, near Bocas Tel Toro Panama, house setting and taking care of a great dog named Turbo over Christmas and New years. The weather was great.
Got home a couple weeks ago to very cold weather. Been working on two more rocking chairs in my wood shop until the weather breaks. Looks like a couple more weeks of cold ahead. Just finished gluing the back legs to the seats and while waiting for the glue to dry, I am working on the back splats. Long way to go on the chairs yet.
Got some good news on the truck. Made arrangements to paint the truck this spring or summer. Will do the cab first so I can get it back on the frame and start the wiring. Would like to get the engine started and broke in this year. The fellow that will do the painting is Jeff Crow. He lives about 40 miles south of me in Warsaw Illinois. He does beautiful work. This was arranged with the help of Bob Ertzinger and Tony Cetta, two very good friends. The color has been decided and will be Mercedes Iridium Silver. I've decided on a single color. I was going to do a two tone with dark blue on top. Decided against that and will do some pin striping instead. Anxious to get started again. The front sheet metal needs to be addressed and the hood still needs to be sandblasted. A lot of work to do before the painting gets started.
Oh yes, I still have the bed to do too. Oh yes, and Nancy wants to do more traveling this year.
I may have to start working a second shift. I think the pay is the same.
Got home a couple weeks ago to very cold weather. Been working on two more rocking chairs in my wood shop until the weather breaks. Looks like a couple more weeks of cold ahead. Just finished gluing the back legs to the seats and while waiting for the glue to dry, I am working on the back splats. Long way to go on the chairs yet.
Got some good news on the truck. Made arrangements to paint the truck this spring or summer. Will do the cab first so I can get it back on the frame and start the wiring. Would like to get the engine started and broke in this year. The fellow that will do the painting is Jeff Crow. He lives about 40 miles south of me in Warsaw Illinois. He does beautiful work. This was arranged with the help of Bob Ertzinger and Tony Cetta, two very good friends. The color has been decided and will be Mercedes Iridium Silver. I've decided on a single color. I was going to do a two tone with dark blue on top. Decided against that and will do some pin striping instead. Anxious to get started again. The front sheet metal needs to be addressed and the hood still needs to be sandblasted. A lot of work to do before the painting gets started.
Oh yes, I still have the bed to do too. Oh yes, and Nancy wants to do more traveling this year.
I may have to start working a second shift. I think the pay is the same.
Monday, November 25, 2013
Hitch is in
Finished installing the trailer hitch last week before the cold weather hit. Had to modify it a little to get it to fit. Cut off 8 inches of the forward mounting tangs and used those parts to beef up the other two frame mounting points on each side. Pretty strong now and if nothing else, it protects the gas tank somewhat. The weather has kept me inside and working on wood projects for a while.
Need to turn the chassis around in the garage so I can work on the front sheet metal. I would like to put in new front inner fender well panels. The existing ones have quite a few factory holes that would need to be welded up, and one side has a lot of rust pits. I think new metal would look nicer. The top of those pieces are curved and the outer fenders attach to them. I need to figure out how to make new metal while possibly incorporating the top part of those curves. Head scratching time.
Headed to Panama after Thanksgiving for another house setting job for a month. Will be back the second week of January. Gonna be colder then. Hope you all have a great Christmas.
Need to turn the chassis around in the garage so I can work on the front sheet metal. I would like to put in new front inner fender well panels. The existing ones have quite a few factory holes that would need to be welded up, and one side has a lot of rust pits. I think new metal would look nicer. The top of those pieces are curved and the outer fenders attach to them. I need to figure out how to make new metal while possibly incorporating the top part of those curves. Head scratching time.
Headed to Panama after Thanksgiving for another house setting job for a month. Will be back the second week of January. Gonna be colder then. Hope you all have a great Christmas.
Saturday, November 16, 2013
New Stainless Bumpers and Grill Trim
The new stainless steel bumpers and grill trim arrived this week. All from Dennis Carpenter. Very happy with the bumpers. They are polished to a higher gloss than I expected. I also didn't know how the grill trim was going to be mounted to the grill. There are a nice bunch of very simple stainless clips that slide into crimps in the back of each trim piece. A 3/16" threaded stud is welded to the clip and holes will need to be drilled in the grill shell for the clips.
Mounted the back bumper temporarily to get positive measurements for a trailer hitch. Looks good there, and I just ordered a Draw Tite hitch from Amazon. Should be here next week. Now I need to get back out and bump some more metal. Rain is here today but it's still warm out.
Mounted the back bumper temporarily to get positive measurements for a trailer hitch. Looks good there, and I just ordered a Draw Tite hitch from Amazon. Should be here next week. Now I need to get back out and bump some more metal. Rain is here today but it's still warm out.
Saturday, November 9, 2013
Gone Again
Did a three week stint in the New England States. Had a great time seeing the coast and eating all the seafood I wanted. Great stuff. Hit the fall colors just about right. Next, headed to Panama again for a 3 week house setting job in December. Should be better this time. (I hope.)
Got a little done on some of the front end sheet metal. Pounded out a lot of dents and cut out some cancer. Put some new pieces in and fixed some torn bolt holes. The weather is going below freezing this next week so that will slow things down again. Going to order the front and back bumpers in stainless steel soon. I need the back bumper to take measurements for a trailer hitch. I will also order the stainless steel grill bars for the front end at the same time. All that, except for the hitch, should come from Dennis Carpenter Ford Parts. Got to get the cab painted this next spring so I can start the wiring and interior stuff. How long is this going to take????
Got a little done on some of the front end sheet metal. Pounded out a lot of dents and cut out some cancer. Put some new pieces in and fixed some torn bolt holes. The weather is going below freezing this next week so that will slow things down again. Going to order the front and back bumpers in stainless steel soon. I need the back bumper to take measurements for a trailer hitch. I will also order the stainless steel grill bars for the front end at the same time. All that, except for the hitch, should come from Dennis Carpenter Ford Parts. Got to get the cab painted this next spring so I can start the wiring and interior stuff. How long is this going to take????
Sunday, October 6, 2013
Side Tracked Again
About time I got this updated again. Got side tracked again with a few things, but got some work done on the back fenders. Had more Cancer to cut out on one and then built some backer plates for the mounting flanges. Decided to sandblast all the flash rust off again this morning. Got both fenders done before it started raining. Need some mud work and sanding on both. Then I will shoot them with the first coat of primer. Have a little more mudding to do on the cab and then some touch up primer for it. Not much time left to do outside work as winter is fast approaching. Got to move the boat back in the garage also. Oh yes and we leave for New England for three weeks next Saturday. Also going back to Panama again in December for a better house setting job for a month.
will this truck ever get finished???
will this truck ever get finished???
Tuesday, September 10, 2013
Inside of Cab Masked
Masked off the interior of the cab so I can shoot the next coat of filler primer. Had to mask the inside of the dash and just above the front windshield. This area will get painted just like the exterior. Still have a little spot mudding to do before I shoot it again. Going to cool down tomorrow so will mud then and maybe shoot it the next morning if the weather cooperates.
Thursday, September 5, 2013
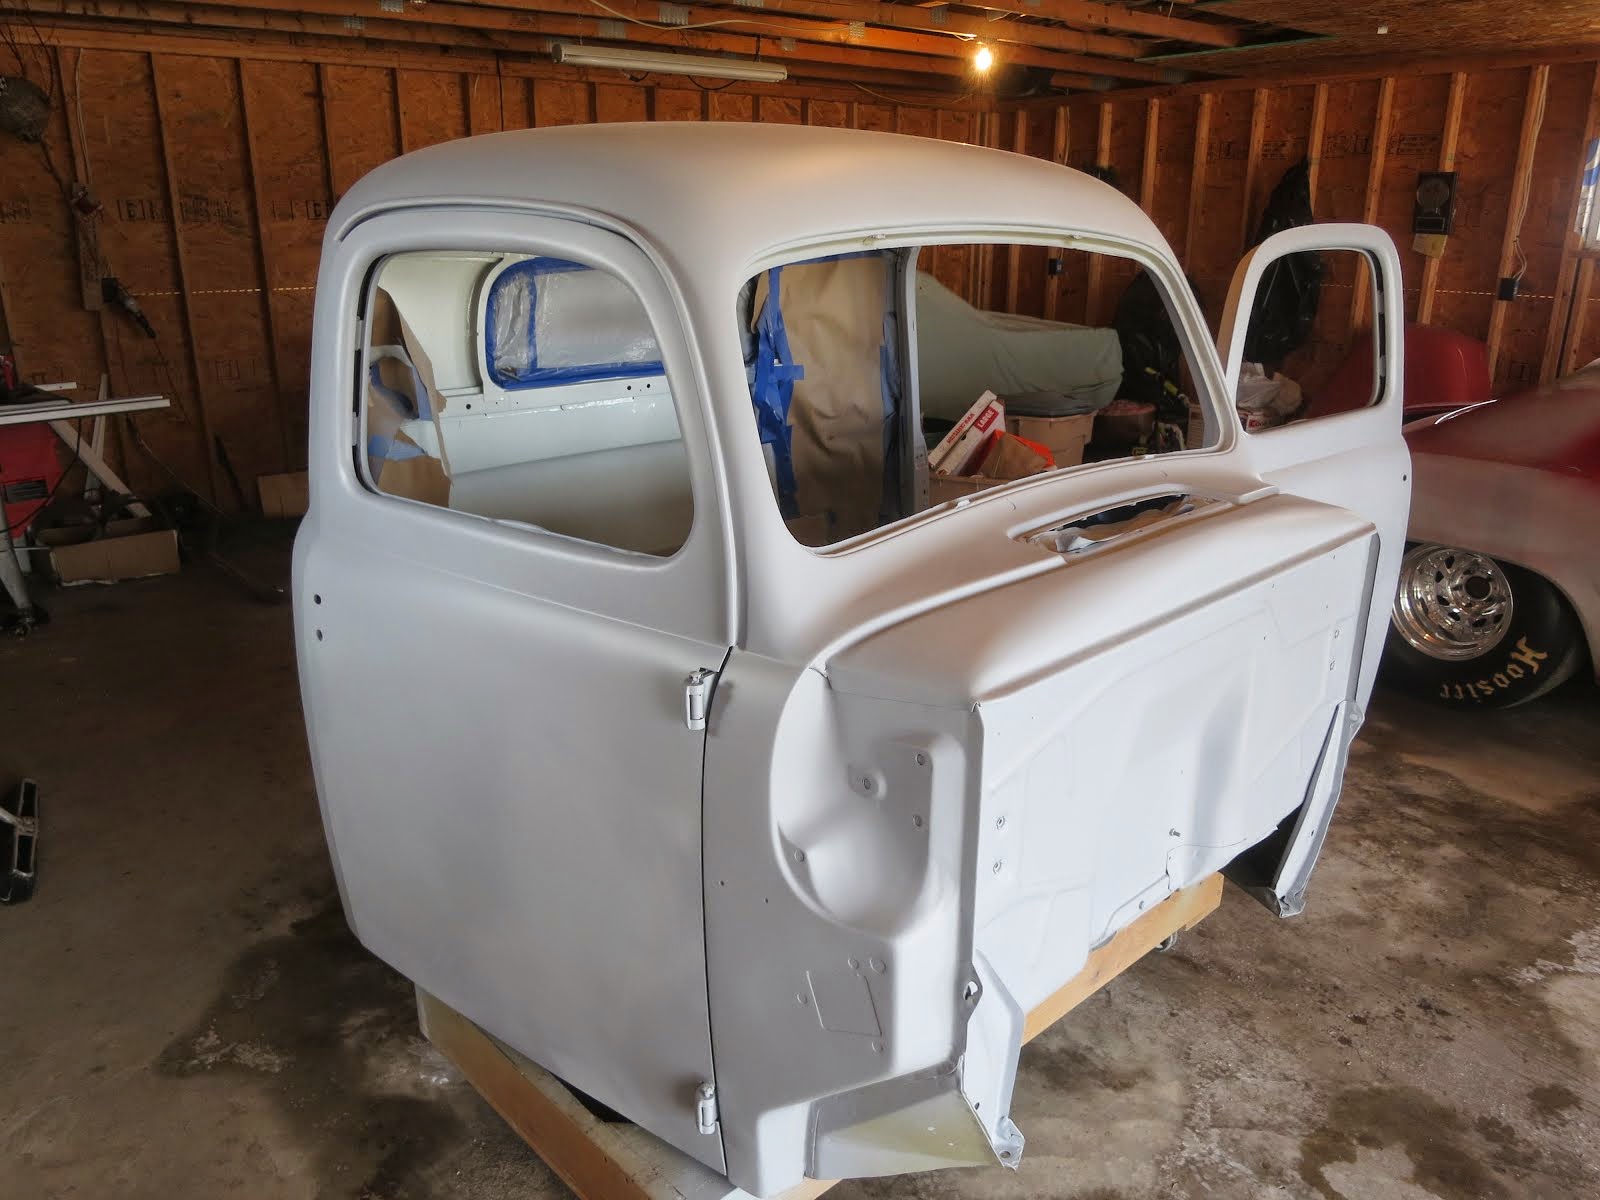
Cab Interior Painted
After shooting the whole cab inside and out with etching primer, I painted all of the interior with DuPont Centari Acrylic Enamel. When talking to my car guys group, they told me ,first, Paint it a light color. This will make it easier to see up under the dash when doing the wiring etc, I chose a very white color that really brightens up the interior. The boys said to just paint it with a brush as it will all be covered up later anyway with upholstery or carpeting. Also you can get into some of the cracks and crevasses easier with a brush. I put on three coats and that should protect the inside longer than I will be around. The Centari white was mixed two to one with a DuPont reducer and one part hardener.
I may have lost a few more brain cells from the toluene smell, but that stuff sure dries fast and hard.
You can see in the photo's that I got a little sloppy and will have to sand some off the exterior. Minor problem. Next I have to do a little more mud filling in spots I missed and then mask off the interior and shoot the outside with the filler primer.
Winter is coming, gotta hurry up.
I may have lost a few more brain cells from the toluene smell, but that stuff sure dries fast and hard.
You can see in the photo's that I got a little sloppy and will have to sand some off the exterior. Minor problem. Next I have to do a little more mud filling in spots I missed and then mask off the interior and shoot the outside with the filler primer.
Winter is coming, gotta hurry up.
Subscribe to:
Posts (Atom)